click on the area of interest.
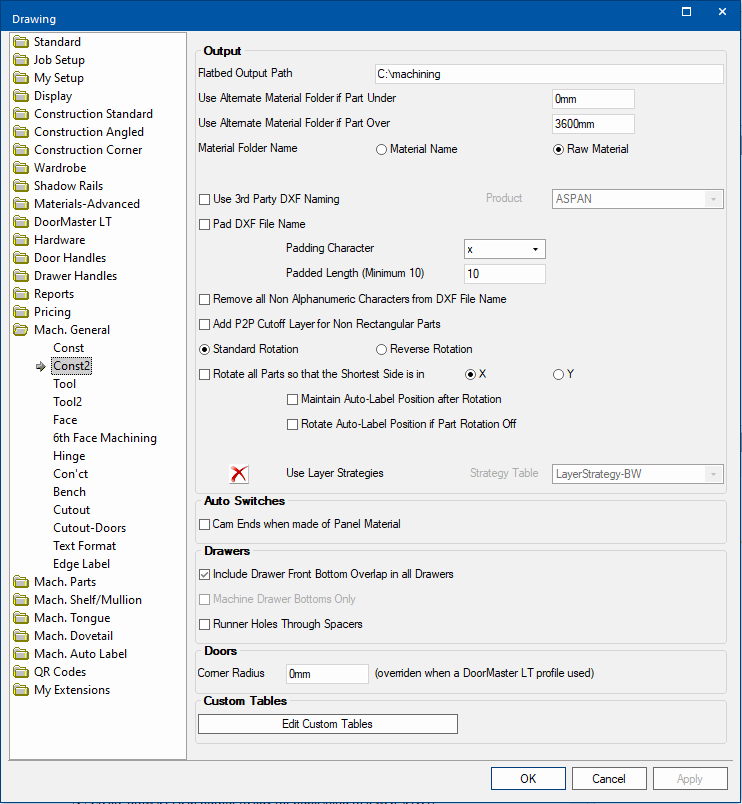
Flatbed Output Path
The path to write the machining DXF file to. CabMaster will automatically create a subfolder at this location using the drawing name. Within here the files are placed inside folders for each material.

Alternate Material
You can Use Alternate Material Folder if a part is under and/or over the chosen limits entered in the edit boxes. The folders will be named:-
- <Material Folder Name>'-Under '<Lower Limit> for parts under the chosen lower limit and;
- <Material Folder Name>'-Over '<Upper Limit> for parts over the chosen upper limit.
For example, the lower limit is set at 50mm and parts with a material name of 'Whiteboard 16mm'.
If either a part's height or width is less than 50mm it would be placed in a folder named 'Whiteboard 16mm-Under 50mm'.
Material Folder Name
Use the radio buttons to designate whether the folder name is:-
- the Material Name
- OR
- the material's Raw Material property. This can be useful, for example, if the material is to be painted on completion.
If the Panel and Doors use the same material, but the material has a different name, you have to remember to select both folders into the EzyNest/EnRoute Parts list for nesting.
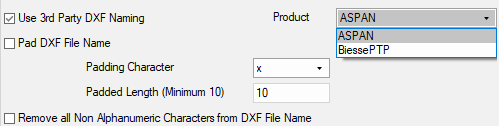
Use 3rd Party DXF Naming
Any number of '3rd Party' setups can be created and are used for special purposes. Using a 'Third Party' configuration changes the following machining and reported for each part:-
- DXF File Name
- Comment
- 'Boring' Code
- Part Rotation
Product
Select the 3rd party naming configuration to use.
Setting up 3rd party configurations does require a certain level of understanding of the CabMaster environment and is not recommended without first seeking assistance.
Pad DXF FIle Name
Whether or not the DXF file name should be of a minimal length.
Padding Character
Which character is used to pad out file names.
Padded Length
The minimum length of the DXF file name.
Example: With the Pad option on, a padding character of "x" and a minimal length of 10:-
If the original file name was "MyFile.dxf" (6 characters) it will be created as "MyFilexxxx.dxf" (10 characters)
If the original file name was "MyFileLonger.dxf" (12 characters) it will be created as "MyFileLonger.dxf" (12 characters)
Remove all Non AlphaNumeric Characters from DXF File Name
Strip out special characters from the file name (those that are not 0-9 or a-z).
Example: If the original file name was "My_FileName-$3.dxf" it will be created as "MyFileName3.dxf"
Add P2P Cutoff Layer for Non Rectangular Parts
Using a Point to Point machine to cut parts may require an additional machining step to make cutouts in addition to the continuous border.
Example: A Corner Shelf


Standard and Reverse Rotation
Parts made of Grained material are rotated by a fixed amount as they are exported for machining.This rotation can either be AntiClockwise (Standard) or Clockwise (Reverse).
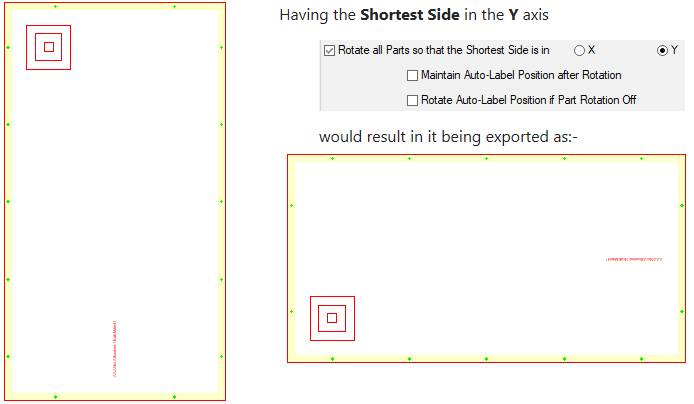
Rotate All Parts so that the Shortest Side is in X (or Y)
Select which axis parts have to be sent for machining if they need to be in a given dimensional orientation (required for some 'flow through' machines).
Example: Natural orientation compared to 'Rotate all Parts' ON
If a part's natural orientation is as follows:-
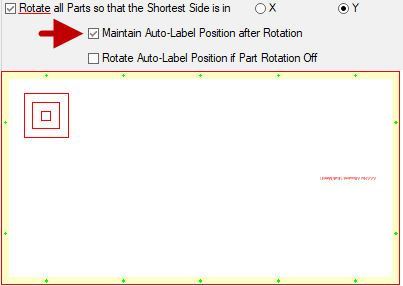
Maintain Auto-Label Position After Rotation
The Label remains in the same position relative to the part as a whole (e.g. if set as the top left corner it will remain in the top left corner after rotation)
Example: 'Rotate all Parts' ON and 'Maintain Position' ON
Using the part illustrated example above, note how the label remains in the top left after rotation.
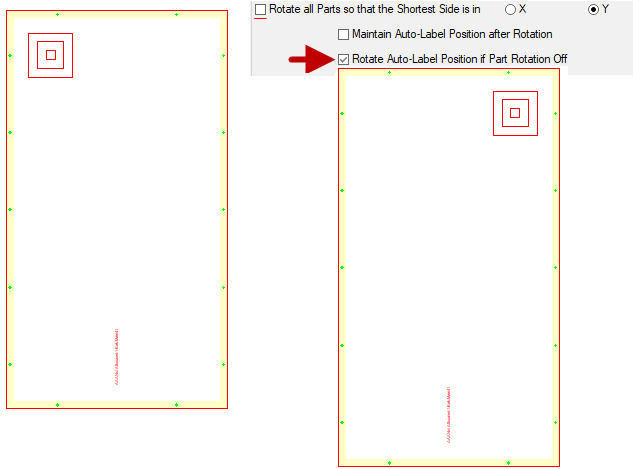
Rotate Auto-Label Position if Part Rotation Off
Move the label position to where it would be after a rotation - if the rotation is not turned on.
Example: 'Rotate all Parts' OFF and 'Rotate Position' ON
The part's natural orientation compared to:-
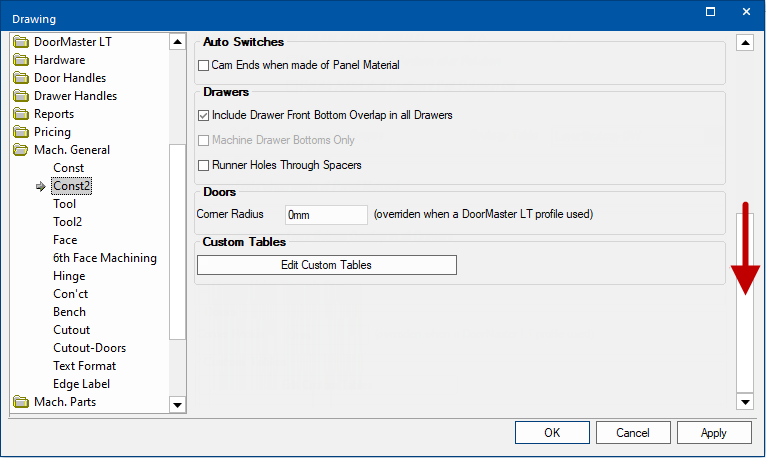
Layer Strategies
Use Layer Strategies option is off
by default.
Formulas in the Layers table are used to define strategy strings (used by $$EzyNest), however not all layer names are mapped via the Layers table. To overcome this, the translation into the more complex strategies can be done by enabling the Use Layer Strategies option on
the Mach.General > Const2 page. An 'Override' table is then used by the application to evaluate the actual layer names placed in the resulting $$DXF$$. See Introduction to Layers and Strategies for details.
If this is required, it is strongly advised to contact our $$CabMaster Support Team$$ to assist you to make the required changes.