CM-Cabinets Library User Guide
Your custom range of cabinets are based on a library, for example CM-Cabinets, and are managed in the Library Catalog Manager [LCM] which can be accessed using the command button located on the View tab.
To locate information about any part of the following image,  click on the area of interest.
Library Catalog Manager is only available with CabMaster Designer Pro and higher.
The Catalog Properties accessed from the LCM have extra Categories and Pages which cannot be accessed from the File menu. These are:-

Click to view Visibilities page
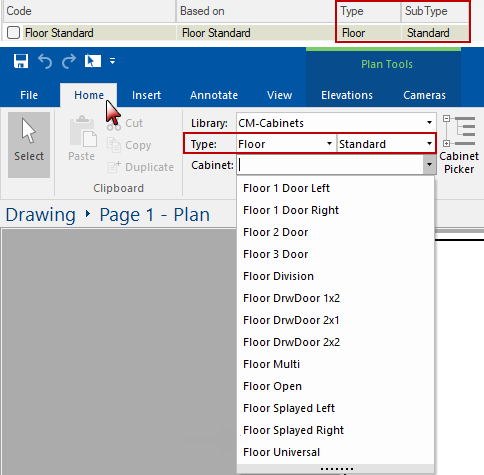
The Library, e.g. CM-Cabinets, selected on the Home tab will be made available. The selected library can then be customised.
Cabinet options set in the Library (pink background) will be made available as the Cabinet Tool (blue background) and when placed on the drawing (light grey background).

The cabinet Description can be customised, by using either the green button or typing directly into the edit box in the Library Catalog Manager, to change the cabinet label (if F9 Options is set to 'Desc') after placement on the plan and the cabinet tooltip description displayed in the Palette/Gallery.
See topic on the Cabinet Information button and the tutorial on Cabinet Label Display 
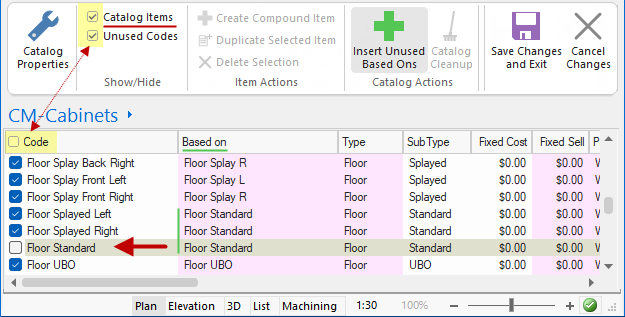
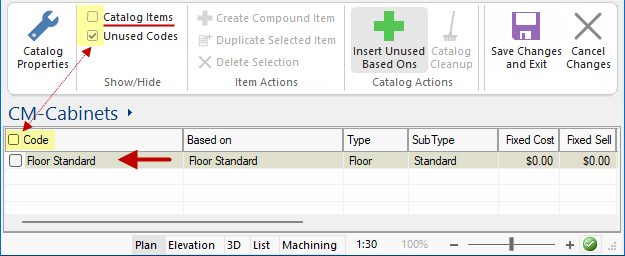
The Show/Hide checkboxes are provide the ability to filter the list of items in the designated library e.g. CM-Cabinets.
The 'Use Code' checkbox is provided to allow you to quickly select/deselect all items listed.
This means that you can tick the Use Code to select all items and then deselect the items not required (or vice versa).
A compound item is a single item made up of two or more distinct parts or sub-items. Creating customised parts/items can be done in either Plan View* or directly in the Library Catalog Manager.
*For a full discussion on creating, converting and adding to catalog in Plan View, see tutorials on Compound Items and Freeform.
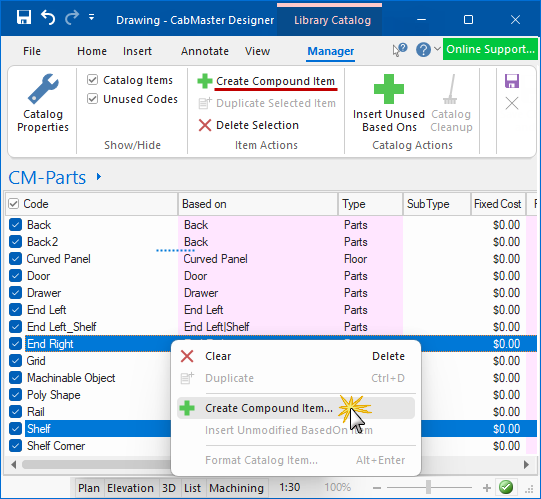
In the following example, we have selected the CM-Parts library (on the Home tab) and then opened the Library Catalog Manager.
1) Select the items that are required to make your compound item.
To select multiple, non-adjacent items in a list or folder, you can use the Ctrl key
Select Individual Items
Each item you click will remain highlighted, allowing you to perform an action on all of them at once.
Deselecting an Item
If you accidentally select an item, simply continue holding the Ctrl key and click on that item again to deselect it.
2) Then from the right click menu or the ribbon command, select 'Create Compound Item'.
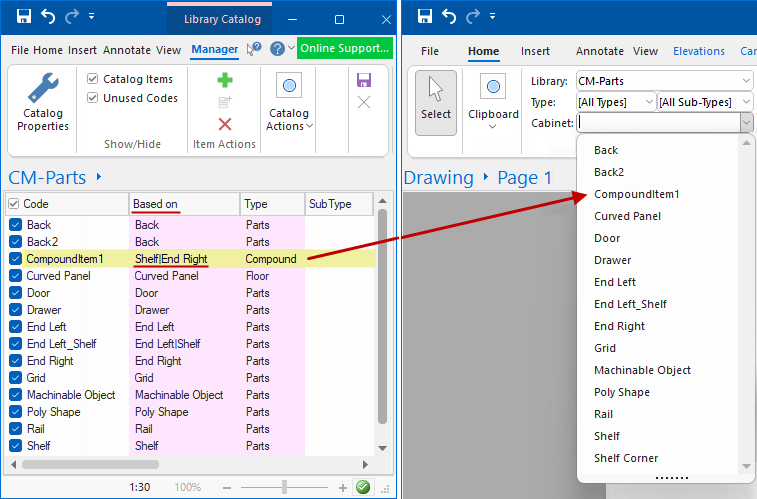
A CompoundItem will be created using the Based on parts, as shown below left. This can be renamed as required by clicking on the Code name.
If the Use Code checkbox is ticked, the newly created item will be made available for selection for future jobs from the drop down on the Home tab.
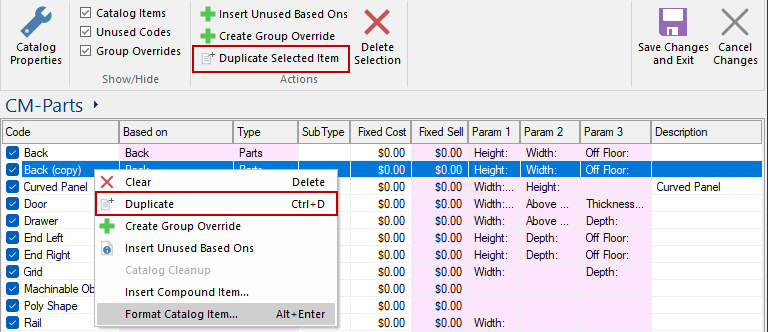
You can create a copy of an item by selecting an existing 'Catalog Item' and using the 'Duplicate Selected Item' command (also available from the right click menu - see example).
This can then be customised as required by either selecting Format Catalog Item from the right click menu or double clicking on applicable item.
Example of duplicated item
The Back item has been duplicated creating a new Back (copy) item.
The item can then be customised (i.e. Format Catalog Item) and renamed as required by clicking on the Code name.
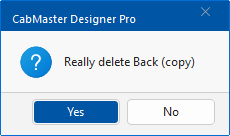
Deletes the selected 'Catalog Item' from the list. A message will be presented for the action to be confirmed.
When a new cabinet is added to the library in an update, or if you have deleted a cabinet from your catalog entirely, you can add any missing cabinets to your catalog with the Insert Unused BasedOns option.
Library updates are regularly made available to customers with a valid Customer Care Maintenance annual subscription. Also, sometimes a new BasedOn cabinet is added by the library developer which you will want to add to your own customised library (.qim).
This command is only available to our Support Team and is therefore greyed out.
Export to a tab-delimited ASCII (text) or XML file into the current drawing.
The two exporting options are also available from the File menu.
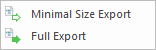
The difference between the two is that a Minimal Size Export does not save the properties that are the same as the in-built default values. For example, if the offset of a section is zero, this line will not be exported because zero is the default. A full export will output every property in a drawing, regardless of its value. The main differences are, if transferring drawings via Import/Export :-
Merge from a tab-delimited ASCII (text) or XML file into the current drawing.
The importing options are also available from the File menu.
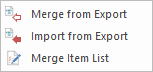
The Import from ASCII and Merge from ASCII options are very similar: both load values from a text file and add them to the current drawing. If a property already exists, it is overwritten with the new value.
The main difference is that Import clears the current properties first, so is effectively the same as starting a new drawing (or library) and then using Merge.
Merge is the most common option, as it allows you to add a handful of property values to an existing drawing.
XML or ASCII
The term "ASCII file" refers to a "text" file that is readable by the naked eye (it only contains the letters a-z, numbers, carriage returns, and punctuation marks). Therefore, any file that one can read with a common editor, like simple Windows Notepad program, is considered an ASCII file.
Some benefits of using XML format files are that they :-
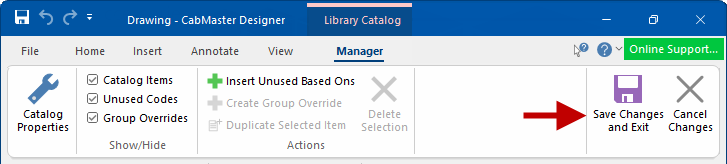
When all changes have been completed, you need to save the Catalog.
It is possible to click on other menu tabs but this does not close the LCM. You must use either the Save or the Cancel command to properly exit.
The library for viewing in the Library Catalog Manager is related to the library selected on the Home tab.
Example of Library and Cabinet Selection
This example shows the Library : CM-Parts on the Home tab.
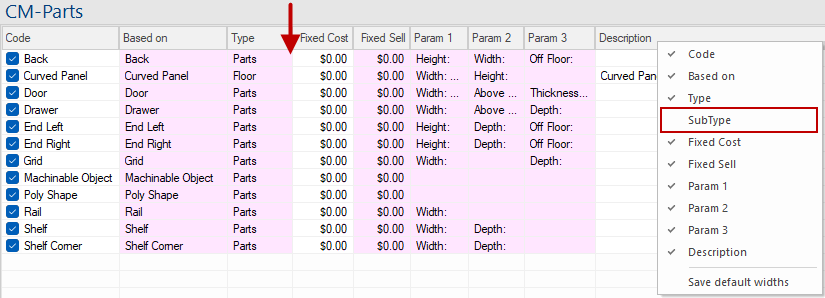
If you now open the LCM, the items in the CM-Parts library are made available for editing etc., as shown below.

Columns can be sorted by clicking on the headings.
You can also hide/show columns by using the right click menu on a heading. In the following example, SubType has been unticked and is hidden.
Each cabinet has a Code name and a Use Code checkbox. The Code names in the Catalog can be renamed to suit your business requirements and standards, simply click on the current name and type in new name.
The 'Use Code' checkbox is provided to allow you to quickly select/deselect all items listed. If the Use Code checkbox is ticked, then these are displayed for Cabinet Selection. This means that you can tick the Use Code to select all items and then deselect the items you do not require (or vice versa).
Unticking the checkbox only removes the selected cabinets from being displayed for cabinet selection. It does not delete the cabinet.
The Based on field cannot be edited by an end user as this is supplied with the software. This is the unique code that is understood by our CabMaster Support Team, so use this when reporting an issue with a cabinet/item.
The Type and SubType can be edited by the end user and can be used to filter the cabinet selection, as shown in the example.
To create your own SubTypes, simply click on the cell and use the F2 key and rename. For an example of use, see Wardrobe > Settings for Universals.
Example
Filtering the selection of cabinets by Type (Floor) and SubType (Standard) provides a much shorter list.
Fixed Cost
The Fixed Cost pricing method, discussed in the following tutorials, is accomplished in the LCM and is applied to each cabinet.
Parameters
The parameters for Width, Height, Depth (as applicable) are displayed for clarity. These relate to the dimensions set on the Format dialog.
Description
The description can be customised by the end user and offers a more thorough explanation of the cabinet.