™ already has a lot of different colours already in the system for making materials, but if you wanted to include more and you cannot find colour you need, we can simply add more.
You need to first locate the folder that is holding all of the folders of the material colours currently in the system. Then you can simply:-
Within your CabMaster software product, locate where files are located by using the keyboard shortcut F10 or from the File menu, click on Options as shown.
![File menu > Options [F10] - Click to Expand](images/DrawingOptions/Materials/Other/Mat_Color_Location_thumb.png)
File menu > Options [F10] - Click to Expand
Then in the Options > File Locations page
- copy the path stated for 'Pictures, Textures & styles’

Select path to Bitmap folder and copy to enable you to paste into Windows File Explorer
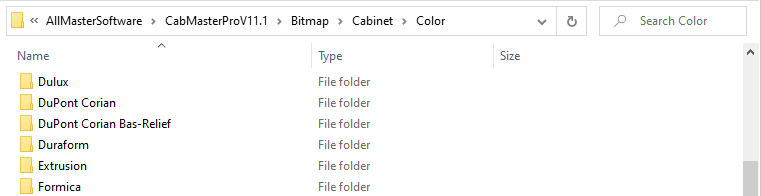
In Windows File Explorer:-
- paste the Bitmap folder location into the address bar and press enter
- now locate the Cabinet folder and then the Color folder
There are a couple of points to make about the images that are used in CabMaster software products.
It is best to use JPG format, and transparencies in the image are not needed.
Most users jump online and search the internet for a colour swatch of the colour they want and select to download it. Some of the images you can find online might be PNG or BMP format. Any image can be converted back to JPG if you need and we will discuss how to do this.
Step 1 - Download image
Locate and download your image. It is recommended to save the image to your desktop for a moment to check it's format.
Step 2 - Edit Image
If you right click on the downloaded image, windows will give you the option to Edit the image.
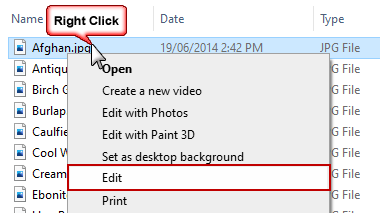
Clicking on the Edit option should open the PNG, BMP, JPG file in Paint.
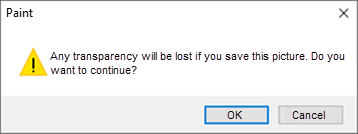
Step 3 - Save As
In Paint you can simply use the File > Save As > JPEG picture in location of your choice.

Save As JPEG in location of your choice
If you get a warning message that transparency will be lost, that is ok as transparencies are not needed.
Step 4 - Copy to Folder
Now that you have an image without transparencies, it can be copied into the correct folder location discussed earlier in this topic.
Remember your new colour can be added to a new folder, or you can add them to an existing folder that is of the correct brand.
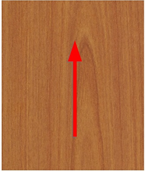
Grained images should be orientated with the grain pattern going up the screen as shown in the example.