In This Topic
The Handles Editor provides the ability to create, edit and delete handles used in your job/drawing and can be accessed from the / Properties and located on either the :-
- Pricing > Materials/Hardware page

Pricing > Materials/Hardware page - Click to Expand
OR
Click to view

Hardware > Managers page - Click to Expand
Using the Handles Editor
Open the editor by clicking on the Handle Editor button.
There are 3 options when opening the handle editor :-

Editor buttons - Click to Expand
Step 1 Edit button
Click on the Edit An Existing Handle button and click Next.

Click to Expand
This will open the following Handle Selector dialog.
Step 2 Handle Selector
The Handle Selector allows you to locate the required handle by using the three (3) drop lists.

Edit - Click to Expand
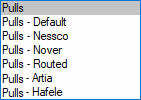
- Table - the table file the handle is stored in.
- In this example, select Pulls from the drop list.
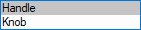
- Type - Handle or Knob
- In this example, select Handle from the drop list.
Note: Finger pulls are currently not supported in the handle editor.
- Name - the name of the handle to edit.
- In this example, we will select All Square Handle 128mm from the drop list.
Make your selection and click Next to open the following dialog.
Step 3 Handle Info and Dimensions

Edit - Click to Expand
Type in the changes to the selected handle.
- Name – the name of the handle.
- This is greyed out when editing a handle.
- If you want a new name you need to create a new handle rather than edit an existing one.
- Brand – the brand of the handle, used in reports.
- Hole Spacing – the distance between the holes for machining.
- Hole Machining Override – allows you to specify...
- Layer Name - overrides the Layer setting on the Mach.General > Tool page.
- Hole Layer Colour - DXF Colour useful for viewing only
- Hole Depth - overrides the default Through depth set on the Mach.General > Tool page.
- Machine in Back Face - specify the face in which a handle is machined (Back or Front face).
- Example: Allows for machining of 'Lip Handles' that hook around the door to fasten from the Back.
- If selected for current then these details will be displayed on the Handles > Basic page.
- Length – the length of the actual handle, used in the 3d views.
- Depth – the depth of the handle, used in the 3d views.
- Width – the width of the handle (vertically), used in the 3d views.
Make your changes and click Next to open the following dialog.
Step 4 Appearance

Edit - Click to Expand
Type in, or select from the drop lists, the changes to the handles Appearance.
- Finish – the finish of the handle, used for reporting.
- Environment – the environment for the 3d model of the handle (if the model supports it).
- Material – the material used for the 3d model of the handle (if the model supports it).
Model
Use the radio buttons to select whether your model is Custom 3D Model or Default Model
Custom 3D Model
Selecting this allows you to use a custom 3d model for the handle.
Location of Models :-
- Handle - <your CabMaster folder>\Bitmap\Pulls\Handles & Knobs\Handlesx1 folder
- Knob - <your CabMaster folder>\Bitmap\Pulls\Handles & Knobs\Knobs folder
Default Model
Selecting this allows you to select one of the in-built handle models that have already been rotated and scaled correctly.
Model Rotation
This is only made available when using the Custom 3D Model option.
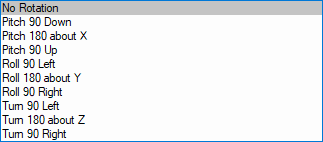
It allows you to apply an additional rotation to the custom 3d model if it is not displaying correctly.
Make your changes and click Next to open the following dialog.
Step 5 Price

Edit - Click to Expand
Amend the following to price the selected handle.
- Cost – the cost price of the handle.
- Labour time – the labour time to apply to the handle for pricing.
- Labour rate – the labour rate to apply to the handle for pricing.
- Labour on/off – whether labour pricing is enabled. (See Pricing Labour tutorial)
- Part number – the part number of the handle, used for reporting.
Make your changes and click Next.
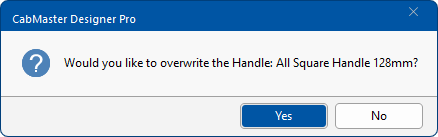
Step 6 Save and Finish
A message will be presented requesting you to confirm changes. If you want to overwrite, click Yes.
The dialog will inform you that the Handle Saved Successfully. Click Finish.

Edit Finish - Click to Expand
Step 1 Create a New Handle button
Click on the Create a New Handle button and click Next.

Click to Expand
This will open the following Handle Selector dialog.
Step 2 Handle Selector

Create New - Click to Expand
Create a New handle by using the two (2) drop lists to select :-
- Table - the table file the handle is stored in.
- In this example, select Pulls from the drop list.
- Type - Handle or Knob
- In this example, select Handle from the drop list.
Optional Copy
Name - Instead of starting from scratch, you can optionally select a handle to copy the information from.
- In this example, we will select All Square Handle 128mm from the drop list.
When completed, click Next to open the following dialog.
Step 3 Handle Info and Dimensions

Create New - Click to Expand
Type in (or overtype) the New details for required handle - in this example we have only changed the Name to My New.
- Name – the name of the new custom handle.
- In this example, we have only changed the name to My New All Square Handle 128mm.
- Brand – the brand of the handle, used in reports.
- Hole Spacing – the distance between the holes for machining.
- Hole Machining Override – specify...
- Hole Layer Name
- Hole Layer Colour - useful for viewing only
- Hole Depth
- Machine in Back Face - specify the face in which a handle is machined (Back or Front face).
- Example: Allows for machining of 'Lip Handles' that hook around the door to fasten from the Back.
- Length – the length of the handle, used in the 3d views.
- Depth – the depth of the handle, used in the 3d views.
- Width – the width of the handle, used in the 3d views.
When completed, click Next to open the following dialog.
Step 4 Appearance
Create New - Click to Expand
Type in, or select from the drop lists, the changes to the handles Appearance.
- Finish – the finish of the handle, used for reporting.
- Environment – the environment for the 3d model of the handle (if the model supports it).
- Material – the material used for the 3d model of the handle (if the model supports it).
Model
Use the radio buttons to select whether your model is Custom 3D Model or Default Model
Custom 3D Model
Selecting this allows you to use a custom 3d model for the handle.
Location of Models :-
- Handle - <your CabMaster folder>\Bitmap\Pulls\Handles & Knobs\Handlesx1 folder
- Knob - <your CabMaster folder>\Bitmap\Pulls\Handles & Knobs\Knobs folder
Default Model
Selecting this allows you to select one of the in-built handle models that have already been rotated and scaled correctly.
Model Rotation
This is only made available when using the Custom 3D Model option.
It allows you to apply an additional rotation to the custom 3d model if it is not displaying correctly.
When completed, click Next to open the following dialog.
Step 5 Price
Create New - Click to Expand
If required, enter pricing details (or you can edit at a later time).
- Cost – the cost price of the handle.
- Labour time – the labour time to apply to the handle for pricing.
- Labour rate – the labour rate to apply to the handle for pricing.
- Labour on/off – whether labour is included for the handle.
- Part number – the part number of the handle, used for reporting.
When completed, click Next.
Step 6 Save and Finish
A message will be presented asking if you would like to save, click Yes.
The dialog will inform you that the Handle Saved Successfully. Click Finish.
Edit Finish - Click to Expand
Step 1 Delete A Handle button
Click on the Delete A Handle button and click Next.

Click to Expand
This will open the following Handle Selector dialog.
Step 2 Handle Selector
The Handle Selector allows you to locate the required handle by using the three (3) drop lists.

Delete - Click to Expand
- Table - the table file the handle is stored in.
- In this example, select Pulls from the drop list.
- Type - Handle or Knob
- In this example, select Handle from the drop list.
- Name - the name of the handle to edit.
- In this example, we will select My New All Square Handle 128mm, created previously, from the drop list.
Step 3 Save and Finish
A message will be presented asking if you would like to delete, click Yes.
The dialog will inform you that the Handle Deleted Successfully. Click Finish.

Delete Finish - Click to Expand
Video
This video discusses the handle editor. (3:04mins)
See Also
Pricing Tutorials
Catalog/Drawing Properties
