| Column Name | Details |
| Table | Multiple hardware tables are allowed for and can be selected using the drop list |
| Filter Type |
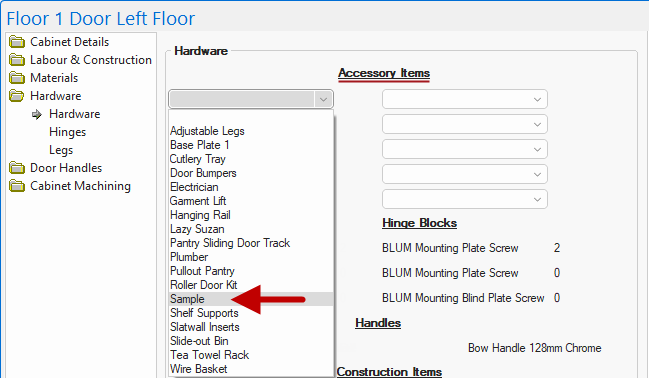
The Filter is used to shorten the selection of Hardware Items from the drop list i.e. the type the hardware is assigned.
|
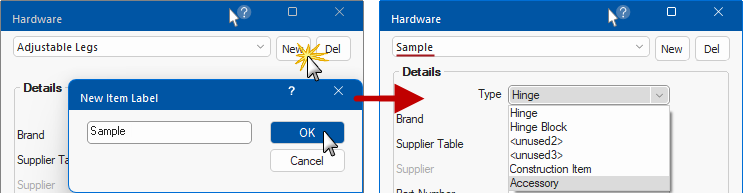
| Hardware Item | Item of hardware |
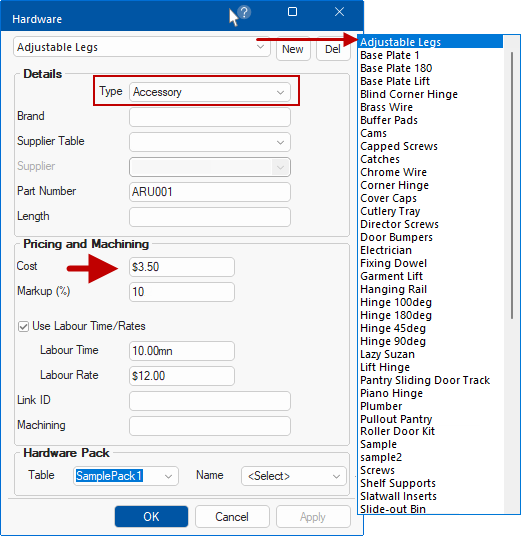
| Brand | Manufacturers name or brand name. Example: Hettich |
| Supplier Table |
Multiple 'Supplier' tables can exist in the root of <your CabMaster folder>\Table\Supplier folder. Users are at liberty to create their own tables, but in most cases additional supplier tables are added as a result of installing a download from StoreMaster. |
| Supplier | Reports by supplier, can be enabled on the Reports > Hardware page and/or Reports > Other (Quantities report). |
| Part Number | Suppliers part number |
| Length | Length, if applicable, including the measurement unit. Example: 300mm |
| Image |
Click on Browse button to locate the required image Some items have an image that is used on the hardware selection pages e.g. Robe Tracks. |
| Model |
Click on Browse button to locate the required model Some items actually display Models in 3D view e.g. Hanging Rails or any Advanced Object. * Cutlery drawer models can be displayed (when present), see Notes on Models below. |
| Cost | Cost of Hardware, including a $dollar symbol. Example: $2.50 |
| Use Labour Time/Rates |
To use costing calculations based on Labour, check the box for "Yes". Uncheck for "No" - See tip below. If yes, the calculation is LabourRate/60*LabourTime*Qty where * is multiplied by and Qty is the quantity of the hardware item in use on the cabinet. See Hinge Set Pricing. |
| Labour Time | Time it takes to do the job in minutes, including measurement unit. Example: 10mn |
| Labour Rate | This is a 'per hour' amount i.e. hourly rate. Example: $10 per hour |
| Link ID | This column can be used as the to the machining tables for Hinges and the Advanced Object. If this column is present, it will be used as a the link otherwise it will use the Part Number. |
| Machining | This determines the table used to specify the machining settings for that Hinge or Hinge Block type (note that there could be just one or multiple tables and, within each, the Part No from the Hardware table is used to determine the settings to use). |
| Table |
Hardware Pack - each Hardware item can be associated with a list of elements that make it up for ordering purposes. **Feature not currently available. |
| Name | If a Pack table is selected, this is made active. |
CM-Cabinets Library User Guide


 button.