Hood / Rangehood Construction : Cabinet
When the Rangehood Type is set to Standard it provides the typical options available to all based-on rangehood cabinets.
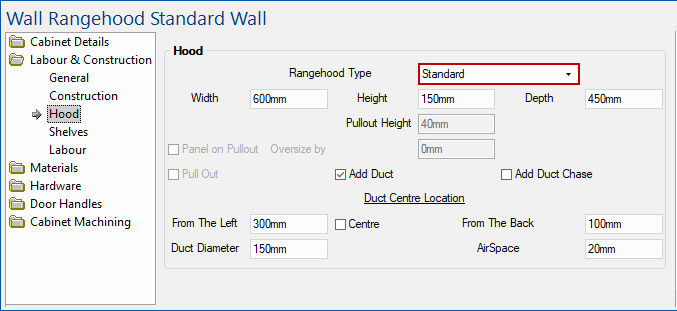
Dimensions
These are the Width, Height and Depth of the Rangehood only.
Add Duct
Enable by ticking the checkbox to add a duct.
Add Duct Chase
Enable by ticking the checkbox to add a duct chase.
Duct Location
From The Left
Allows you to adjust the location of the duct to a specified distance from the left side of the cabinet.
From The Back
Allows you to adjust the location of the duct to a specified distance from the back of the cabinet.
Centre
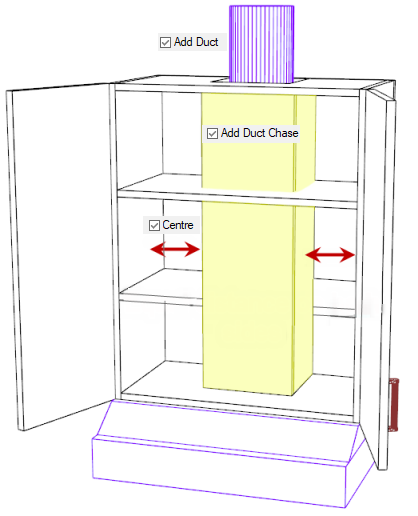
Enabling the Centre checkbox for the duct chase will automatically adjust the position of the duct chase so it is always in the middle of the cabinet, thereby disabling the From The Left option.
Example of Centre Duct
Duct shown with equal distance on both sides.
Duct Diameter
Allows you to adjust the diameter of the duct.
Air Space
Allows you to adjust the air space within the duct.
When the Rangehood Type is set to Pullout, the checkbox to Include Pull Out is turned on and all relevant options are made available.
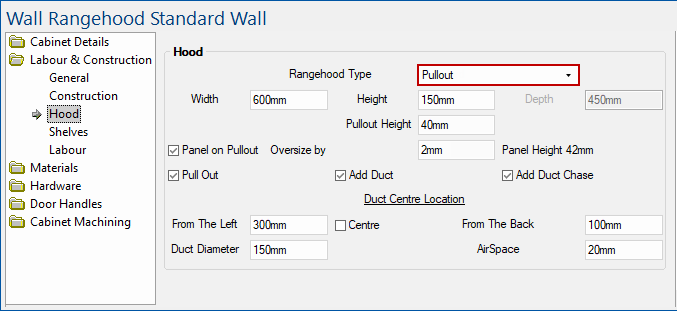
Pullout Height
Set the height of the pullout.
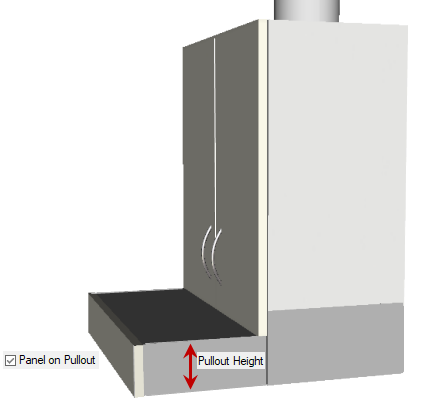
Example of Pullout Height and Panel
In this example, a panel has been added to the front of the pullout.
Panel on Pullout
A panel can be added to the front of the pullout by ticking the checkbox.
An Oversize by edit box is made available allowing a length to be entered. This will display the resulting Panel Height i.e. Pullout Height plus Oversize.
Pull Out
Adds pull out section of the cabinet. (Turned on when Rangehood Type Pullout is selected).
Duct
The options made available when a duct is added are the same as Standard.
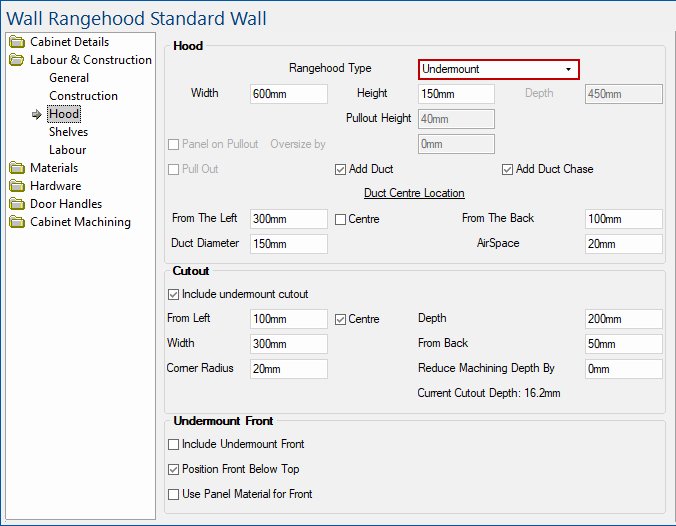
When the Rangehood Type is set to Undermount it drops the doors down and adds in a base.
Duct
The options made available when a duct is added are the same as Standard.
Cutout
If the Include checkbox is ticked, the following options allow you to configure a cutout in the base to suit your requirements.
Include undermount cutout
Adds an undermount section of the cabinet.
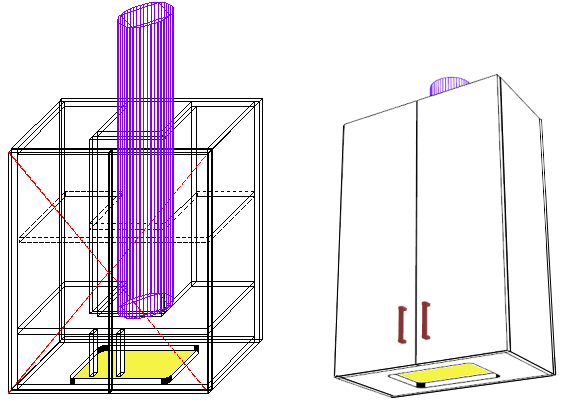
Example of Cutout
The cutout, highlighted in yellow, is set in the centre of undermount i.e. the distance from both sides is equal.
From Left
Allows you to adjust the location of the cutout to a specified distance from the left side of the cabinet.
Centre
Enabling the Centre checkbox for the cutout will automatically adjust the position of the cutout so it is always in the middle of the undermount, thereby disabling the From Left option.
Corner Radius
Set the radius of the corner of the undermount cutout.
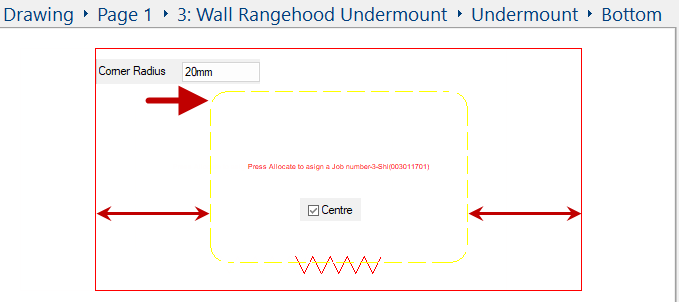
Example of Corner Radius and Centre
This is the bottom of the undermount shown on the Cabinet Machining > View page
In this example, the cutout has a corner radius of 20mm and it is centred i.e. with an equal distance from both sides.
Reduce Machining Depth By
The amount to undersize the undermount cutout. For example, setting this to 1mm would take 1mm off the machining depth of the cutout.
Current Cutout Depth
Displays the current machining depth of the undermount cutout.
Undermount Front
The following options allow you to add a front panel to cover the undermount opening and configure the front panel in various ways.
Include Undermount Front
Adds a front panel to the undermount section of the cabinet.
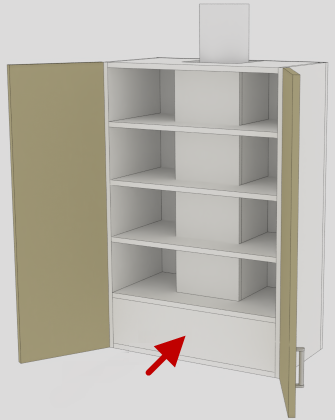
Example of Front Panel
Front Panel added when the Include option is ticked.
Position Front Below Top
Controls the position of the front panel in relation to the top of the undermount section.
- When enabled, the front will sit below the top.
- When disabled, the top will be recessed backwards and the front will extend up to align with it.
Use Panel Material for Front
Sets the front panel to use the panel material, rather than the carcass material.


