
As every job is billed to a customer/client, this is where you can set up Client account and Site information. These details will be displayed on reports.
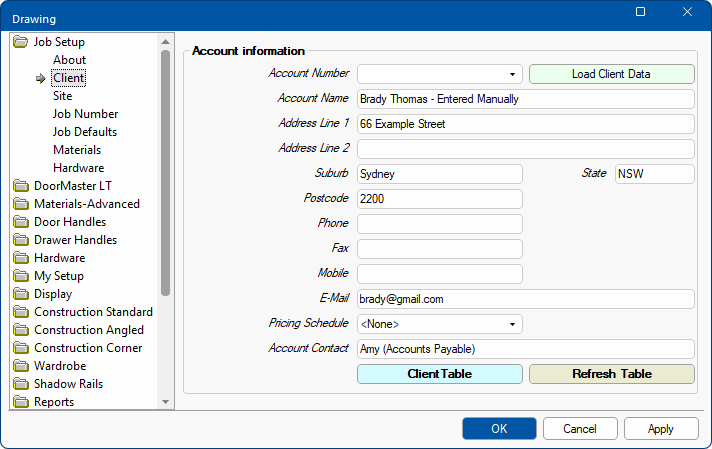
The Job Setup > Client page in the Catalog/Drawing Properties is where your customer information is created and applied to the current drawing.
 click on the area of interest.
This is optional. The Account Number edit box can be manually entered (e.g. Cash Sale) or use the drop down to select from the Client table.
The drop down uses a Client Database to prefill your customer information and grey out all following options except Account Contact. However, if you change your mind and decide to manually enter, just blank out this field and all fields will be again made available for entry.
If you want to amend Customer Details, you will need to use the Client Table button to access the relevant details.
Name of customer or company to bill the current job/drawing to.
Billing address.
Phone, Fax, Mobile, E-Mail.
Used to calculate the sell price and allows you to treat different customer groups with different pricing e.g. Retail, Wholesale, etc.
The drop list allows you to select one of the four available Markup Levels set on the Pricing > Pricing/Markups page.
Name of the customer or other contact associated with the job/drawing.
The Customer Details Form and the corresponding Table can also be accessed in the Catalog/Drawing Properties My Setup > Customers page.
The Customer Details.qlt is located in <your CabMaster folder>/Table/Customer Information folder.
The
button opens a Form Editor which is used to modify the Customer Details i.e. it allows you to:-
- to add a new customer,
- amend/modify a customer selected from the drop list,
- or delete a customer.
As well as address and contact details, the Pricing Schedule can be used to calculate a sell price for the selected customer.
The Refresh Table button should be used after the Client Table is amended.
The Job Setup > Site page in the Catalog/Drawing Properties is where your customer site information, if applicable, can be entered and applied to the current drawing.

The address and contact details pertaining to the site can be:-
- made the same as details set on Client page by ticking the checkbox.
or- set to a different address and contact details by unticking the checkbox and entering new details.
The Job Notes can be added on the Job Setup > Site page or the Job Setup > Job Checklist page of the Drawing Properties and can be reported on.
Clicking on this button opens an Edit Text Form allowing you to enter further comments relevant to the current job/drawing.
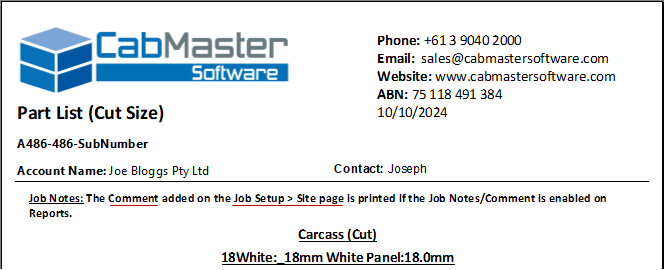
These will be printed on reports if the Job Notes/Comments checkbox is enabled. The following example has this option ticked on the Board report.