
Job Numbers are relevant to each job for billing and tracking purposes.
The Job Setup > Job Number page in the Drawing Properties is where a job number is allocated to your job and applied to the current drawing. These details will be displayed on reports.
Note that the Catalog Properties has limited options.
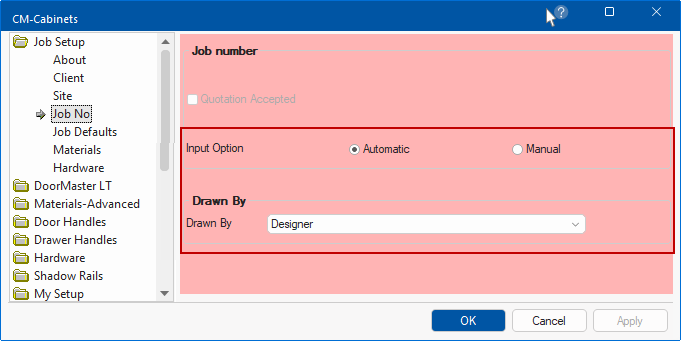
The Catalog Properties, as shown, displays with a pink background.
The job number is not required but you can set whether the Job Numbers are allocated automatically or manually.

To locate information about any option on the following image,  click on the area of interest.

The Job Number can be entered manually or created automatically, depending on the selected Input Option discussed below.
The Allocate button is used to automatically assign your current job a number for tracking and billing purposes.
A Prefix and Suffix can be added to the Job Number. An example of usage would be to differentiate between Quotes and Invoices.
This is an additional part of the Job Number to allow entry of an extra classification such as Unit number, Room number or any other number that will simplify reporting.
Example of Job Number and Sub-Number
Checkbox turn on/off. Default is off and becomes available for selection once a Job Number is allocated.
When checked/turned on, if the Prefix and Suffix is set on the My Setup > Misc Setup page, then the Job Number Quote is automatically allocated an Invoice prefix.
An example of usage would be if the Job Number is a Quote stated as Qte1006 (where Qte is the Suffix) then when you tick/turn this option, the Job Number will automatically display as Inv1006 (where Inv is the Suffix).
Automatic and Manual radio buttons allow you to choose whether you want to allocate the Job Number by manually entering or allocate automatically.
After using the Automatic method for job number allocation, the Allocate button will be greyed out, to let you know that a job number has already been assigned.
If you would like to reset the allocation in order to either manually enter a job number or assign a new automatic job number, you can press the Reset Job # Generation button.
An edit box allows you to manually enter a revision number and the minus/plus buttons can be used to decrease or increase the current revision number.
This drop list allows you to select the details of the designer that is responsible for the job/drawing. These details can be viewed on the Job Checklist, if required.
The Edit List button allows you to open a Form to enable you to add/delete details pertaining to this drop list.