CM-Cabinets Library User Guide
Some businesses prefer to include a letter or name to the Invoice/Quote number, customise edging information and override display of machining pages.
This can be done on the My Setup > Misc Setup page in the Catalog/Drawing Properties.
 click on the area of interest.
Reset Job # Generation
Press the Reset Job # Generation button if you would like to reset the number allocated on the Job Setup > Job Number page (which also caters for this button option). It allows you to either manually enter a job number or assign a new automatic job number.
Starting Number
By default the Invoice starting number is set to 0.
Change this number by entering a new number in the Invoice starting number edit box (e.g. 1000) and then click Set Start Number button. A message will be displayed to request you to confirm this action as this will impact on the numbers that will be automatically allocated on the Job Setup > Job Number page.
Quote/Invoice and Prefix/Suffix
Quote/Invoice edit boxes allows you to customise Prefix/Suffix of both quote and invoice numbers. Some businesses prefer to include a letter or name to the number so that it is clear what stage the document is at. For example you may prefix invoices with the letter 'I' or ‘Inv’ and quotes with the letter ‘Q’ or something to differentiate.
An example of usage would be if the Job Number is a Quote stated as Qte1006 (where Qte is the Suffix) then, when you turn on the option Quotation Accepted on the Job Setup > Job Number page, the Job Number Quote is automatically allocated an Invoice prefix i.e. Qte1006 will become Inv1006.
Edging Codes will determine the type of edge labelling that will be used on the reports.
- TBLR = top, bottom, left, right
- 2L2S = two long, two short
Output edge material via Optimisation/Machining (else thickness)
This requires Optimisation Link or Machining software.
Only populate edge material/thickness when present on that edge
This checkbox provides the ability to only output edging material on edges that are actually edged. The required output via Optimisation Link will depend on the optimisation software in use. This option allows the thickness of the edge to be output in one field regardless of which edge is edged, or via different fields for each edge. This is in addition to the indicator to specify which edge is edged.
Output only the main face component via Optimisation Link
This checkbox allows only the main face component to be exported via Optimisation Link as some parts have machining on two faces, which causes two components to be exported via opti link.
Show Machining Pages In Drawing Properties For Non-Machining Users
Turn on this option to display Machining pages even if you do not have a CabMaster machining license i.e. displays machining pages in CabMaster Designer CL, CabMaster Designer 3D or CabMaster Designer Pro.
This will enable the machining options in Drawing properties, which can be useful if you...
- have multiple CabMaster licenses,
- are sending the drawings to another user to machine, or
- are planning to upgrade to CabMaster Machining Premium in the future.
This does not give non-machining users the ability to export any machining, it just allows the relevant drawing properties to be accessed.
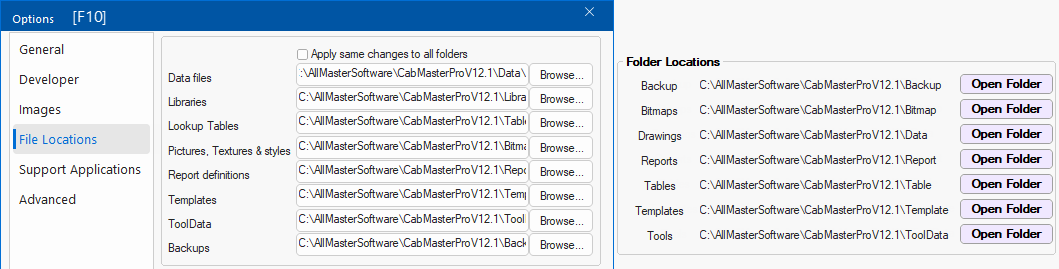
 buttons open corresponding folder locations in File Explorer.
As shown, these reflect the File Locations set in the File Options > Locations.