CM-Cabinets Library User Guide
Be aware that editing and designing your own report is not covered under your Customer Care Agreement.
Contact your preferred CabMaster Software™ retailer if you would like a customised report created by our CabMaster Support Team, as fees apply.
Reporting information should come from tables and CabMaster Drawing properties.
CabMaster will only export the information requested by the report unless otherwise specified with the AMSFilter parameter.
Make sure fields are correct before editing a report, as they will not update automatically if they change whilst designing the report.
See Designing RDL Reports below for information about designing and formatting RDL / SSRS reports.
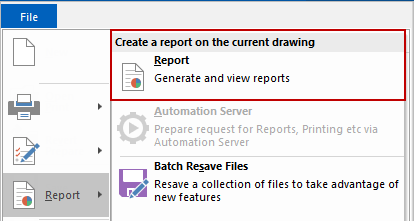
Follow the following steps to generate a MDB (Microsoft Access Database) report.
Open CabMaster.
Place cabinets that are representative of the cabinets to be reported on.
Download the Sample Report here and place in <your CabMaster>/Report folder.
Run the Sample Report from the File menu.
File > Report > Report
Open the <your CabMaster>/Report/TempReportData folder.
Example
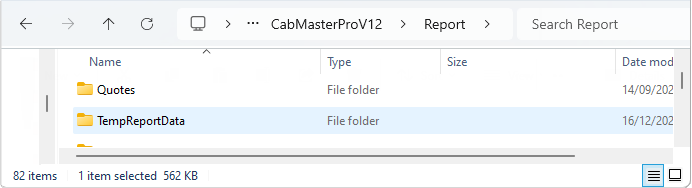
Click to view contents of TempReportData folder i.e. mdb file
CabMaster will have created a TempReportData.mdb containing all of the reporting information.
Open Microsoft Report Builder;
Select Blank Report;
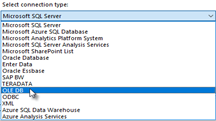
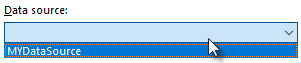
Right click on Data Sources and select Add Data Source...
Select Use a connection embedded in report;
Select OLEDB in the Connection Type drop list;
When writing and testing a report in Report Builder enter the following connection string (<YourPath> will be replaced in Step 8);
Connection String
Provider=Microsoft.Jet.OLEDB.4.0;Data
Source=<YourPath>\CabExportData.mdb;User Id=admin;Password=;
When releasing the report for use replace the connection string with path to the TempReportDataMDB ...
Amend path of the Connection String
Replacing <YourPath> with the path to the TempReportDataMDB
Provider=Microsoft.Jet.OLEDB.4.0;Data
Source=.\TempReportData\CabExportData.mdb;User Id=admin;Password=;
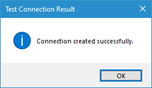
Press the Test Connection button.
If the connection string’s path is correct you will see the following popup.
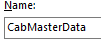
Right click the DataSets tab and select Add DataSet...
Give it a name e.g. CabMasterData;
Select Use a data set embedded in my report;
Select your Data Source from the list;
Enter your SQL query in the text box and press Refresh fields;
Sample Query
SELECT Item.id, Item.label, Component.Comment, Component.displayname,
Component.dimname1, Component.dim1, Component.dim2, Component.dim3 FROM
Component INNER JOIN Item ON Component.id = Item.id
The corresponding fields will be generated in the Dataset and can be used to populate the report.
CabMaster Drawing Property names are required for this section and are located by hovering over the required option - see RDL Property Names.
In this example we will use the Property Name on the Job Setup > Client page.

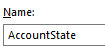
Right click on the Parameters tab and select Add Parameter...
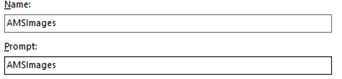
Enter the Property Name in the Name field:
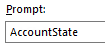
Enter the Property Name in the Prompt field:
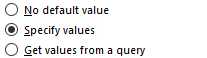
Select Allow Blank;
Go to Default Values;
Select Specific Values;
Click Add;
Enter the Default value;
To add images from CabMaster into your report, you need to :-
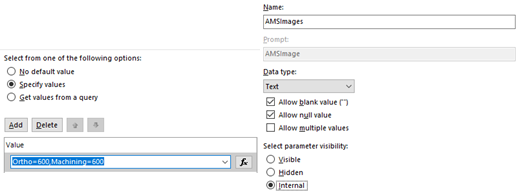
Add a parameter called AMSImages to the report;
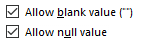
Set the parameter to Allow Blanks and Allow Nulls;
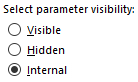
Set the parameter's visibility to Internal;
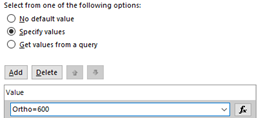
Add a specific Default Value for the image you require;
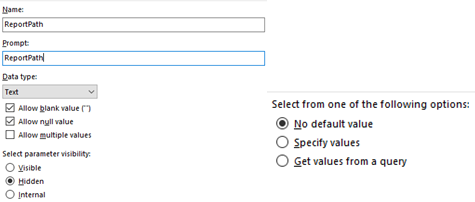
Add a Second Parameter (repeat Step 1 to 3) called ReportPath;
Set the parameter to Allow Blanks and Allow Nulls;
Set the parameter$'s visibility to Internal;
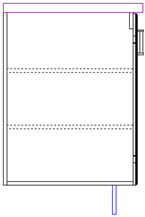
Add an Image Type to the report (in this example Ortho is added). Refer to images using the following :
="file:"&Parameters!ReportPath.Value&"\TempReportData\OrthoImages\"&cstr(CabinetID)&". png"
Replace CabinetID with the field that corresponds to the cabinet's id, as discussed next.
In the following references replace CabinetID with your DataSet field for the cabinet's id.
Reference using :-
="file:"&Parameters!ReportPath.Value&"\TempReportData\PlanImages\"&cstr(CabinetID)&".png"
AMSImage value : Plan=600
Example
Reference using :-
="file:"&Parameters!ReportPath.Value&"\TempReportData\ElevationImages\"&cstr(CabinetID)&".png"
AMSImage value : Elevation=600
Example
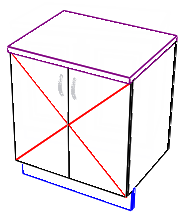
Reference using :-
="file:"&Parameters!ReportPath.Value&"\TempReportData\SideImages\"&cstr(CabinetID)&".png"
AMSImage Value : Side=600
Example
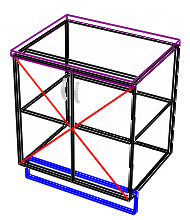
Reference using :-
="file:"&Parameters!ReportPath.Value&"\TempReportData\OrthoImages\"&cstr(CabinetID)&".png"
AMSImage Value : Ortho=600
Example
Reference using :-
="file:"&Parameters!ReportPath.Value&"\TempReportData\WireFrameImages\"&cstr(CabinetID)&".png"
AMSImage Value : Wireframe=600
Example
Reference using :-
="file:"&Parameters!ReportPath.Value&"\TempReportData\HiddenImages\"&cstr(CabinetID)&".png"
AMSImage Value : Hidden=600
Example
Reference using :-
="file:"&Parameters!ReportPath.Value&"\TempReportData\SolidImages\"&cstr(CabinetID)&".png"
AMSImage Value : Solid=600
Example
Reference using :-
="file:"&Parameters!ReportPath.Value&"\TempReportData\TexturedImages\"&cstr(CabinetID)&".png"
AMSImage Value : Textured=600
Example
In the following reference replace FullID with your DataSet field for the Component.IdFull.
Reference using :-
="file:"&Parameters!ReportPath.Value&"\TempReportData\MachiningImages\"&cstr(IDFULL)&".png"
AMSImage Value : Machining=600
Example
Returns the path to the report directory. Parameter's used for placing images in reports.
Parameters
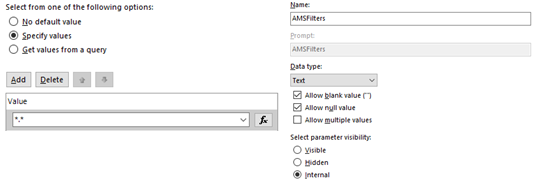
Optionally restricts/extends the data sent to the MDB. By default, CabMaster looks at the SQL statement in the report and generates all tables/fields that are referenced in the SQL. But you may want to provide additional tables/fields in the MDB data, particularly during report development so you can select from more fields.
AMSFilters includes wildcards (e.g *.*).Parameters
Tells CabMaster what images and what resolution to output them as. For available options see Image Types discussed above.
Parameters
For information about designing and formatting RDL / SSRS reports please visit the following links:
https://social.msdn.microsoft.com/Forums/sqlserver/en-US/home?forum=sqlreportingservices