CM-Cabinets Library User Guide
The cabinet is a flexible Rangehood canopy that allows for 4 styles and a number of options including a trim with an optional cap.
When the Panel material is chosen to be of Door material and a DoorMaster LT door profile is used (enabled in the Drawing Properties ) for the doors, the profile can be enabled on all panels independently. See examples of available Styles and Front Panel options below.
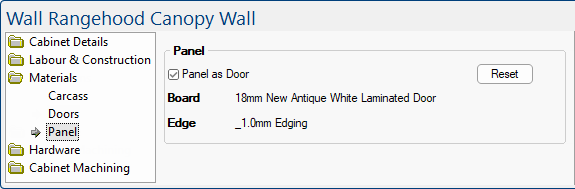
Panel as Door enabled
The Panel as Door can be set either on the Materials > Panel page or the General Settings page (click on image to view).
Click to view General Settings page
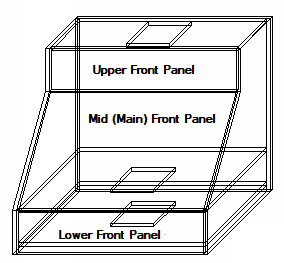
Profiles are available on all Front Panels.
The Mid(Main) Front Panel can have up to 3 profiles which can be cut as 1 or 3 parts.
The Lower Front Panel and Lower Front Trim can have an arch applied.
There are four (4) styles which can be selected from the drop list or by clicking on the image on the General Settings page.
The style can be selected using either the Canopy Style drop list or clicking on one of the images.
 under the image indicates the current selection e.g. Style 4 shown.
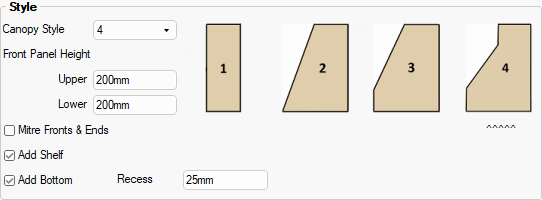
General Settings page - Click to Expand
The Mitre Fronts & Ends option is automatically reflected on the Ends page. If this option is...
The Shelf and Bottom have separate cutout settings.
In the following examples, a DoorMaster LT door profile is used for the doors.
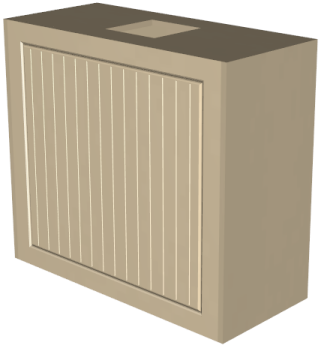
Style 1
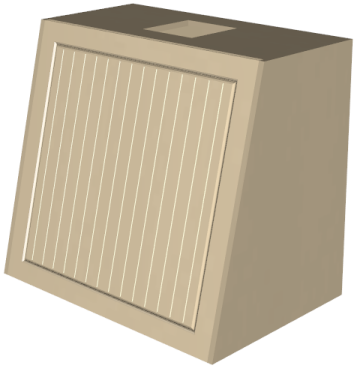
Style 2
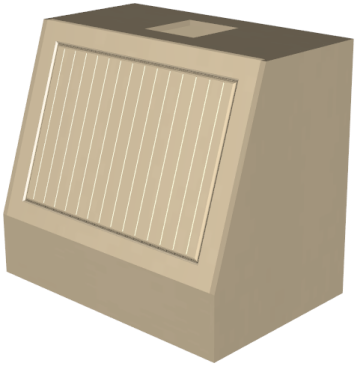
Style 3
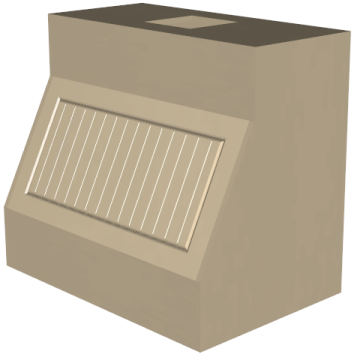
Style 4
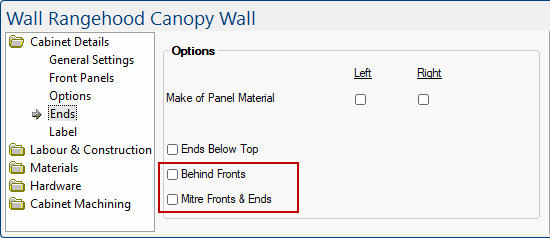
Ends can be placed Behind Fronts, if the Mitre Fronts & Ends option is not enabled.
The Mitre Fronts & Ends option is automatically reflected on the General Settings page.
The Front Panels page allows you to customise each panel i.e. Upper, Mid(Main) and Lower Fronts, independently (click image to view).
Click to view Front Panels page
Only applicable to the Mid Front Panel and allows you to select up to 3 panels individual panels.
The example shown has 3 panels with...
- Door Profile enabled;
- Export As One Panel enabled, which cuts as one part;
- If turned off, then it will cut as individual panels.
- Sizing Ratio has been set as 1:2:1
- This makes Panel 2 twice as wide as the side panels;
- Space as Individual Panels is turned off.
- The border sizes can be automatically adjusted on adjoining profiles so that they space aesthetically (when DoorMaster LT in use).

Style 4 with 3 panels on the central front panel - Click to Expand
Trim can be added to the Lower Front Panel for Style 3 and Style 4.
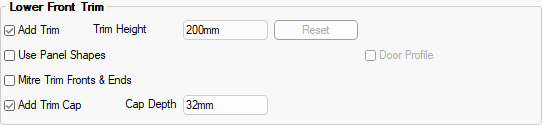
Click to Expand
If the Add Trim check box is ticked, then you have the added options to...
- Use Panel Shapes - Only the bottom edge can be shaped (usually used on the lower panel to make an arch).
- Mitre Trim Fronts & Ends - Use a mitre for the trim on the fronts and ends.
- Add Trim Cap and specify a Cap Depth
- An optional Door Profile can be enabled, (if this is greyed out then it hasn't been turned on in the Drawing properties).
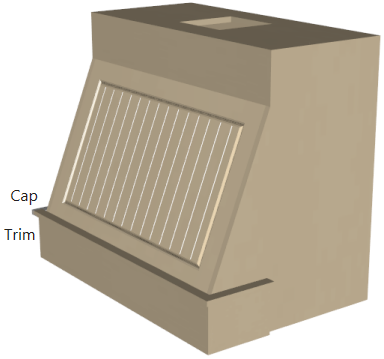
Style 4 with Door Profile, Trim and Cap
The Add Trim has been enabled and a Door Profile applied to the central Front Panel only.
Click to view Front Panels page
Upper and Lower Front Panels - can be made of either Carcass or Panel/Door material.
Upper, Mid, Lower and Trim - can include a door profile (if made of door material and DoorMaster LT in use).
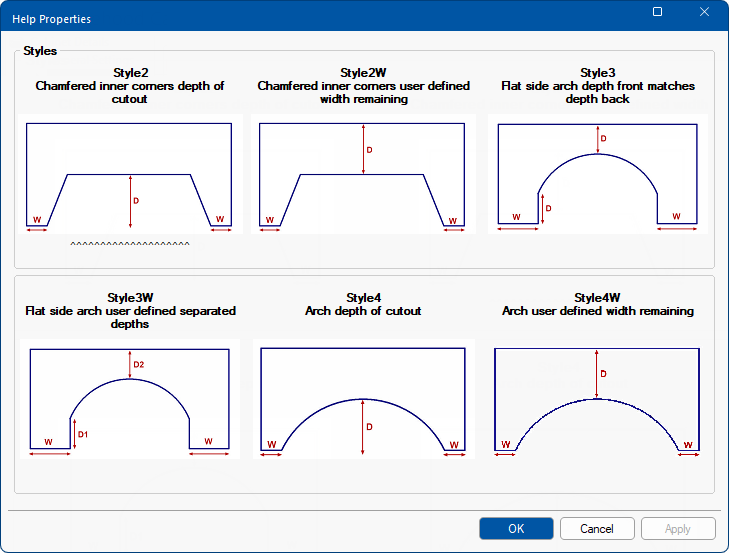
Lower and Trim Fronts Panels have an additional option allowing you to Use Panel Shapes.
A panel shape profile can be selected using the drop list fields and Help button.
The Options button allows you to define the selected Style (click on image to view example).

Click to view Options
Only the bottom edge can be shaped (usually used on the lower panel to make an arch).
Available Shapes - View and Select
Click on the Help button to view available shapes. The shape can be selected from this page by clicking on the required image.
The
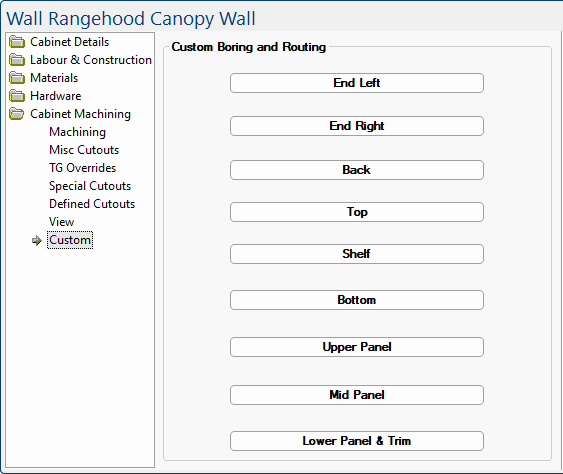
Custom tables are available for all parts - see Custom Tables Explained.
Custom page
On the Cabinet Machining > Machining page, the machining of the trim capping can be turned on/off by using the Machine Trim Capping Parts option .

Cabinet Machining > Machining page Overrides - Click to Expand