CM-Cabinets Library User Guide
The Hardware > Drawers page of the Drawing Properties provides the ability to set current job defaults i.e. default Runner Group and Runner Sets.
 Watch the Videos on how to create a new runner set on the Hardware > Drawers page in the Catalog/Drawing Properties and the affect on a cabinet. Ensure that you set your most frequently used Runner Sets/Series in the Catalog.
All of our tables for drawer runners, handles, hinges and materials are now available for download via StoreMaster.
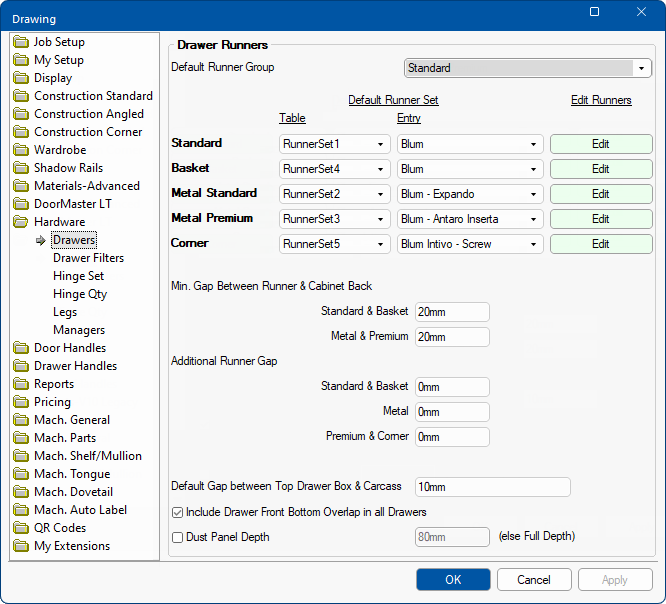
Use the drop list to select the type of drawer runners that are required for the current job/drawing.
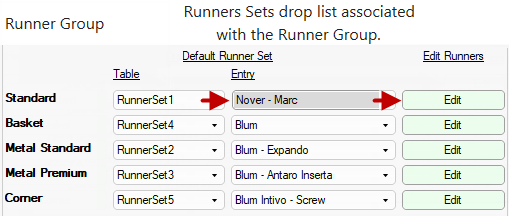
You can select one of three Runner Groups...
Each Runner Group can have any number of Runner Sets associated to them and multiple runner set tables can be set up and then selected from for each drawer type. See notes on tables below.
Example
For the Runner Group "Metal Premium" (below) we have selected the "Finista Edge" Runner Set.
You can now edit the "Finista Edge" runner set by clicking on the associated Edit Runners button.
If the Default Runner Group is set as "Metal Premium" then the current job/drawing will use the "Finista Edge - Matt White" runner set.
Images are provided in the smz file that is downloaded via StoreMaster.
However you can amend these manually - see Runner Sets : Note on Image and Logo.
Edit Runners
The Edit buttons allow you to manage the selected runners set, as shown above.
- Standard
- Metal Standard
- Metal Premium
- Basket
- Corner - Corner runners are similar in construction to Metal Premium
Follow links above to see full discussion on using Runners Properties to manage the Runner Set.
Tables
Associated Runner tables (up to 5 per set) can be amended using the Runner Editor which can also be accessed from here.
Runner Set tables (located in <your CabMaster folder>\Table\RunnerSet have additional columns called...
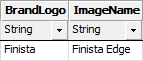
- BrandLogo : An image (in JPG or PNG format) of the brand's logo.
- Image stored in \Bitmap\Supplier\
- ImageName : An image of this runner set's drawer.
- Image stored in \Bitmap\Hardware\Drawers\
Both should be available on the manufacturer's (or supplier's) website. The simplest way is to just screenshot them and crop to size, just ensure that all images used have clean edges.
For more on tables required for a drawer runner system, see Drawer Runner Overview.
The drawer 'Depth' by default is the interior depth of the cabinet minus Min. Gap Between Runner & Cabinet Back.
The Default Gap between Top Drawer Box & Carcass can be overridden by typing the new gap default in the edit box.
The Min.Gap and Additional defaults can be changed on the Hardware > Drawers page or the Runners Properties dialog (click on image)

Click to view Drawers page and Properties page defaults
Cabinet Level Override Min. Gap and Extra Notes on Top Shelf options
It is possible to override the 'Minimum Gap' option in the Catalog/Drawing properties using the options available on the cabinet, as shown.
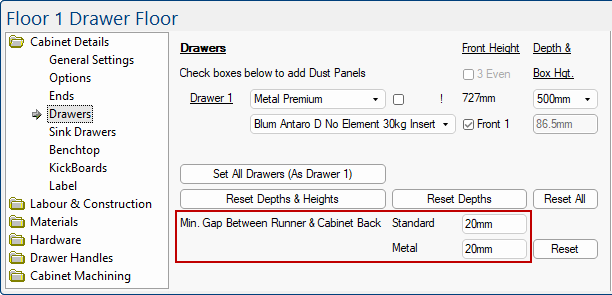
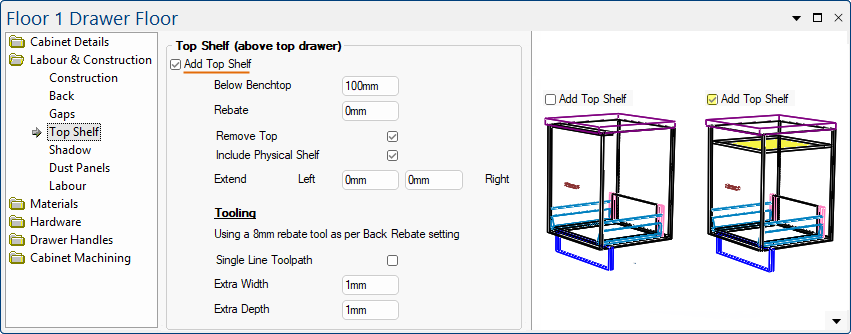
Add Top Shelf option on the Cabinet Details > Drawers page, if turned on, enables corresponding option on the Labour & Construction > Top Shelf page, as shown below. The  button simply provides a quick link to this page, where the configuration of the Top Shelf can be customised.
These increase the value for the gap between the drawerbox and carcass retrieved from a runner table. For example, if the table specifies a 14mm gap and the additional gap is 4mm then the resulting gap is 20mm.
Turn on/off Include Drawer Front Bottom Overlap in all Drawers.
Turn on/off Dust Panel Depth. If enabled...