
The only way to add a Pipe Chase in drawer cabinets is to use a Defined Cutout. Unlike a Door Cabinet, the shelves will not cut around the pipe chase automatically. so we will show you how.
Step 1: Enable Defined Cutouts
Select your cabinet and on the Cabinet Machining> Defined Cutouts page, tick Enable Cabinet Cutout.
Step 2: Quick Configurations
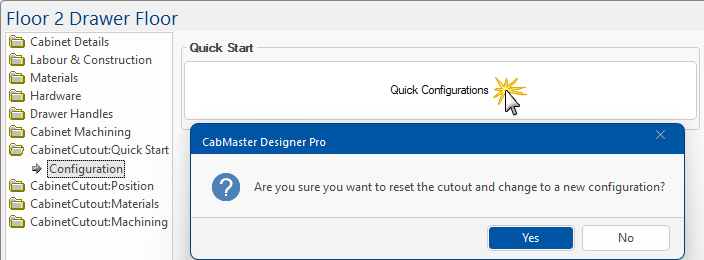
Now you will be able to go to the CabinetCutout: Quick Start > Configuration page.
Click on the Quick Configurations button, as shown.
Click 'Yes' to the message which allows you to reset the cutout and change to a new configuration.

Step 3: Configuration Option
A new window will be presented to allow you to select a configuration.
Click on the PipeChase configuration, which will then be highlighted in green, as shown.
Then click 'Next'.
Step 4: Position and Size
The following window allows you to customise your pipe chase, including where to position the chase and the height and depth of the chase itself.
Step 5: Gaps
Select your gap settings. In this example we have turned off top and front gaps.
Click 'Finish' when completed.
You should now see that the Pipe Chase has been added.
Step 6: Add Sink Drawers
Tick the Use check boxes as shown and amend the position as required.