To illustrate the functionality, we will add four Adjustable Legs to a Floor Standard cabinet and then price.
This method can be used when pricing legs included for machining purposes on the Hardware > Legs page at either Drawing or Cabinet level.
Note that machining is not associated when legs are added on the Hardware > Hardware page of an individual cabinet.
Step 1 Cabinet
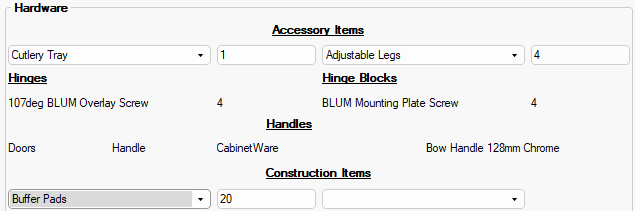
On the Hardware > Hardware page of a cabinet in your drawing add up to 10 accessories.
- In this example, use the drop list to select Adjustable Legs and enter 4 in the quantity edit box.

Select Accessory item using drop list and enter quantity - Click to Expand
Step 2 Hardware Manager
Now we will assign a cost price to the hardware item.
- Open the Hardware Editor by pressing the
 button.
- The hardware item we want to cost (Step 1) is an Accessory Item, so use the Filter Type drop list, as shown.
- The Hardware Type radio button will automatically update to correspond to selection.
- Pricing for Construction Items is done in the same way, except that Type is Construction Item.
- Select the hardware item using the drop list, which in this example is Adjustable Legs.

Use drop list to select hardware item - Click to Expand
-
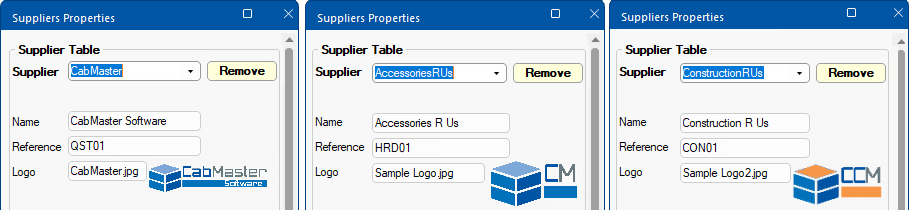
A Supplier can be allocated here, especially useful if you want to report by Supplier - See Tutorial 3 below.
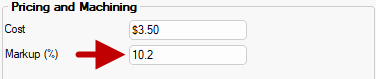
Step 3 Cost and Markup Hardware Item
- Cost the hardware item
- Enter per item Cost as $3.50
- Markup [Optional]
- This markup is applied prior to any drawing based markup - Click on image to view associated table.
- See Step 4 for example of use.

Enter Pricing details - Click to view associated Table
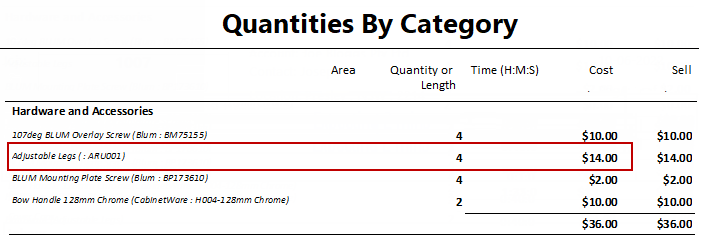
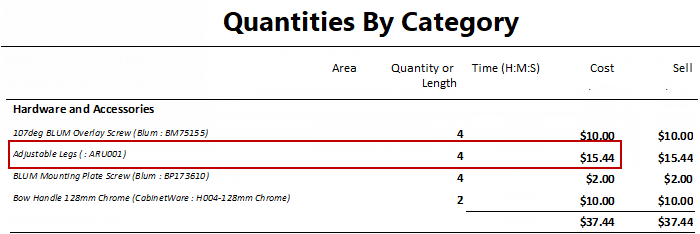
Test Result
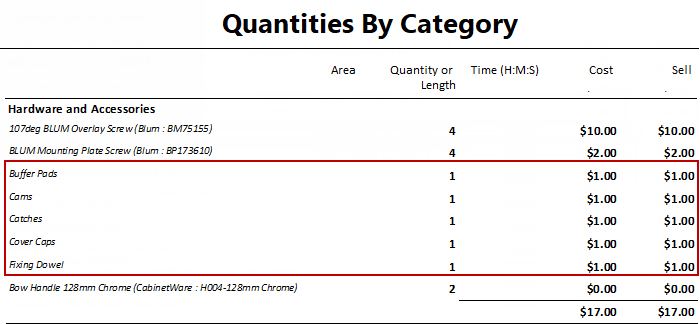
Test the results by running a Quantities By Category report, as shown.
Hardware Item
The calculation is the number of items i.e. 4 multiplied by $3.50. Therefore the cost of Adjustable Legs on this cabinet would be $14.00
Step& 4 Add Optional Markup
A markup value can be entered as a number e.g. a number entered as 10.2 would be 10.2%
This Markup will be included in the cost price.
Test Result
Test the results by running a Quantities By Category report, as shown.
Pricing for Construction Items is done in the same way - see Tutorial 2.
Hardware Item
The Markup of 10.2% will be applied to the Cost of Adjustable Legs on this cabinet would be $14.00 + $1.44 = $15.44
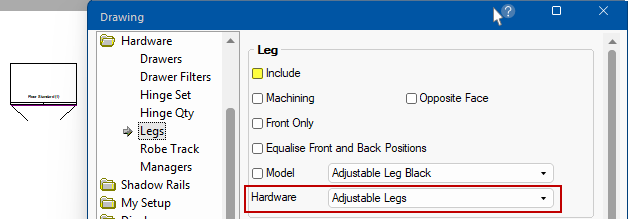
For this example, ensure that the Hardware > Legs page has the Include option unticked, as shown, otherwise the number of legs will be incorrect.
Click to view report incorrectly adding legs created from above options.
The above report shows only pricing details pertaining to this tutorial.
Rounding during the calculation process can cause amounts to increase by a few cents.
To calculate Sell price set Markup Percentages per category on the Pricing > Pricing/Markups page.