CM-Cabinets Library User Guide
There are two ways of applying additional items. You can choose to...
In this tutorial, we will be ...
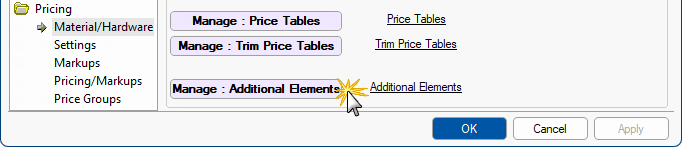
On the Pricing > Material/Hardware page of the Catalog/Drawing Properties, click on the Manage : Additional Elements button.
Click to Expand
Objective : Now we need to add Categories to allow selection from an item drop list - click to view example
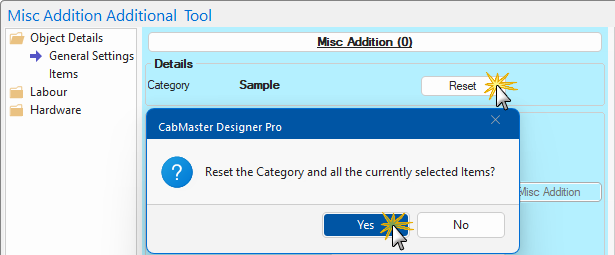
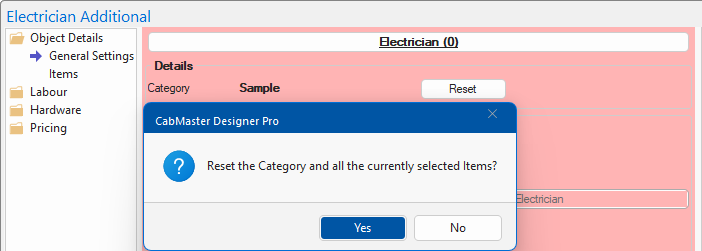
When you initially open the Misc Addition item, a Reset button will be available.
- You need to press Reset to access the following drop list.
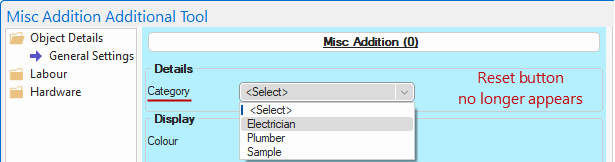
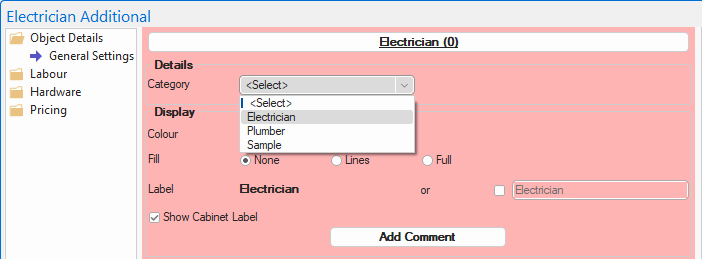
After we add categories in this step, we will be able to select our newly created category from the drop list.
- Note that only the General Settings page is available at this stage.
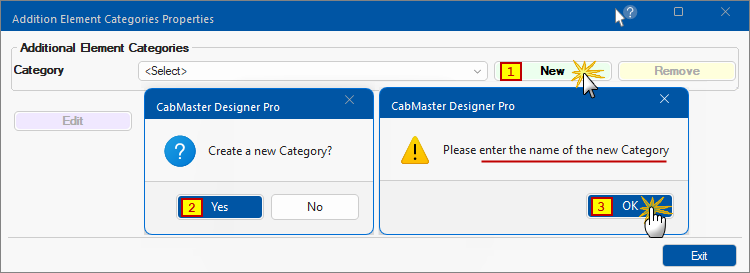
To add a new Category e.g. Electrician or Plumber...
- click on the New button
- confirm that a new Category is required i.e. click Yes
- confirm that a new name will be provided i.e. click OK
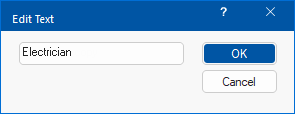
- Type in the new Category Name e.g. Electrician
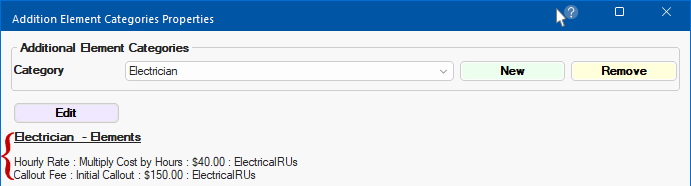
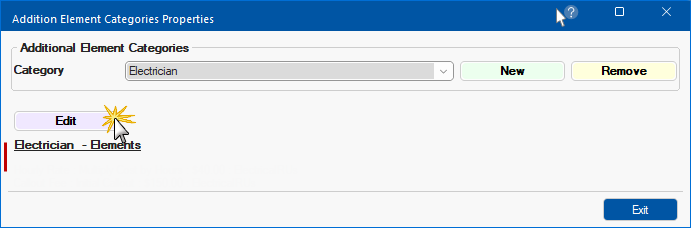
The result will be that a Category called Electrician is created and Electrician -Elements can now be added.
- click the Edit button, as shown, to allow the addition of Elements.
 If you want to delete a Category, simply select it e.g. 'Electrician', and click on the Remove button. You will be asked to confirm this action.
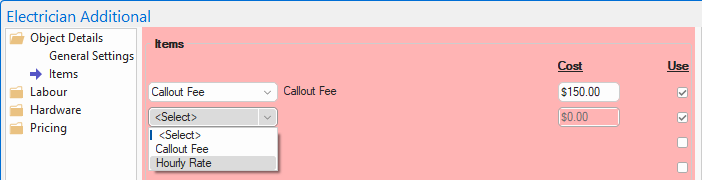
Objective: Now we need to add Elements to the Category, which can be selected from the Items page drop list - click to view example
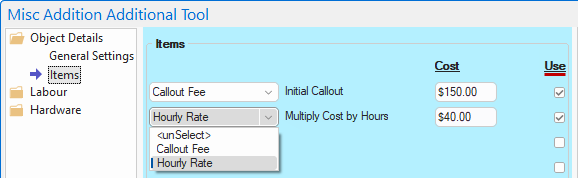
After selecting the Category in Step 2, the Items page is made available.
To add costing, the Use checkboxes need to be enabled. The Elements can then be selected from a drop list.
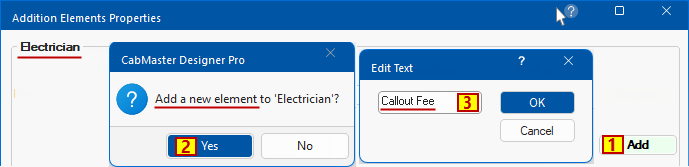
This Properties Sheet will be displayed allowing you to create new Elements to the Category (which in this example is Electrician)
- Click on the Add button
- Confirm that you wish to 'Add a new element' i.e. Yes
- Enter an Element selection name that will appear in the drop list - see above Objective
- In this example, type in the Edit Text box "Callout Fee" and click OK.
- In this example, repeat #3 to create another Element selection called "Hourly Rate".
- As shown, there are now two Elements for the Category 'Electrician'
- Type in a Description, select a Supplier for each and enter a Cost and Markup if required.
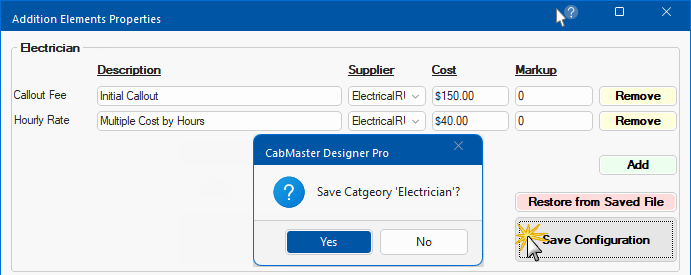
- Save Configuration as shown above.
- If you change your mind before pressing the Save button, you can click on the Restore from Saved File.
- Click on the Exit button to return to the Category.
- The details of Elements added will appear, as shown.
Trouble Shooting : If there is an entry with a blank element name, as per the following, then use the Remove button, as shown.
The reason is that the Element name is the selection criteria for the item/object drop list. Compare with Objective.
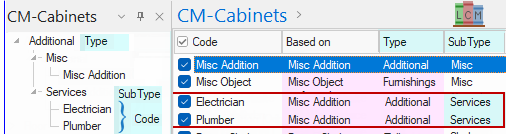
Now we will create additional items, i.e. Electrician and Plumbing, in the Library Catalog Manager based on Misc Addition.
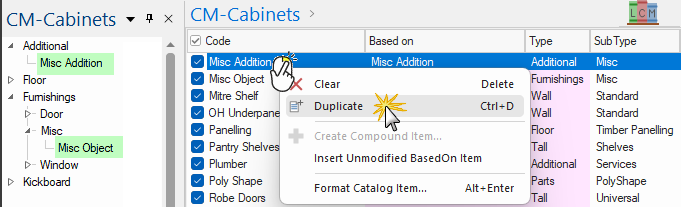
this creates a (copy) which you now need to rename.
to rename the Misc Addition (copy), either double click on the item code or use F2 to select.
enter/type in the required code name.
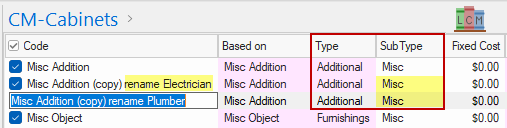
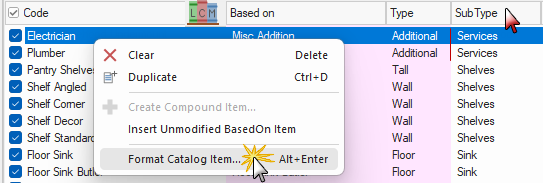
Now we will sort by SubType by clicking on the column header to make locating and formatting items easier.
Now we will Format both items - to do this repeat this step for both the Electrician and the Plumber items.
In this example, the Sell Price is calculated with a Level 1 Markup of 10% - see Pricing/Markup page settings for Additional Elements.