StoreMaster : Download and Install Tables
In This Topic
This guide will take you through the process of adding downloading tables from StoreMaster.
Installing the Tables will
replace existing tables of the same name, not update existing tables.
In CabMaster Version 12.1 the process is streamlined, which means that your tables will automatically be downloaded and installed.
 Watch the Video : A Minute with Mike on how to add your hardware, materials and more using the new StoreMaster button.
This makes it unnecessary to download the CMTableInstaller, which was only compatible for CabMaster Version11 (and up) and Windows 10 (and up).
Step 1: Accessing StoreMaster
Go to the Home tab and click on the StoreMaster command button, as shown.
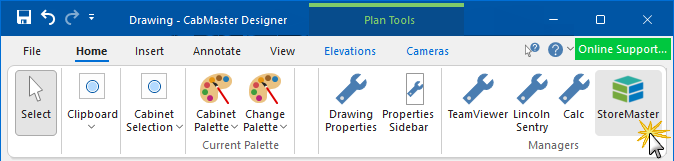
Using this option allows you to directly download addons from within , instead of having to download through our website.
Step 2: Download Tables
After clicking on the StoreMaster command button, you will also see available tables for download. Select the type of download required.
In this example, we have clicked on 'Materials'.
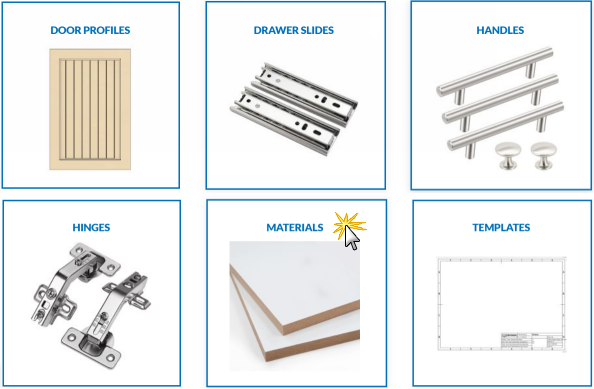
Clicking on any of these will turn the background of the image green, showing that is the option currently selected.
Once selected, press the Next button.
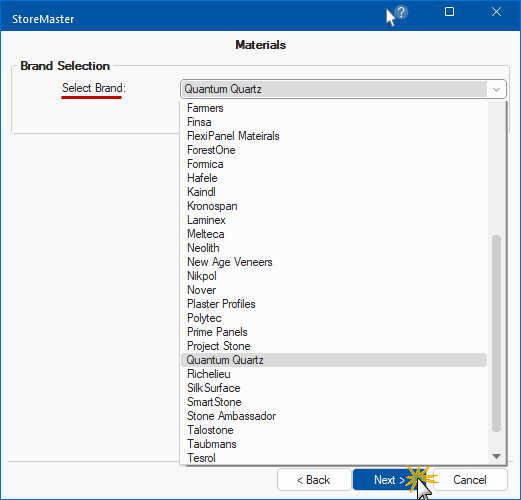
Step 3: Choose the Brand
For Materials and Drawer Runners, this next page will show you the list of brands that have items available for download.
- Select brand e.g. Quantum Quartz and press Next
Step 4: Select Download Item
The next page will show you a list of all items that are available to download in your selected category and/or brand.
- The Material table may also include a year, as shown. This means that the table will include materials available at the time of writing for that year.
- In the , select the item you want to download and press Next.
Step 5: Download and Install
will now install the files for you.
- Be patient as it may take a minute or two to complete the process.
When complete, an informational dialog will confirm the completion status.
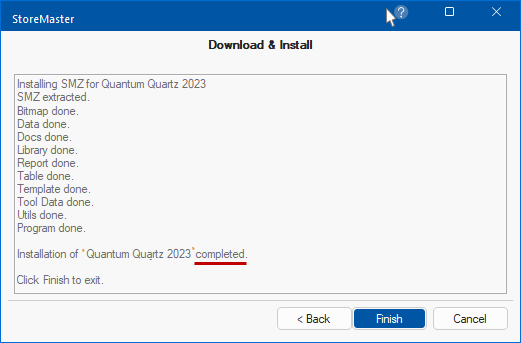
If there are any issues with the installation, it will advise you to contact our for assistance.
Materials DataSource Setup
Changes to the Materials DataSource need to be in the / Properties.
Remember that the are the default settings applied to all future drawings but can be overridden by the [F4].
If you make the following changes to the first and then create a new drawing, the changes will be automatically applied to the current drawing.
Watch the Video to learn more on adding new Material DataSources in ™ [1:41mins]
Catalog Properties
You cannot edit the with more than one application is open. It is therefore recommended to close on any other computers that are accessing the same file locations.
From the File menu select Prepare > Catalog Properties
![Click to view the same changes in the Drawing Properties [F4]](images/Install/StoreMaster26_thumb.png)
Click to view the same changes in the Drawing Properties [F4]
If you wish to make the same changes in the Properties, then you can select File > Prepare > Drawing Properties.
Property pages are similar, except that the background colour for properties is pink and properties is light grey.
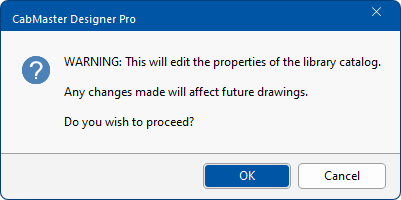
- You will be presented with a warning message. Click OK.
Example of Warning Message
- Go to My Setup > Materials DataSources page
- To 'Use', tick the check box and select the Materials required from the .
- Shown here, Quantum Quartz 2023 has been selected from the and the Use checkbox has been enabled/ticked in the .
- Click Apply and OK.
![Click to view the same changes to the Drawing Properties [F4]](images/Install/StoreMaster12_thumb.png)
Click to view the same changes to the Drawing Properties [F4]
- Close CabMaster - you do not have to save the drawing.
- You will be asked to 'Save changes' to the catalog - click Yes.
- All future drawings will have these changes applied.
When you open new drawings, the new Materials will be available for use.
Drawing Properties
If you need to apply new Materials to an older/current drawing, then you will have to repeat the above in the .
Create & Setup a Runner Set
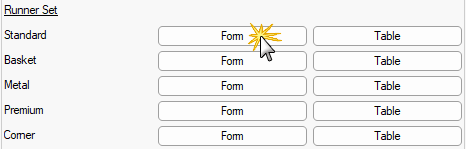
In , go to the Hardware > Managers page in the [F4].
Under Runner Set there are five (5) different types - knowing the type is critical for setting up the runner.
The following instructions hold true for all five types of Runner Sets, you just need to click on the applicable Edit button.
See also the topic on how to Create a New Runner Set for step by step instructions.
These are the ones you need to know:-
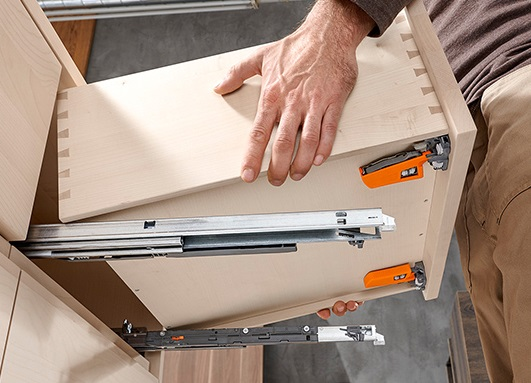
Standard / Box Drawers
Standard = Box drawers with ball bearing runners or under-mount runners.
Example of Standard drawer runner
Step 1 On the Hardware > Managers page in the [F4]...
- Click the Standard Edit button, as shown.
Hardware > Managers page - Click to Expand
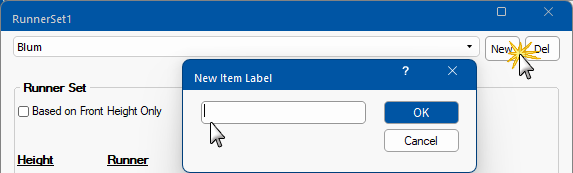
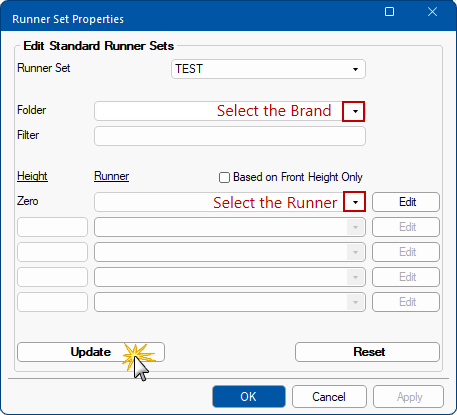
Step 2 In the Runner Set Properties, click Add New Series, as shown below.
- Create a 'New Series' label for the new Runner Set.
- Suggest that you name it as per StoreMaster (click on image) but you can name it whatever you like.
Click to view Runner Set details downloaded and installed
- Click OK and you will get a confirmation message.
- The Runner Set still needs to be set up.
Step 3 Now select your newly created runner set series e.g. Blum Standard
- From the Folder , select the brand;
- Complete selection of applicable runners;
- From the first runner (Zero) select the desired runner from the .
- Then enter a Height value for each subsequent runners selected from the .
- Select the correct Image and Logo using the drop lists;
- Save your changes when you are finished.
Click to view Runner Set details downloaded and installed
Make sure that you match the StoreMaster settings.
- Click OK to close the Hardware > Managers page.
Your Runner Setup is now complete.
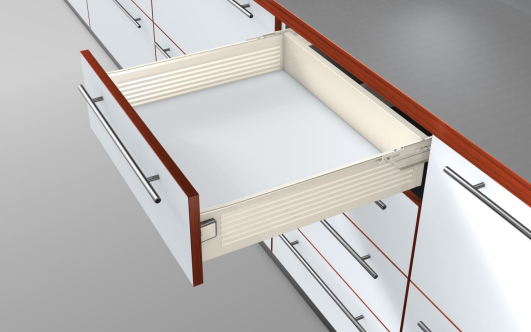
Metal/Single-Wall Drawers
Metal = Single walled, metal-sided drawers.
Example of Metal drawer runner
Step 1 On the Hardware > Managers page in the [F4]...
- Click the Metal Form button, as shown.
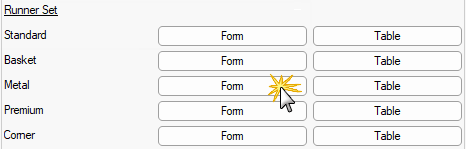
Hardware Managers page - Click to Expand
Step 2 and Step 3 Click on this link and follow the instructions above.
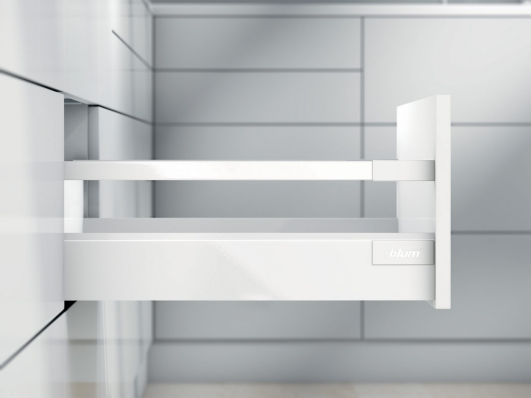
Premium/Double-Wall Metal Drawers
Premium = Double walled, metal sided drawers.
Example of Premium drawer runner
Step 1 On the Hardware > Managers page in the [F4]...
- Click the Premium Form button, as shown.
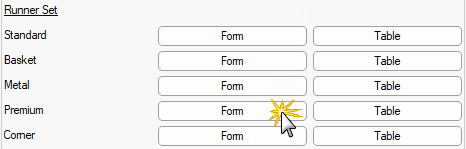
Hardware > Managers page - Click to Expand
Step 2 and Step 3 Click on this link and follow the instructions above.
Video
A Minute with Mike : How to add your hardware, materials and more using the new StoreMaster button inside from V12.1 onwards. [1:04]
See Also
Library Basics
Runner Sets and Properties