CM-Cabinets Library User Guide
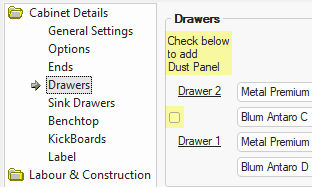
This topic discusses the options on the Cabinet Details > Drawers page with links to related topics.
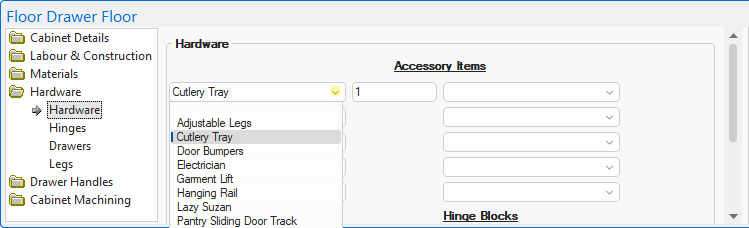
At Cabinet level, you can allocate which drawer (or drawers) has a cutlery drawer displayed in 3D on the Cabinet Details > Drawers page. The one proviso is that the number of Cutlery Tray's selected from the drop list on the Hardware > Hardware page is greater than zero (0).
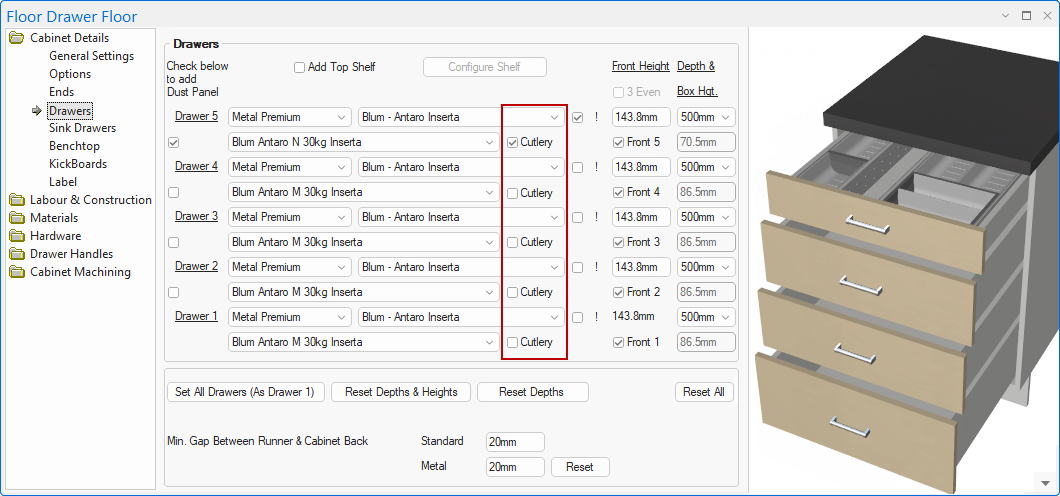
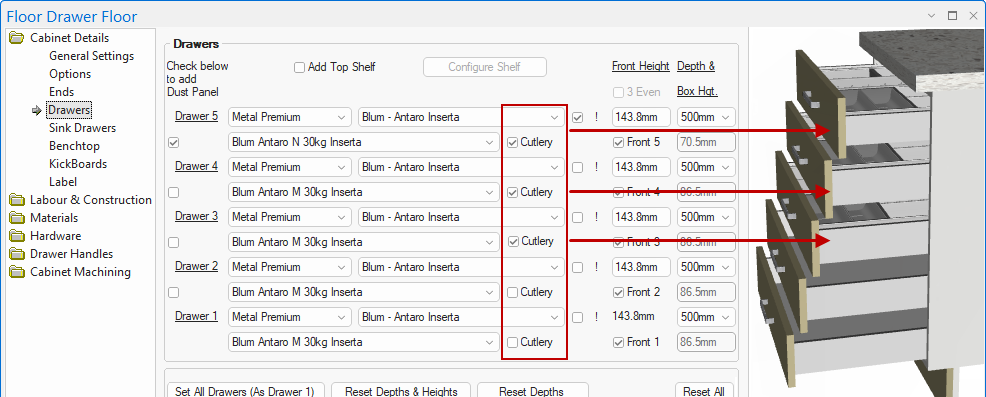
You can allocate any drawer/s to display a Cutlery Tray in 3D, using checkboxes on the Cabinet Details > Drawers page. However the checkboxes only appear when there is at least one Cutlery Tray selected on the Hardware page.
Previous to v12.1 Note
Previous to v12.1, if a drawer cabinet had a Hardware Accessory Item called 'Cutlery Tray' added to the cabinet (with any quantity) only the top drawer would show a 3D model of the tray.
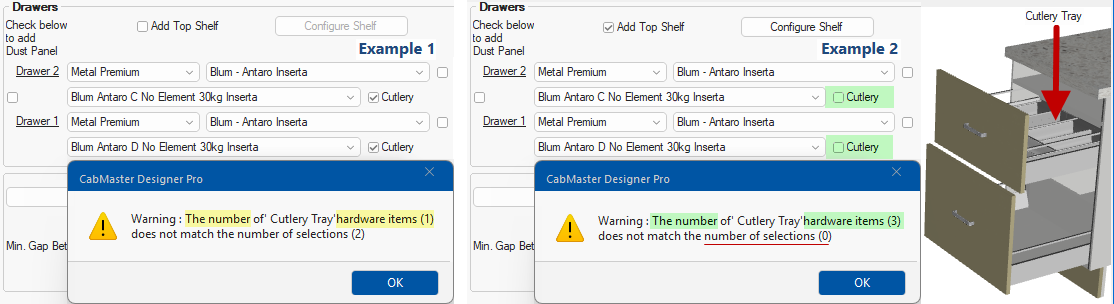
If the number of Cutlery Tray items on the Hardware > Hardware page does not equal the number of selections on the Drawers page, then a warning message will be presented (this is informational only).
As you can see in example 2, the 3D display is allocated to the top drawer even if the 'Cutlery' checkbox is not enabled because the Hardware page has been allocated with one (or more) Cutlery Tray items, so you will need to check and customise appropriately, manually.
If the number of Cutlery Tray items on the Hardware > Hardware page is greater than zero (0), then extra checkboxes called Cutlery will be made available on the Cabinet Details > Drawers page (click on image below to compare with a Drawers page with zero items).
You can allocate any number of drawers to display a cutlery drawer in 3D. See also Reporting/Costing below.
Click to view example of Drawers page with NO Cutlery Trays selected on the Hardware page.
For reporting/costing purposes, the quantity of Cutlery Trays must be manually entered on the Hardware page to correspond with the Drawers page i.e. the Hardware page is not automatically updated.
In the following example, three (3) Cutlery drawer checkboxes are enabled, so the Hardware page must correspond with the same number of Cutlery Tray items.
 A dust panel is a horizontal wood panel or board that acts as a divider, or barrier, between drawers to eliminate dust and keep it off the drawer contents. The dust panel is located below each drawer and separates one drawer from another. It is like a bottom case that a drawer slides into. The dust panel does not pull out with the drawer, instead it is attached to the framework of the piece i.e. it is like a frame within the frame.
Dust panels can help prevent a drawer from getting overstuffed as well as keep smaller items at the back of a drawer from falling down to a lower drawer. Keeping everything where it should be prevents you from having to pull out a lower drawer to fish out what’s fallen down to the back of it.
The Construction Standard > Drawer Dust Panels page of the Catalog/Drawing Properties provides options to include a dust panel either as a rail or full depth.
At Cabinet level, the Labour & Construction > Dust Panels page provides options to set the dimensions and position of dust panels between individual drawers. The construction type can be controlled on the Cabinet Machining > Drw Adj page.
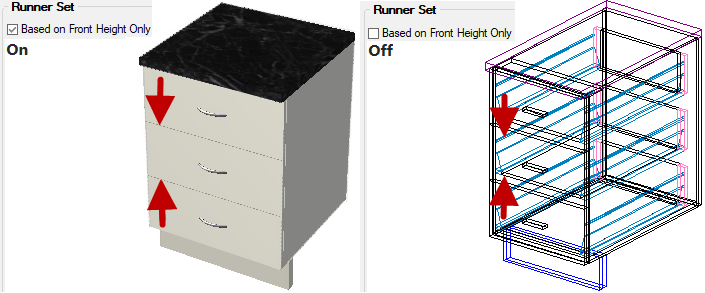
Height edit boxes, sets the height automatically dependent on the 'Based on Front Height Only' option when the runner set is created. The specified 'Height' can relate to the actual panel coloured front of drawer or to the internal height of drawer which is often specified in your product suppliers catalog.
Click to view related Runner Properties
See also Advanced Drawer Front Configuration.
The drawer 'Depth' by default is the interior depth of the cabinet minus 'Min. Gap Between Runner & Cabinet Back'.

Default for Runner Properties - Click to View
The Box Height default is based on the settings in the Runner Properties (click on image below).

Default for Runner Properties - Click to View
See tutorial on creating Runner Sets which will discuss how to create and apply a Runner Set defaults to your current drawing and how to change the individual cabinet runners on the Cabinet Details > Drawers page.
In some cases two different construction methods are required within the same drawing (such as making pot drawers from whiteboard and also making timber drawers using Hettich Quadro* runners) - see topic on Drawer Runners Properties.

Enabling the 'Add Top Shelf' checkbox (as shown above) will turn on the corresponding option on the Labour & Construction > Top Shelf page. The 'Configure Shelf' button is simply a quick link to this page, allowing you to customise it's position and tooling.
Bin drawer runners are available for use with bin configurations in Single, Double and Quad, displayed in 3D for a visual representation - see tutorial on how to apply Bins.