
In this topic, we will add a utensil drawer to a Floor Universal i.e. a drawer inside a larger drawer.
It is recommended to remove the doors to provided a clearer view for designing purposes.
Do this by unticking the Include option on the Doors > Div Door page.
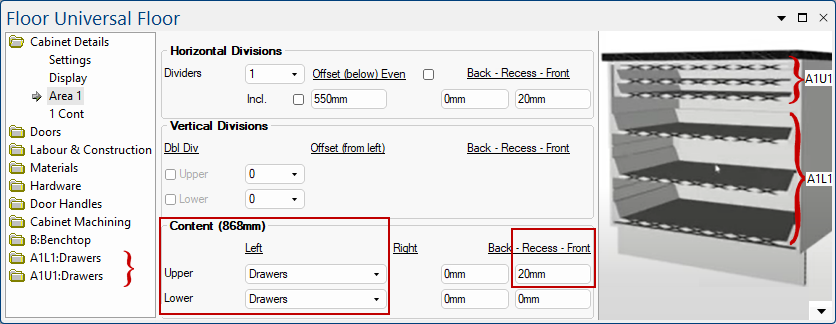
On the Cabinet Details > Area 1 page, add a horizontal Divider and then...
- untick the Even checkbox to allow you to enter an Offset dimension of 550mm;
- then untick the Include check box and add a 20mm Front Recess to the horizontal division.
The division disappears from the preview pane but it still there, it is just not a visible machinable part.

- Now add Content i.e. drawers for the Upper and Lower areas.
- Recess the Front of the Upper Drawers by 20mm

First we will design the top utensil drawer...
- On the A1U1:Drawers > Options page, change the drawers Quantity from 3 to 1.

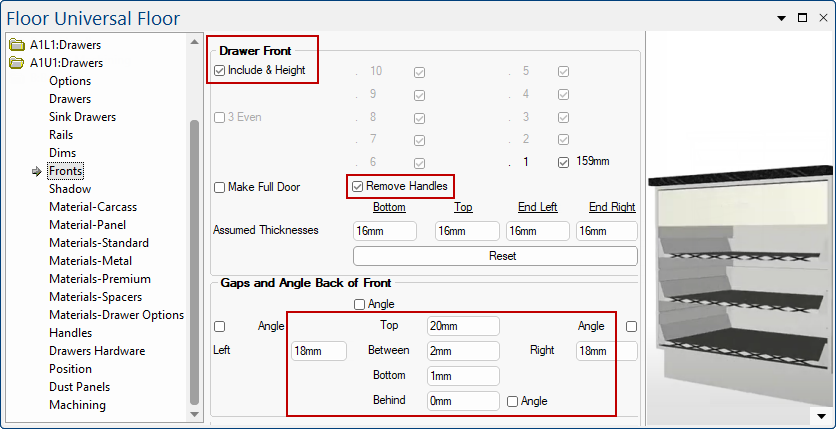
- On the A1U1:Drawers > Fronts page, tick the Include check box. Then Remove Handles and add Gaps, as shown.

Now we will design the lower drawer area...
- On the A1L1:Drawers > Options page, change the drawers Quantity from 3 to 2.
- On the A1L1:Drawers > Fronts page, tick the Include check box.
- As you can see in the preview, There is still a substantial gap leaving the face of the utility drawer exposed.
To fix this, simply adjust the door gap by changing the Top Gap to -145mm.
- As shown, the drawer fronts have adjusted.
- When the drawers are opened, the top area now contains a drawer within a drawer.
To open drawers, go to the Options page of both the Lower and Upper Drawers and use the slide.
Clicking on the Drawers button will open a window to allow independent opening of multiple doors.
Clicking on the % button will shut all drawers in the applicable Area.