Universal Cabinets do not have drawers by default. The drawers content allows you to add up to 10 drawers to the area.
To locate information about any part of the following image,  click on the area of interest.
This includes the options on this page and the pages listed under A1L1:Drawers.
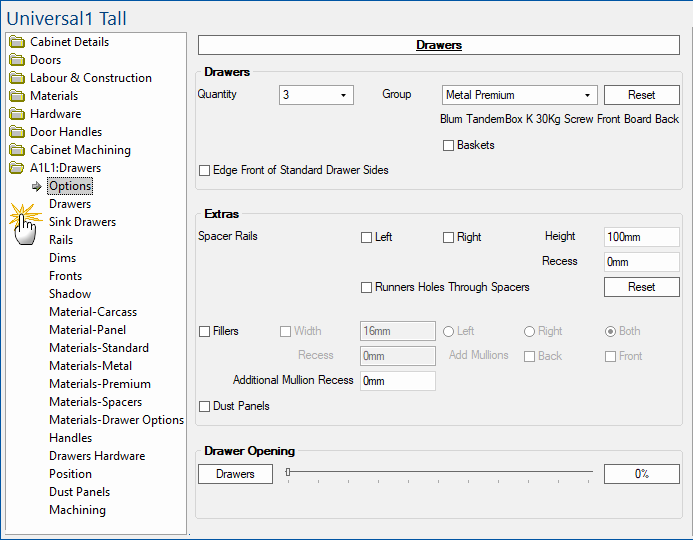
The button named Drawers allows you to access the Local Properties of the currently viewed item, which can be amended.
Drawer Quantity
Sets the number of drawers in the area, up to 10 drawers.
Group
Use the drop list to select the type of drawer runners that are required. You can select one of three Runner Groups ...
- Standard
- Standard Metal (includes Metabox) and
- Premium Metal (inc. )
The default Runner Set is displayed just under the Reset button - in the example above, the Runner Set is Blum-Antaro Inserta
The A1L1 > Drawers page will provide the ability to select a Runner Set item on each drawer.
Baskets
Ticking the checkbox will replace drawers with baskets.
Edge Front of Standard Drawer Sides
This option only applies to Standard drawers and, if check box is enabled, the front of drawer sides will be edged.
Spacer Rails
Same options available on the Cabinet Details > Ends page on a typical drawer cabinet.
If you are adding a drawer behind a door, you can include spacers to offset the runner from the edge. You have the option to drill the runner holes through the space so they line up with the runner holes in the Carcass End to assist in correct assembly.
Fillers
A cabinet filler is a finished wood strip used to close gaps between cabinets, walls, or other cabinets, allowing doors and drawers to open fully and creating a seamless, built-in look by accommodating uneven walls and ensuring proper clearance for hardware. These strips match the cabinet's finish and can be cut to size and scribed to fit non-plumb walls, providing a custom appearance while improving functionality.
Fillers can be adjusted and Recessed. Mullions can be added and an Additional Mullion Recess can be set.

Dust Panels
Enable Dust Panels using check box. The Position and Offset can be adjusted on the Dust Panels page of the same area.
Drawers
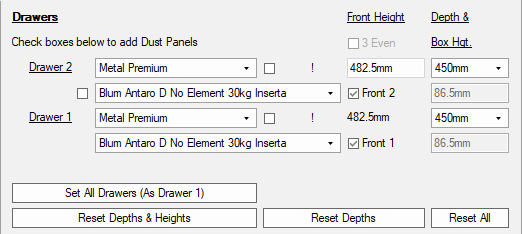
Same as Cabinet Details > Drawers page on a typical drawer cabinet (with the exception that there is no minimum gap override).
The number of drawers available for amendment is set on the Drawers > Options page of the selected area.
Area : Drawers page
Click to Expand
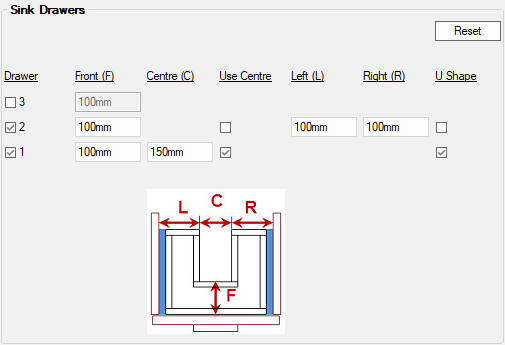
Sink Drawers
Same as Cabinet Details > Sink Drawers page on a typical drawer cabinet.
The number of drawers available for amendment is set on the Drawers > Options page of the selected area.
Area : Sink Drawers page
Click to Expand
Rails
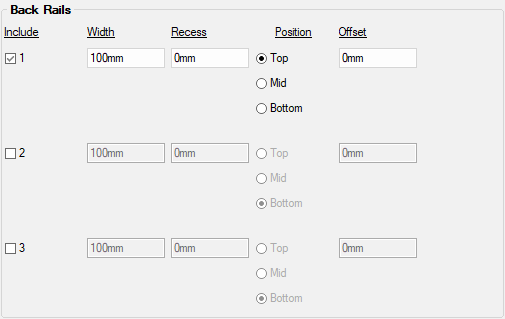
Similar to options set on the Labour & Construction > Back page of a typical cabinet.
Include up to three (3) rails by ticking the check boxes. These will be placed In Front of Back or Behind Back of panel, depending on the defaults set on the Construction Standard > Top/Rail page.
Set the Width and Recess using the edit boxes, as required.
Nominate the Position i.e. Top, Mid or Bottom. An Offset can be applied, if required.
Area : Rails
Click to Expand
Dims
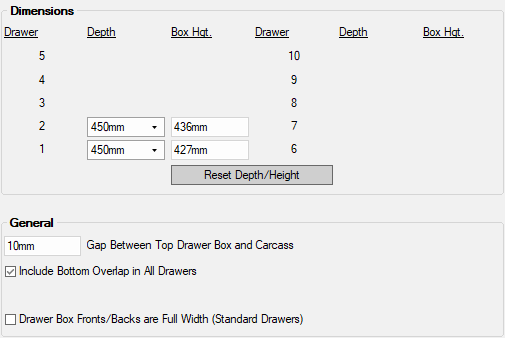
Dimensions of the Depth and Box Height of each drawer in the area. The number of drawers available for amendment is set on the Drawers > Options page of the selected area.
Gap is the distance from the carcass end to the side of the drawer box and, with standard drawers, is the key value for determining the drawer box width.
Drawer Box Fronts/Backs are Full Width option is only available (i.e. not greyed out) if Standard is selected for Group on the Drawers > Options page.
Area : Dims
Click to Expand
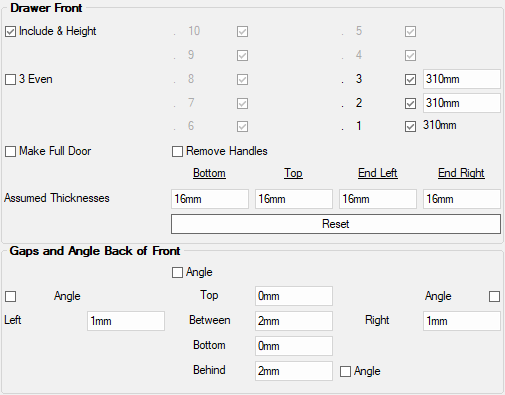
Fronts
Include & Height option allows you to add a Drawer Front and amend the Height, using edit boxes, to each of the drawers.
3 Even is only made available if the number of drawers set on the Drawers > Options is three (3).
Assumed Thicknesses defaults to the thickness of the selected material for Bottom, Top and Ends (see Materials > Carcass page).
Angle options, if enabled, adds machining angle to the corresponding side of the front.
Area : Fronts
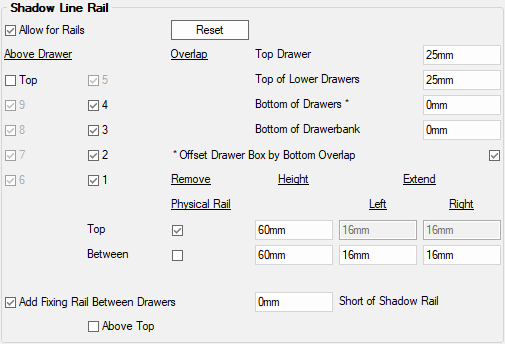
Shadow
Similar to options set on the Labour & Construction > Shadow page on a typical drawer cabinet.
Area : Shadow
Click to Expand
Material-Carcass
Same as Materials > Carcass page on a typical drawer cabinet.
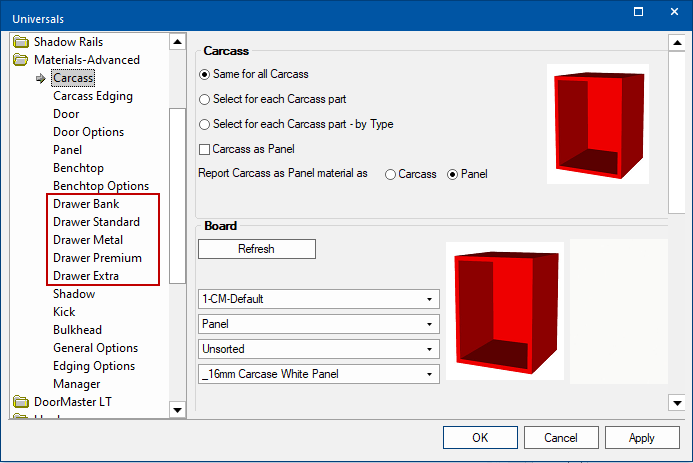
Materials-Advanced category of the / properties allows you to set the defaults for the drawer box material for each part of the drawer, discussed here.
Materials-Advanced defaults
Default material for the carcass, panel material and drawers is set under the relevant page. Selected options are summarised on the General Options page.
Materials-Fronts
Only available if the
Include & Height option is enabled on the
Fronts page.
Same as Materials > Drawer Fronts page on a typical drawer cabinet.
Use Full Door for Drawer Fronts, if enabled, makes the drawers on a single cabinet become a complete door with recut values to break into separate parts. Useful if you want to hold drawers in a block to preserve the pattern of the grain. If enabled, this recutting can be completed with a CNC router bit, or a Panel Saw manually. See also discussion on Drawer Fronts Grained.
Force Full Door as Drawer when Grained, if enabled ensures that even if the above is not enable but the material is specified as grained in Manager, then the drawer fronts will be treated as one 'drawer bank'.
Material-Panel
Same as Materials > Panel page on a typical drawer cabinet.
Materials Standard/Metal/Premium
Same as pages in the Materials category on a typical drawer cabinet i.e. Drawer Standard page, Drawer Metal page and Drawer Premium page. (Defaults are set in the Materials-Advanced category of the / properties - Reset will revert any changes back to the defaults).
The radio buttons allows the selection for materials to be based on Carcass or Panel (materials will be described) or Other makes Material drop lists available for each drawer component.
Area : Runner Group Materials
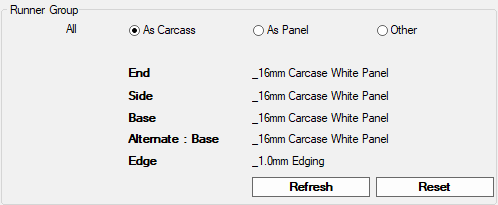
Click to view Material-Advanced settings
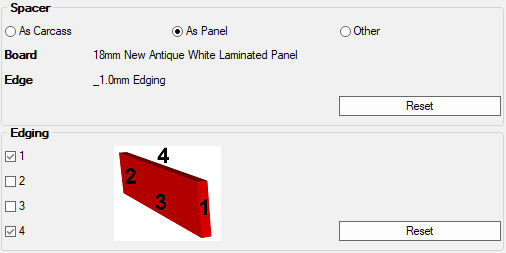
Materials-Spacers
A spacer (or filler) is a strip of wood or panel used in kitchen and bath installations to fill gaps between cabinets and walls, or between cabinets themselves, ensuring doors and drawers can open fully, creating a seamless look, and allowing for adjustments where cabinets do not perfectly fit the space.
The radio buttons allows the selection for materials to be based on Carcass or Panel (materials will be described) or Other makes Material drop lists available for each drawer component. Also allows for selection of Edges.
Area : Spacer Material and Edging
Materials-Drawers Options
Same as Materials > Drawer Options page on a typical drawer cabinet. See also Using Filters.
The Grain (Drawer Sides and Ends) material can be overridden, if required.
Area : Options
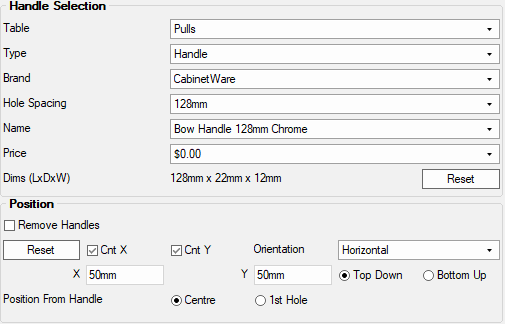
Handles
Same as Drawer Handles category on a typical drawer cabinet.
Area : Handles
Drawers Hardware
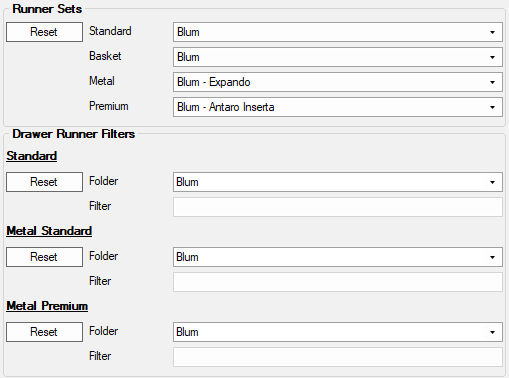
Runner Set selection, same as Hardware > Drawers page on a typical drawer cabinet.
Area : Hardware
Position
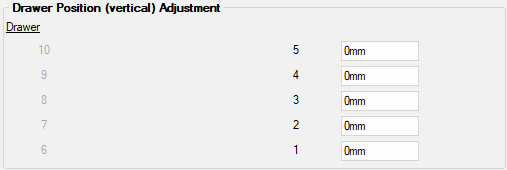
Allows the actual position of the drawer runner holes to be offset by adjusting the vertical position of area drawers. Same as Cabinet Machining > Drw Adj page on a typical drawer cabinet.
Area : Position
Dust Panel
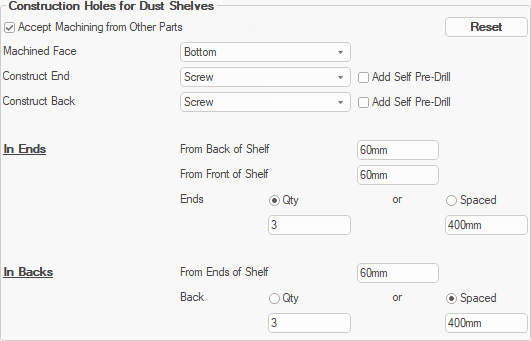
Similar to the Labour & Construction > Dust Panels page on a typical drawer . However, positioning control for the Dust Shelves does not rely on the Standard shelf.
Accept Machining from Other Parts - Within cabinets, the parts that touch each other, donate machining to each other (such as construction holes). This however, is not always desirable and so can be turned on/off using the check box.
for the Machined Face are located on the Mach. General > Face page and the Construct End/Back are set on the Mach. General > Const page. If these settings are changed here, then the Reset button will apply defaults.
In Ends/Back - Dust panel construction hole positioning control is particularly useful when the Dust shelf is used like a rail.
Click to Expand
Machining
View machining for selected parts using the drop list.
Runners Holes Through Spacers allows you to drill the runner holes through the space so they line up with the runner holes in the Carcass End to assist in correct assembly.
For more on Part Editing see F1 Help Topics available in your software. (Relevant topics located under Machining > Machine Editing)
Area : Machining

Click to Expand
 click on the area of interest.

