CM-Cabinets Library User Guide
The Universal cabinets have been designed as highly customisable, versatile options within CabMasterPro. A single Universal cabinet can be used to create something as large as a full-sized wardrobe, or something as small as a standard floor or wall cabinet.
Video  discussions on individual features are available to provide you with everything you need to know to create Universal Cabinets.
See also the topic on the Floor Multi cabinet, which is similar to the customisable Universal Cabinet, but may be easier to use.
For Alternate Dimensions default settings, see Job Setup > Job Defaults page (click on image to view the related cabinet settings).

Click to view Options > General page of a Universal item and Reset option
Materials Datasource for CM-RobeDoors provides default materials to be used for Robe Doors.
Before creating your Universal cabinet in CabMaster Software, it is important to first decide on your desired end result.
A Universal cabinet has the option of up to 4 Main Divisions (of vertical orientation), thereby creating 5 separate Areas inside the cabinet, as shown below.
Within each Area, you can place up to 2 Horizontal Divisions, and up to 3 Vertical Divisions (one in each of the sections Upper, Mid and Lower).
Each section has a code to reference its location, as shown below :-

Divisions and Area - Click to view example of Cabinet Settings
Important note on Divisions
It is also important to note that :-
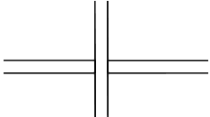
- a Horizontal Division will separate/split Vertical Divisions
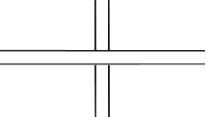
- a Main Division will show as the separation between Horizontal Divisions.
Note on Robe1 and Robe2
Both Robes are available from the CM-Robes library but a copy of Robe2 is available from the CM-Cabinets library.
Robe1 has a 'Split' feature and can have up to 4 vertical divisions but each area can have only 2 horizontal.
Robe2 can only have 1 vertical division but each area can have up to 4 horizontal.
Once you have decided how many Areas you need in your Universal Cabinet and what you would like to place in each Area, you can start to create the cabinet, and adjusting the sizes and applying content to each Area.

Area settings for the Floor Multi use radio buttons to select the configuration of each required cabinet area.
To resized each Area manually, untick the Even checkbox on the Cabinet Details > Settings page and set the Width for each Area, as shown.

Cabinet Details > Settings page - Click to Expand
Inside each Area (the areas separated by the Main Divisions), the Horizontal and Vertical divisions can also be positioned to set the widths and heights of each Area.
Example
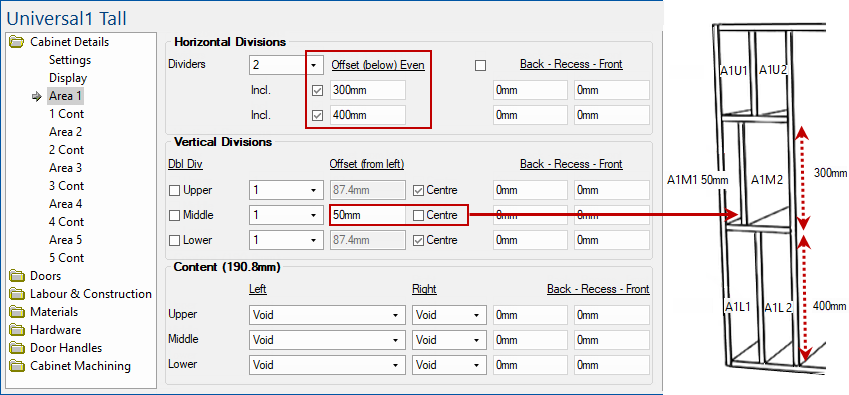
As shown in the image below,
- the Vertical Division has moved so that A1M1 (Area1 Middle1) will have a width of 50mm, and the remaining space will be for A1M2 (Area1 Middle2).
- the height of A1M1 and A1M2 will be 300mm above the lower section and;
- the height of A1L1 and A1L2 (Area1 Lower1 & Lower2) will be 400mm;
- the remaining height will be positioned in A1U1 and A1U2 (Area1 Upper1 & Upper2).
This page allows you to customise the colour of the cabinet parts when viewed in 3D, excluding Textured mode.
To change, simply press the corresponding part button. A Display Colours Property Sheet will allow you to select both the colour and the fill.


Right (+ve) / Left (-ve) : Moves the cabinet label left or right. A positive number will move it right and a negative number will move it left.
Back (+ve) / Forward (-ve) : Moves the cabinet label backward or forward. A positive number will move it backward and a negative number will move it forward.
Display Cabinet Height : Shows the cabinet height on plan if enabled.
The matching Show Cabinet Heights option must be turned on in the Display > Options page of the Drawing Properties as well.
In each Area, you can put different Content, click image to view. There is the choice of :-

Click to view Area page
The presence of doors are controlled on the Doors > Div Doors page by using the Include checkbox.

Doors > Div Doors page - Click to Expand
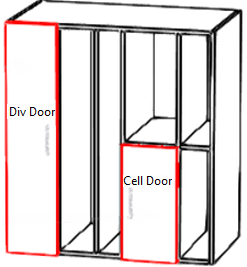
Div Doors versus Cell Doors
The difference is that a Division Door can only attach to a Main Division, End Left and End Right, but Cell Doors can attach to any part of the cabinet.
For doors to be present, turn on the 'Include' option on the Doors > Div Doors page.
The properties for individual Division Doors are accessed on the Doors > Div Doors page by pressing the Edit button alongside the name of the door which you want to modify.
The Door Properties dialog allows you to amend the settings for Hinge positions, Extend To and Additional Door Gaps.

Doors > Div Doors page - Click to view Door Properties
For doors to be present, turn on the 'Include' option on the Doors > Cell Doors page.
The properties for Cell Doors can be adjusted by clicking the button with the name of the door that you want to modify.
The Door Properties dialog allows you to amend the settings for Hinge positions and Additional Door Gaps.

Doors > Cell Doors page - Click to view Door Properties
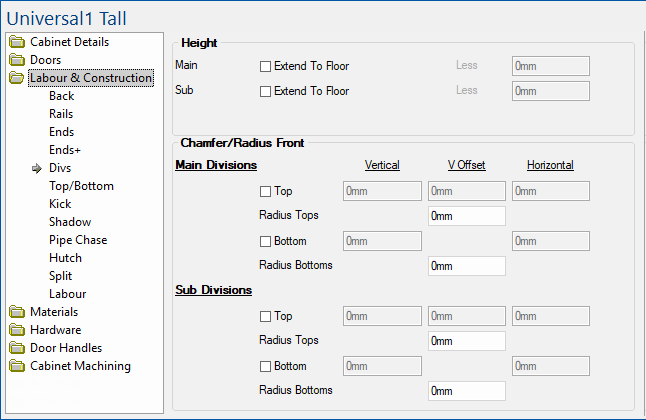
By default, Universal Cabinets have a Top/Bottom, End Left, End Right, Top Rail and Bottom Rail present.
The presence of these cabinet parts is controlled under the Labour & Construction category. From these pages you can also adjust the positioning, sizes, extensions and recesses of individual cabinet parts.
Context Help is the best way to find discussions on any cabinet page.
Context Help
is not available for every cabinet page but the sections on Cabinet Design and Cabinet Properties > Labour & Construction may include topics of interest.
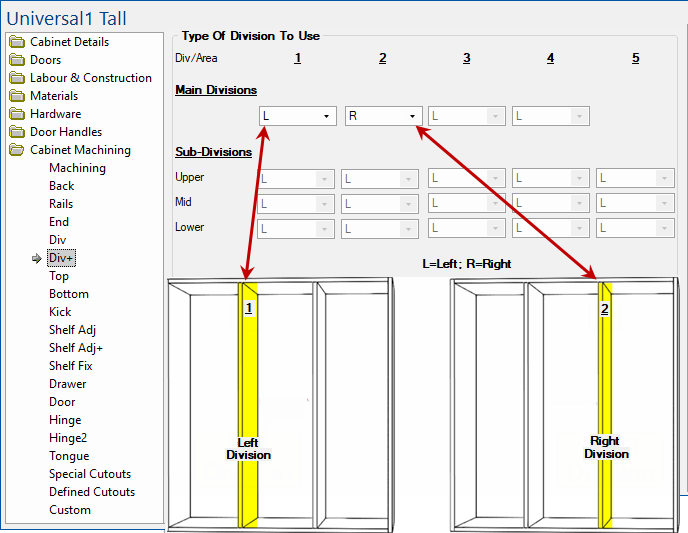
On the page Cabinet Machining > Div+ page, there are the options to specify what type of division it is.
Example of Div+ page
As shown in the diagram below, Main Division 1 has been selected as a Left-hand Division and will have machining applied to the right side, and Main Division 2 has been selected as a Right-hand Division and will have machining applied to the left side.
Sloped cabinets are only available in the Universal1 cabinet. The Sloped check box can be enabled on the Cabinet Details > Settings page.
Example
Looking at the colour references below, you can see how each value entered affects the size and shape of the sloped cabinet.
Universal cabinets allow you to import a set of parts into the CabinetCutout by selecting one of the 5 options from the drop list on the CabinetCutout:Position > Parts page, as shown below. This page and the corresponding categories can only be accessed if the Enable Cabinet Cutout option is turned on, located in Cabinet Machining > Defined Cutouts page. In the following example...
The CabinetCutout Content available (shown below right) will be similar to the Area Content (shown below left).

Click to view example
If you wish to Filter by SubType then you may need to change this in the Library Catalog Manager, if the SubType is incorrect (e.g. Standard), blank or you want a custom filter.
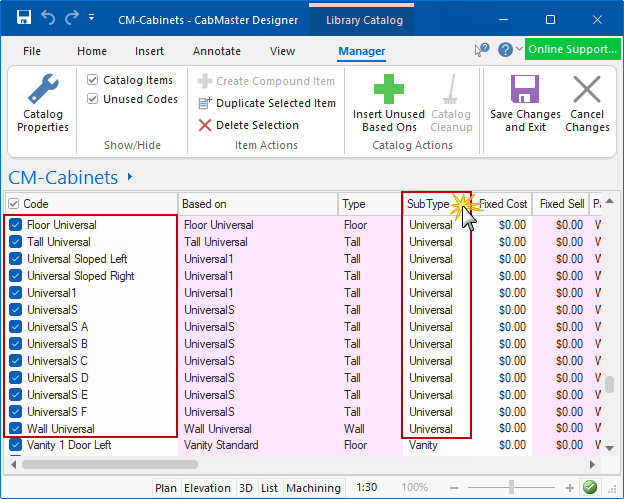
Click to view example of a blank SubType and the result when using the Cabinet Selection Filter