CM-Cabinets Library User Guide
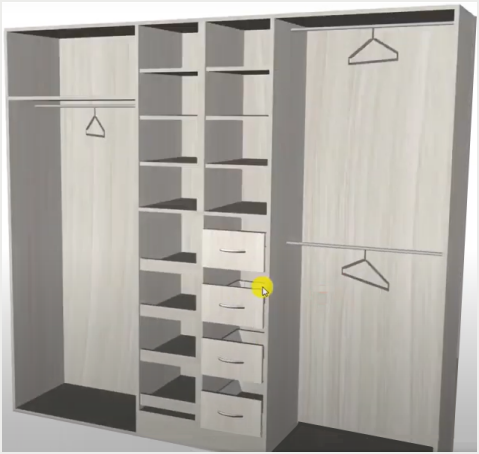
A Universal cabinet can be used to create a full-sized wardrobe (closet) with customisable sections.
 Watch the video to see how quickly and easily that the wardrobe shown above can be created. See also Understanding Universal Cabinets.
The following will discuss the steps taken using the Robe1 cabinet from the CM-Robes library, which is similar to the one used in the video.
Robe1 has a 'Split' feature and can have up to 4 vertical divisions but each area can have only 2 horizontal.
Robe2 can only have 1 vertical division but each area can have up to 4 horizontal. [Available also from CM-Cabinets library]
Alternate Dimensions defaults can be set on the Job Setup > Job Defaults page.

Universals in CM-Robes and CM-Cabinets libraries
Alternate Dimensions for the following Universals are applied by the default on the Job Setup > Job Defaults page.
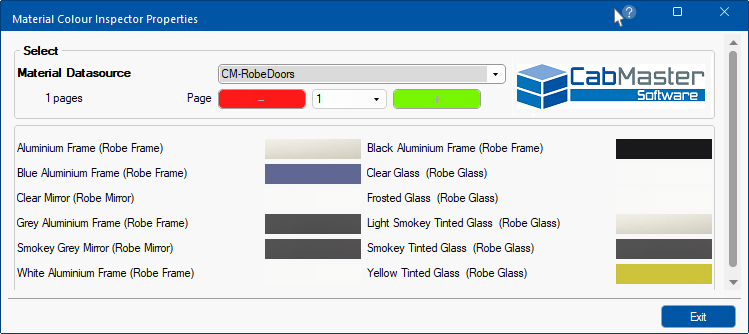
Material Datasource : CM-RobeDoors DataSource sample materials are also available from the CM-Default DataSource. This allows for the option of using the CM-RobeDoors and/or adding new materials to your CM-Defaults (Materials.qlt) - see topic on Material Datasource and ensure that the required materials to be used for Robe Doors are enabled.
The Materials Inspector can be used to view the available default materials for CM-RobeDoors
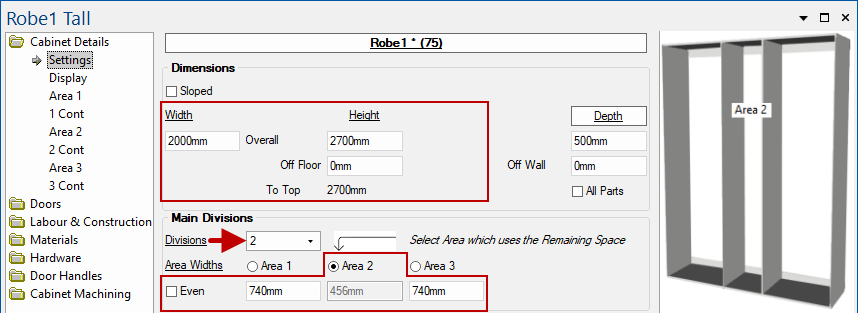
Before you begin, you need to select the number of divisions you want your wardrobe to have on the Cabinet Details > Settings page. In this example...
These divisions are referred to as Area 1, Area 2, etc. and additional options allowing you to set the Area Widths are made available. In this example, uncheck the Even checkbox to allow manual entry of widths. Then use the radio button to select Area 2 which allows you to set the width of Area 1 and Area 3 manually (740mm each) and tells CabMaster to automatically calculate the Remaining Space for Area 2.
Click to Expand
To configure each area select the applicable Area pages.
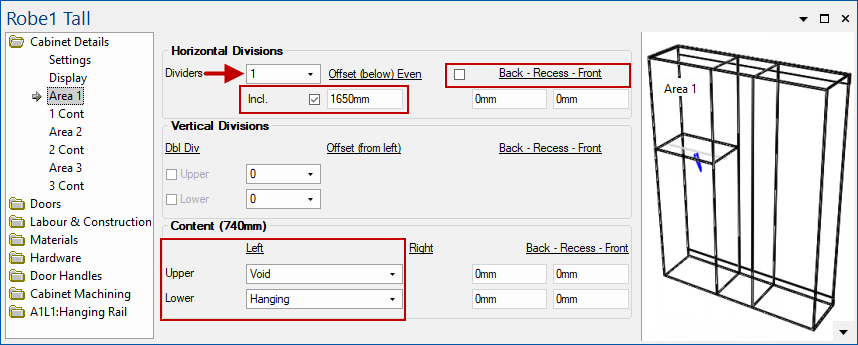
Create a Horizontal Division by selecting 1 Divider and change other settings as shown for this example.
We now have an Upper and Lower area where we can designate Content. In this example we will leave the Upper Void and make the Lower content as Hanging.
An Advanced Object can be created/customised for use. It has a dual purpose i.e. it can contain a 3D model of any object and deliver the machining to fit the object, if required.
Example of Advanced Object
After selecting the Content on the Area page, shown above, the Accessory is selected on the Object > General page, shown below.
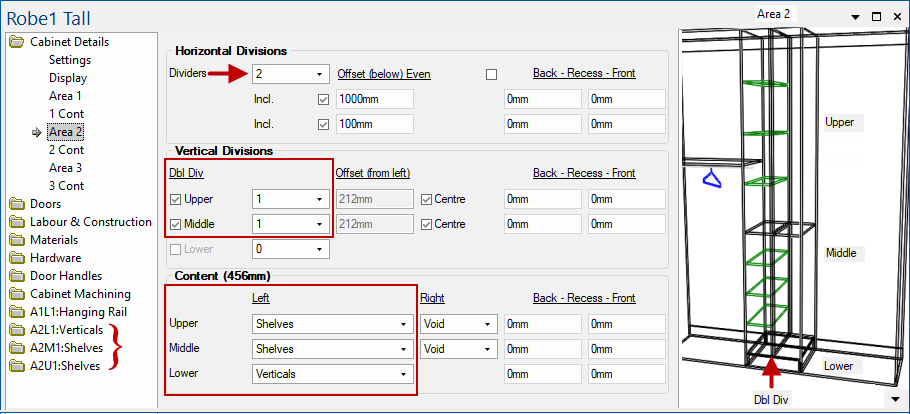
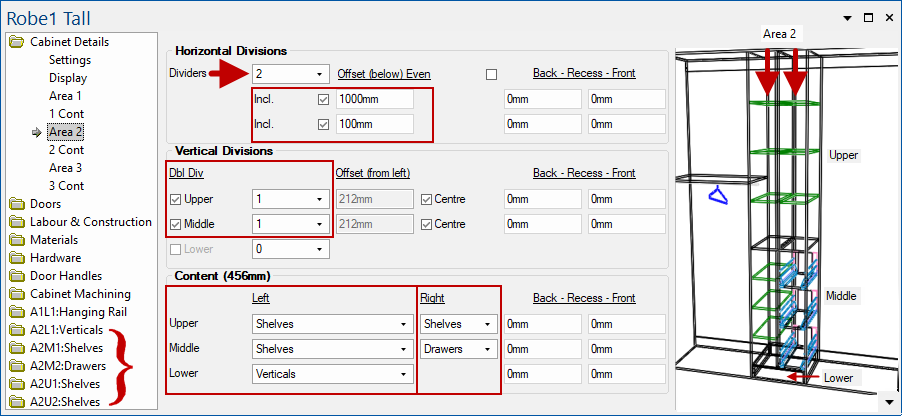
We will create a Horizontal Division by selecting 2 Dividers (change other settings as shown) and ...
- Vertical Divisions for the Upper and Middle area by selecting 1 Divider for each as shown from the drop list.
- If you require Double Divisions tick the 'Use' checkboxes as shown.
- Content for the Left and Right divisions can now be selected
- Left : Upper = Shelves, Middle = Shelves and Lower = Verticals
Example : Left
Note that extra categories are provided i.e. A2U1:Shelves; A2M1:Shelves and A2L1:Verticals which allow further control options. For example, you can see that three (3) shelves have been added by default in Upper and Middle but later we will change this to four (4) shelves.
- Right : Upper = Shelves and Middle = Drawers
Click to Expand
In this area we will just make the Content as Dbl Hanging.
Example
Now we can open the extra categories provided and make further changes i.e. A2U1:Shelves; A2M1:Shelves and A2L1:Verticals.
Make changes as per the images below.
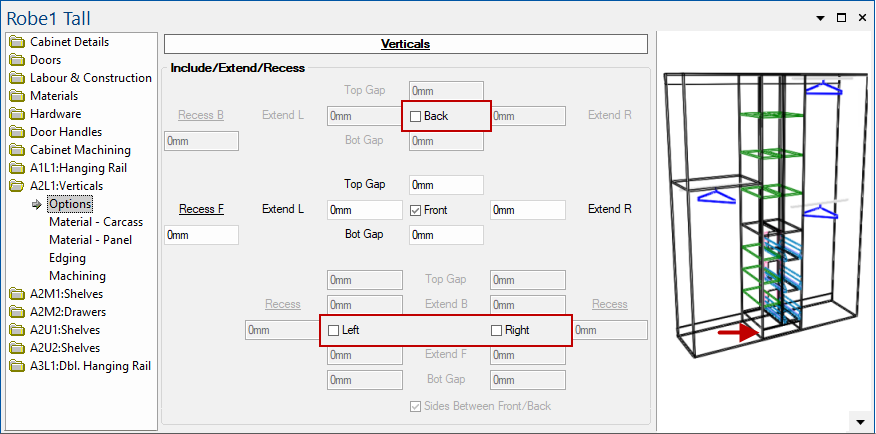
A2L1:Verticals
For more details on Verticals and the related pages, see topic under Universal Cabinets.
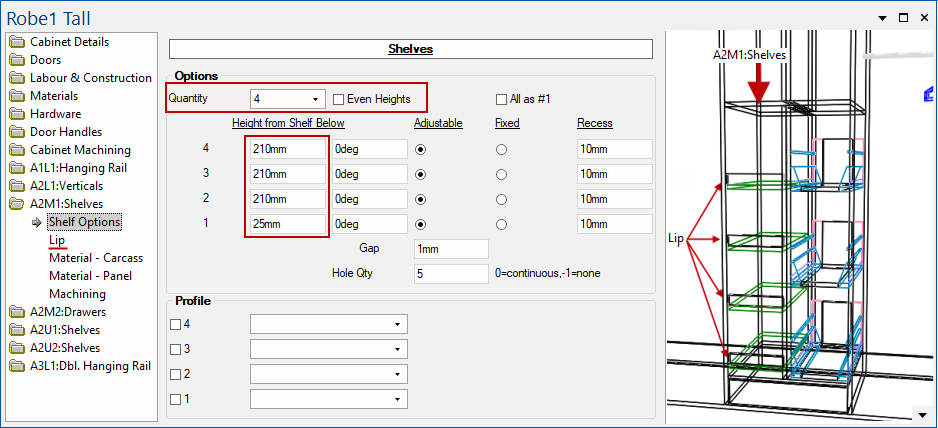
A2M1:Shelves
Here we have changed the default Quantity of shelves from 3 to 4 and untick the Even Heights check box to allow manual entry of Height from Shelf Below.
Also add a Lip to the front of shelves on the Lip page (click on image to view).
For more details on Shelves and the related pages, see topic under Universal Cabinets.
Click to view Lip page
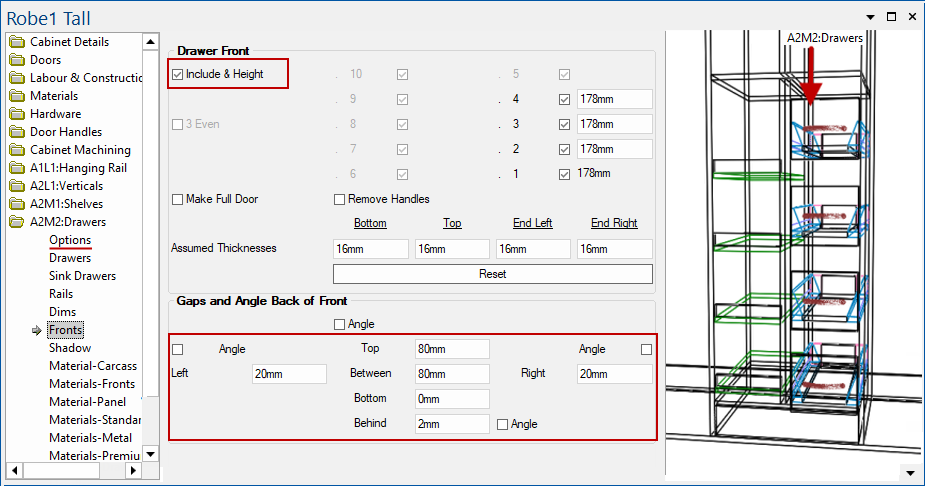
A2M2:Drawers
On the Options page change the default Quantity of drawers from 3 to 4 (click on image to view) and set options on the Fronts page as shown.
For more details on Drawers and the related pages, see topic under Universal Cabinets.
Click to view Options page
This video shows how quickly and easily that the wardrobe discussed above can be created. [2:55 mins]