Material DataSource Creation
In This Topic
uses a default set of materials [CM-Default] that can be customised to the user’s preference. There are, however, times when new material manufacturers will appear, and you might want them stored in a separate database.
These can be enabled on the My Setup > Material DataSources page and managed using the Materials Manager.
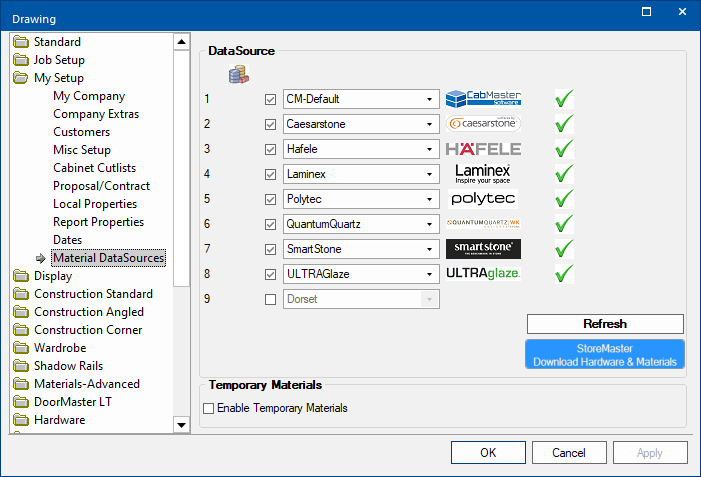
My Setup > Material DataSources page
See topic under My Setup for details.
Click to view related list on Materials-Advanced > Manager page
Create a New DataSource
In this topic we will discuss the step by step process of setting up a new source of material from another manufacturer.
Advanced Topic - This process will require some Microsoft Excel skills and other processes that may require help from our .
A 'Blank' sample file can be downloaded and used in Step 2 instead of a full Materials.qlt file. It is a working sample that you can copy and rename as required.
Step 1: File Location
The location of tables for your CabMaster Software version can be found by using the menu File > Options [or use keyboard shortcut F10 key].
Copy the path stated in the Options > File Locations page for the Lookup Tables.
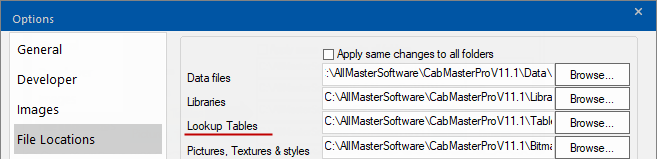
Select path to Tables folder and copy to enable you to paste into Windows File Explorer
In Windows File Explorer [ +E] paste the Table folder location into the address bar and press enter.
Step 2: Create Table and Logo Files
There are two (2) files that will need to be created or duplicated from an existing working sample.
These are located in the Table folder and the other is located in the Table\Materials folder.
Then we will save a JPG file of manufacturer's logo.
A 'Blank' sample file can be downloaded here and used instead of a full Materials.qlt file for the next step. Copy into Table folder and rename as per the instructions below.
For the purpose of this topic we will create a new source of material from Formica using Windows File Explorer.
Table folder
In this example, we will take the Materials.qlt located in the Table folder and create a duplicate:-
- use the Context menu (right click on file name) and select Copy and then Paste
- this will create a file called Materials - Copy.qlt
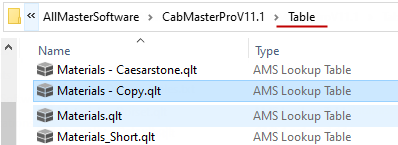
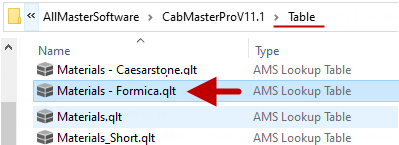
Then rename it to Materials - Formica.qlt as shown...
Table\Materials folder
Then create a duplicate of the Material DataSource file CM-Default.qlt located in the Table\Materials folder and create a duplicate :-
- use the Context menu (right click on file name) and select Copy and then Paste
- this will create a file called CM-Default - Copy.qlt
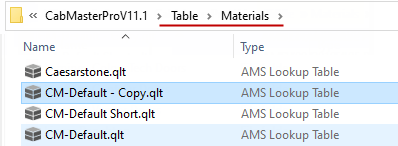
Then rename it to Formica.qlt as shown...
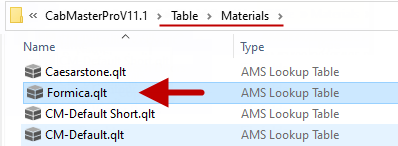
This will be the name that is displayed in the Drawing Properties as the material source.
JPG File of Logo
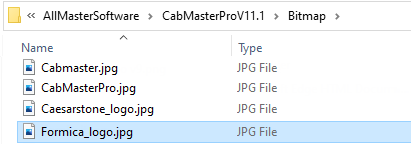
We will now save a copy of JPG file of a manufacturing brand logo that you have from manufacturer.
You will need to locate where images need to be placed using the menu File > Options [or F10 key].
- On the Options > File Locations page copy the path stated for 'Pictures, Textures & styles’
- Paste the Bitmap folder location into the address bar and press enter.
Save the JPG file of logo in the Bitmap folder and name appropriately, as shown....
Step 3: Edit New DataSource File
In the new Data Source file ...\Table\Materials\Formica.qlt we created there a couple fields that need to be altered. To do this double click on the QLT file to open using CabMasters TableEditor.
First we will change the Image and Source File names, located at the top of the table.
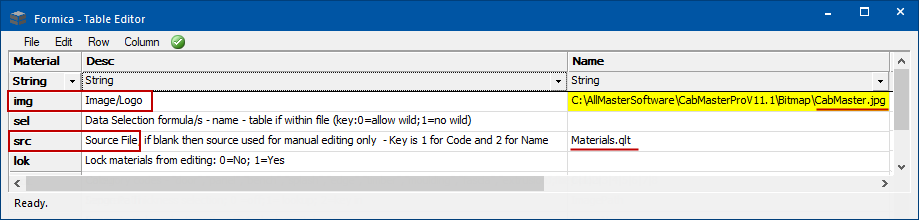
Formica.qlt Image and Source File names BEFORE changes
| Row |
Details to change in Name column |
| img |
Edit the image file name to reflect the new jpg created.
In this example, change "...\CabMaster.jpg" to "...\Formica_logo.jpg" |
| scr |
Change the DataSource to reflect new QLT created.
In this example, change "Material.qlt" to "Materials - Formica.qlt" |
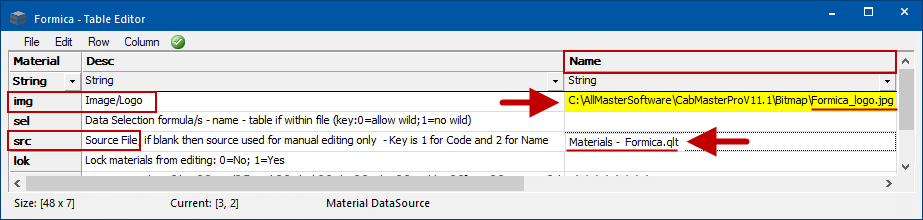
Formica.qlt Image and Source File names AFTER changes
Keep in mind that your newly created qlt file may be a little different but same instructions apply.
Now we will change the EditPost row, located at the end of the table.
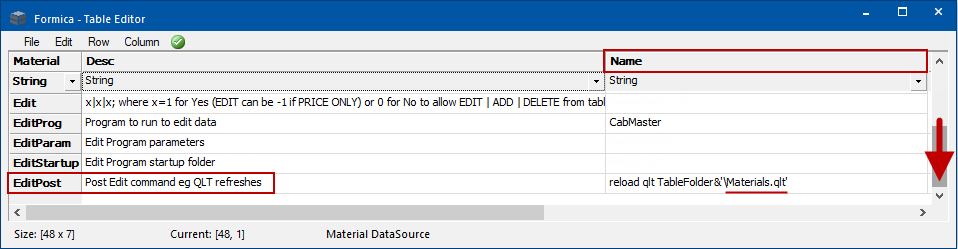
Formica.qlt EditPost BEFORE changes
| Row |
Details to change in Name column |
| EditPost |
Change the DataSource to reflect new QLT created.
In this example, change "Material.qlt" to "Materials - Formica.qlt" |
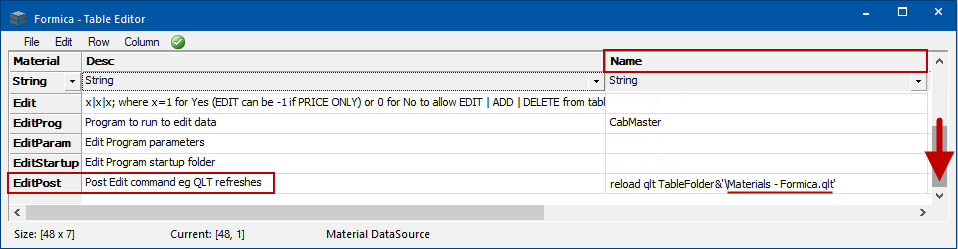
Formica.qlt EditPost AFTER changes
Step 4: Table Cleanup
We need to clean up the copied Table and making it ready for the new materials to be written in.
At this stage it is recommended opening the "Materials - Formica.qlt" with Microsoft Excel.
Open Microsoft Excel with either ...
- a blank workbook, then drag the "Materials - Formica.qlt" into the open workbook
- or right click on the QLT file and select Open With and choose Microsoft Excel if it is in the list
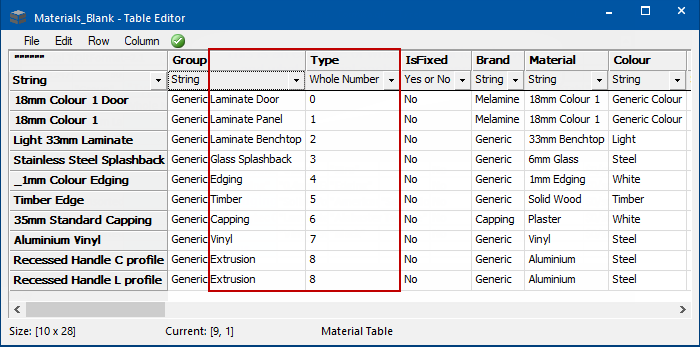
Format Required
The image is an example of what we want to achieve i.e. delete unwanted rows/materials leaving only one material of the each type:-
Using Excel
To achieve the above you will need to sort, filter and delete unwanted rows. The following will explain how with pictorial references.
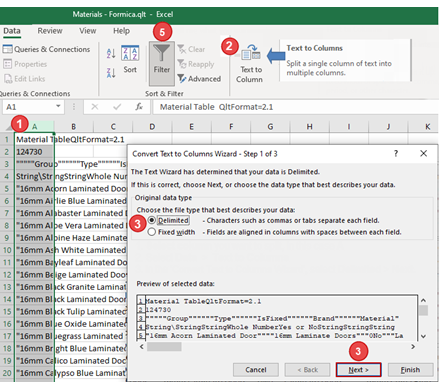
- Select Column A as all data on opening with excel has been placed in a single column.
- On the Data tab, click on Text to Column which will split this single column into multiple columns.
- In the 'Convert Text to Columns Wizard', select Delimited (radio button) and then click Next
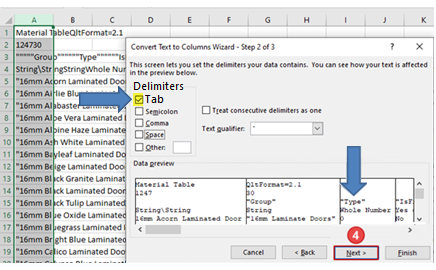
- Select Tab delimiter and then click Next
- Now use the Filter on the Data tab (refer Step 3 image) and repeat until you have only one of each material type...
- select one type at a time (shown type 0 selected)
- select all but one row of required material and delete

- When you have completed step 5 you should have an excel spreadsheet that looks like the one illustrated at the beginning of this discussion on Table Cleanup.
- Save your changes and Close.
Note that this does not save this table in excel format, so ignore any warnings concerning this.
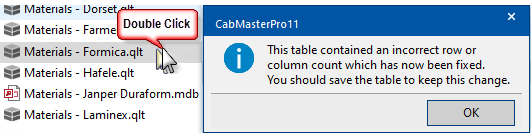
- Now double click on your new 'Materials - Formica.qlt' and run with TableEditor.
Resave so that it can correctly recount the rows in the table.
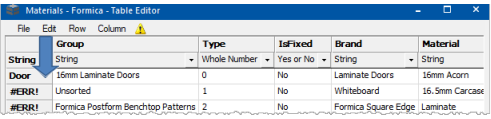
- You may notice that the row headings show #ERR! but these can be overtyped e.g. 1st row in illustration has been changed to "Door"
Step 5: Activate New DataSouce in CabMaster
In CabMaster, activate your newly created DataSource in the Drawing properties on the following pages:-
My Setup > Material DataSources page
Select the relevant DataSource which in this example is Formica from the drop list and tick the checkbox to enable.
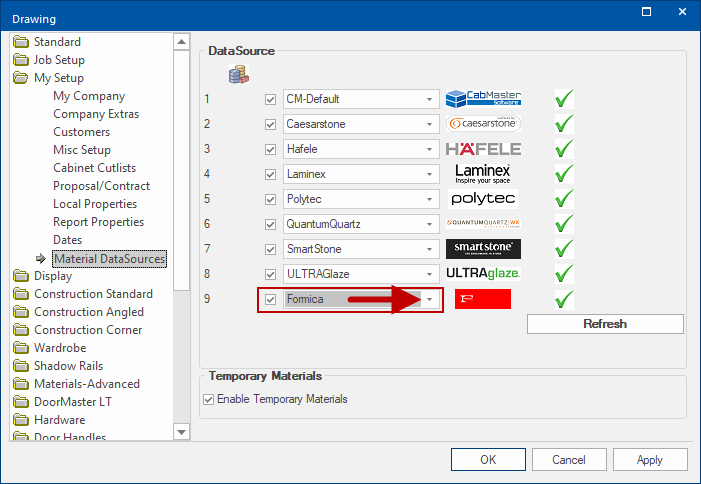
Click to view error message if creation of DataSource not correct
If the process has been completed successfully, there will be a green tick

but if not then you will be presented with a red cross

with a message - click image to view.
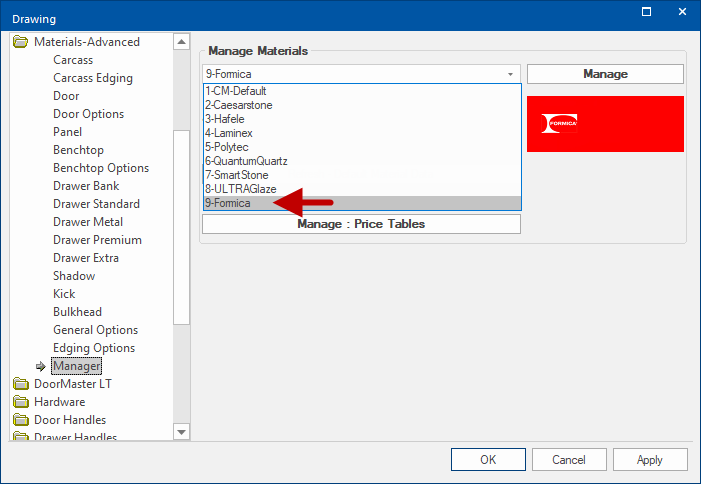
Materials-Advanced > Manager page
Select the relevant DataSource, which in this example is Formica from the drop list.
You can click the Manage button to create, modify or delete materials from this data source.
See Also