CM-Cabinets Library User Guide
This topic will discuss how to setup definitions for LED rebates and how to apply these for cabinet machining purposes.
 Watch the Video on how to use custom tables to create Led Strip Rebates.
On the My Setup > Local Properties page in the Catalog/Drawing properties :-
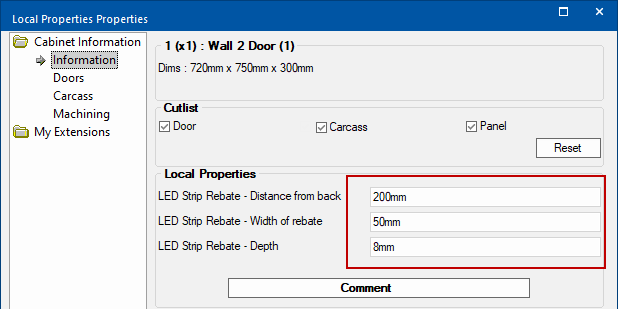
On the Job Setup > Local Properties page in the Catalog/Drawing properties enter the :-
Select the cabinet that you want to apply the rebate to. Then on the Cabinet Machining > Custom page :-
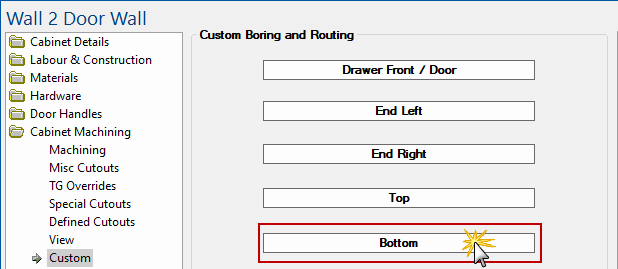
Click to Expand
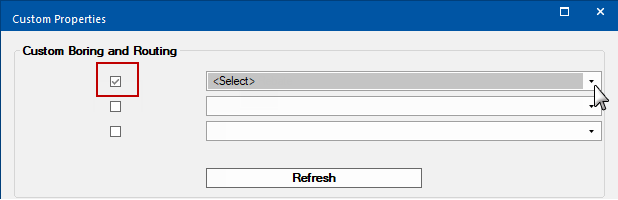
When you click on the Bottom button, the Custom Properties dialog will be presented.
Cabinet Machining > Custom properties - Click to Expand

Cabinet Machining > Custom properties - Click to Expand
Custom tables are located in <your CabMaster folder>\Table\Machining\Custom folder and, as the drop list above shows, there are a number of LED Strip tables that can be applied. Contact Customer Support if you need further help with these.
Result
If you have multiple cabinets and are applying a rebate with settings that are different to the default settings you entered in Drawing Properties, you can adjust the rebate for each individual cabinet using the additional steps discussed here.
Select the cabinet that you want to adjust the rebate on.
Then on the Cabinet Details > General Settings page, press the Cabinet Information button
On the Cabinet Information > Information page, adjust the x1, x2 and x3 options as required.