CM-Cabinets Library User Guide
Local Properties of the currently viewed cabinet can be accessed on the Cabinet Details > General Settings page and can be amended to reflect the requirements of the cabinet.
 Watch the Video A Minute With Mike : Secrets of the Cabinet Information/Name button to see how easy it is!
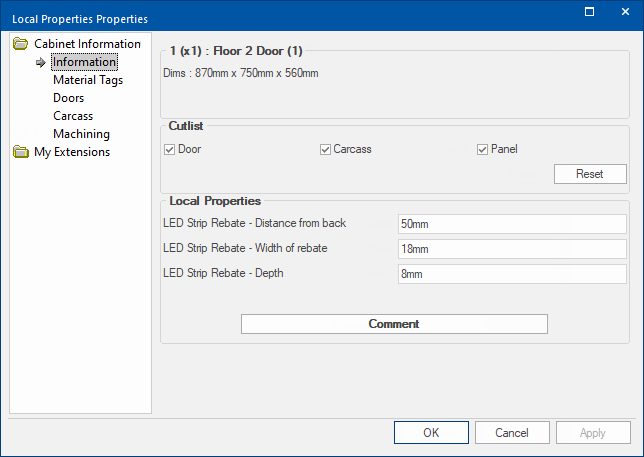
 All pages pertaining to the Cabinet Information category restate the Height x Width x Depth dimensions.
If you enable the check boxes for Door and/or Carcass, then extra pages will be added to the Cabinet Information category.
On these extra pages, machining sizes are provided. The left side measurement is the finished size and the right side, in brackets, is the size with edging. This an ideal area to check if there is ever a part that seems to be coming out incorrectly in CabMaster or EzyNest.
Desc in Library Catalog Manager
The cabinet Description can be customised in the Library Catalog Manager to change...
- the cabinet label (if F9 Options is Desc), after placement on the plan;
and- the cabinet tooltip description, displayed in the Palette/Gallery.
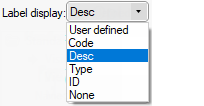
F9 Options - Desc must be selected
Open the Library Catalog Manager from the View tab and...
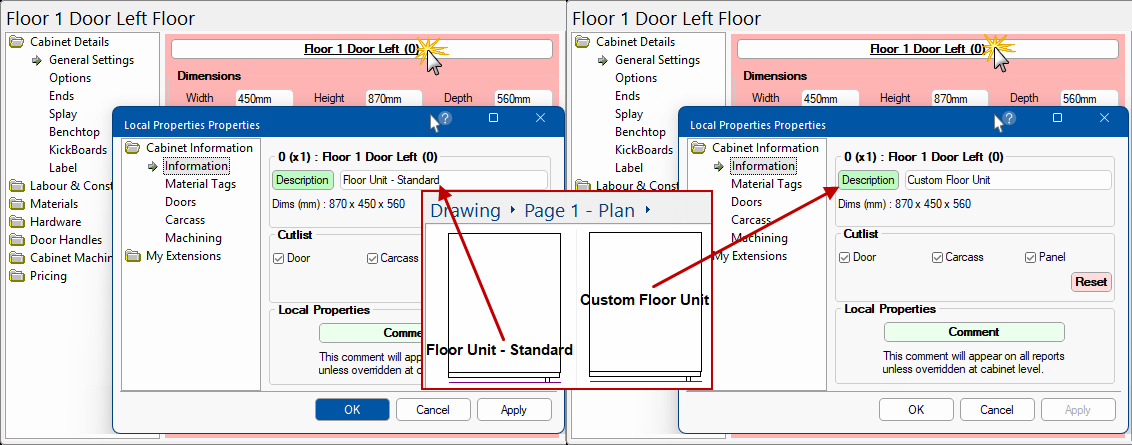
- double click on the cabinet code e.g. Floor 1 Door Left - this opens the Property Inspector displayed with a pink background.
- select the Cabinet Details > General Settings page;
- then click on the Customer Information button, shown.
- on the Cabinet Information > Information page, type the Description changes;
- either directly into the edit box or by clicking on the button.
- close the Local Properties using the OK button;
- click on the Save Changes and Exit of the Library Catalog Manager.
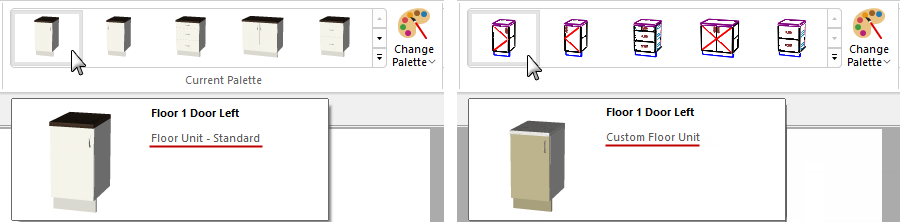
As per the following example, we have changed the description from the default Floor Unit - Standard to Custom Floor Unit.
- This change is reflected on the drawing page for cabinet placed after changes made (as shown).
- This change is also reflected on the tooltip available in the Palette/Gallery
.
See also the tutorial on Cabinet Label DisplayCutlist
Cutlist reporting defaults can be overridden by ticking the checkboxes for Door, Carcass and/or Panel.
The Reset
button will restore the settings back to the defaults on the My Setup > Cabinet Cutlists page.
Reverse dimensioning can also be set on the My Setup > Cabinet Cutlists page.Local Properties
Custom Local Properties such as LED Strip Rebate and the measurement defaults are displayed and can be overridden using Edit boxes.
The Definition of these properties can be customised on the My Setup > Local Properties page.
The defaults pertaining to each definition can be customised on the Job Setup > Local Properties page.
Comment / Part Notes
The Comment button opens a text box which allows you to make Part Notes that will be printed if enabled for the relevant report.
The Cabinet Notes and Part Notes checkboxes are available for the Board, Doors/Drws, Hardware and/or Quantities reports.
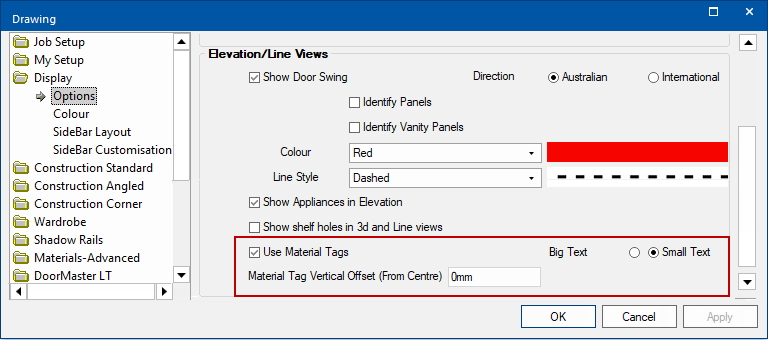
This page is only made available if the Use Material Tags option is enabled in the Drawing Properties on the Display > Options page.
As shown in the image below, this option allows tags to appear over the Doors and Drawers of the cabinets in the Elevation View.
Example of use on an elevation
In this example a different Material tag has been set in the Drawing properties for each of the Types (Floor, Wall, Tall) - click on image.
Notice that the Drawer Material Tag is set to be the same as the Floor Material Tag.

Click to view default Tag descriptions set on the Materials-Advanced > Door page
This is a two step process in the Drawing Properties to make this available i.e. :-
- On the Display > Options page, turn ON Use Material Tags.
- The default text size and vertical offset can be set here as well.
Example: Display > Options
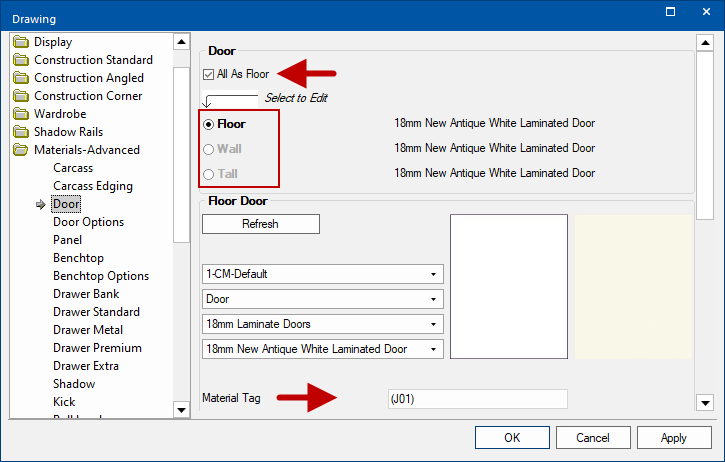
- Then on the Materials-Advanced > Door page enter the default Material Tag description.
- If you need to have a different Material tag for each of the Types (Floor, Wall, Tall) then turn OFF All As Floor here.
Example: Materials-Advanced > Door
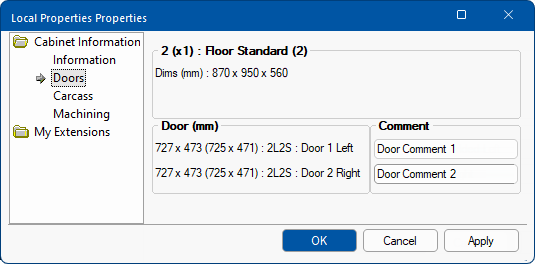
This page provides more detailed information on the door parts i.e. the door cut list, with sizes and edging details.
The left side measurement is the finished size and the right side, in brackets, is the size with edging.
Edging Codes determines the type of edge labelling that will be used on the reports. See My Setup > Misc Setup page
- TBLR = top, bottom, left, right
- 2L2S = two long, two short
The Comments will be printed if the Part Notes checkboxes are enabled on the applicable Board or Door Report page.
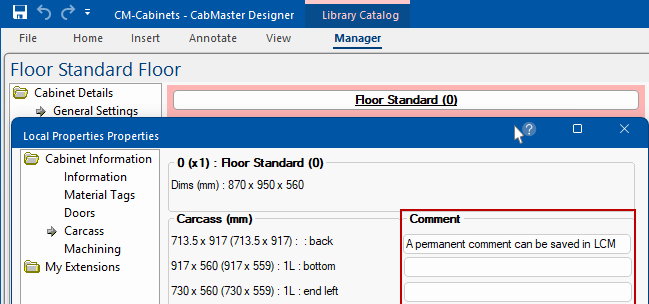
A permanent comment can be entered in Library Catalog Manager as well as the cabinet once place on drawing.
A Quick Access view of this page can be setup using the Properties Sidebar.
This page provides allows you to see a preview of the part sizes in the cabinet and add comments for reporting purposes.
The left side measurement is the finished size and the right side, in brackets, is the size with edging.

Information relating to carcass - Click to Expand
The Comments will be printed if the Part Notes checkboxes are enabled on the applicable Board or Door Report page.
A Quick Access view of this page can be setup using the Properties Sidebar.
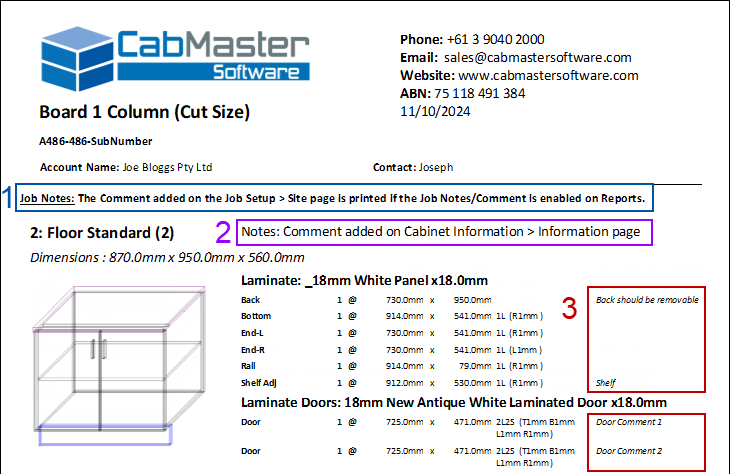
Example of Comments on Report
Click on image to view Drawing Property Report options that need to be enabled to print Notes/Comments.
- Job Notes will be printed if there is a Comment entered on the Job Setup > Site page of the Drawing Properties.
- Cabinet Notes will be printed if there is a Comment added on the Cabinet Information > Information page (discussed above) or the Cabinet Details > General Settings page. .
- Part Notes will be displayed on the Cutlist report if there are Comments added. They are not displayed on the Properties Sidebar.
Click to view Part Notes checkboxes which must be enabled to print on applicable Reports
This page provides more detailed information on the machining. Sample 1 = Vents

Click to view Special Tables (Vents) added to cabinet
System Tables
These are 'custom machining tables' that can be defined for the entire drawing (as opposed to the normal custom tables that are selected by part of each cabinet).
The System Tables for the drawing are selected on the Mach.Parts > System Tables page of the Catalog/Drawing Properties.
The Reset buttons can be used to revert back to the Drawing properties.
Enable
System Tables can be turned on/off at cabinet level through the cabinet information page using the enable checkbox options.
On the example above the Dor 1 has been enabled and System Tables Sample 1 has been selected from the drop list, which has been set up to apply vents. Click on the above image to view example.
Centred Labels
By using the Centre check box in conjunction with the Part drop list, you can override the label position set on the Mach.Auto Label > Settings page of the Drawing Properties - follow link for complete details and examples.
To provide customers with extra reporting flexibility, our CabMaster Support Team can set up export tables to extract and manipulate specific data for reporting. For example, If the Supplier Reporting is enabled in My Setup > Report Properties then an extra Supplier page is added in the Local Properties of the cabinet. Whether these properties are greyed out or not is dependent on the background configuration.
One use of this is to provide information for ordering from suppliers. An example is where this is used with the CM-Farmers library for ordering purposes of specific items, as shown below.

Click to Expand
The My Extensions > Plug-Ins page can be accessed at Drawing level and/or at Cabinet level. A Plugin is an external control that integrates with the CabMasterPro™ interface with which the user can interact with.
A Minute With Mike : Secrets of the Cabinet Information/Name button. [1:55 mins]