This options allows you to add/create an empty table which can be manually populated.
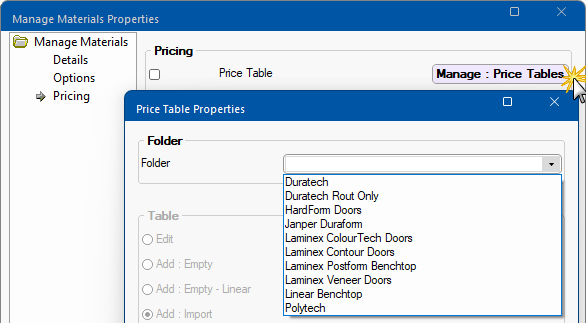
Step 1 : Table Folder
First you need to select the folder from the drop list or type in the name of a new folder.
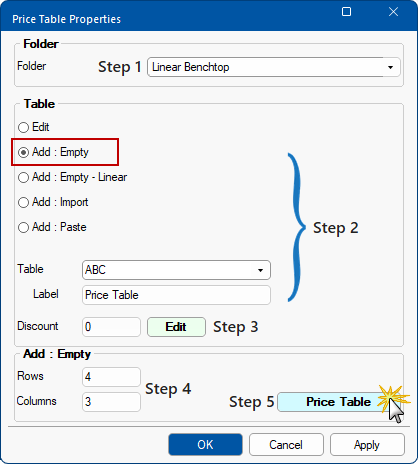
Step 2 : Table Name
Using the radio button, select Add : Empty option. Type in the name of a new Table.
Enter the Table name along with a Label, which is a Table Comment.
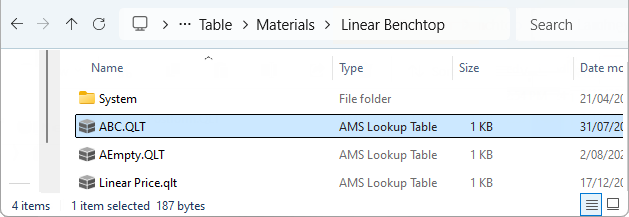
Price Table location will be under <your CabMaster folder>/Table/Materials/Folder/TableName.qlt
In this example : <your CabMaster folder>/Table/Materials/Linear Benchtop/ABC.qlt
Step 3 : Discount
A Discount can be applied - see Editing Discount Tables.
Discount Table can be found in a subfolder named System within any Price Table folder - see above image.
In this example : <your CabMaster folder>\Table\Materials\Laminex Postform Benchtop\System\Discount.qlt.
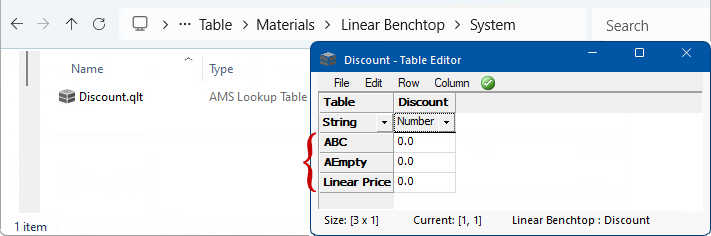
It contains a row for each Price table in the parent folder with a single column "Discount" for the discount to be applied to all the values from that table.
Step 4 : Rows/Columns
Specify the size of the table Rows and Columns. In this example, Rows = 4 and Columns = 3
Step 5 : PriceTable
Click on the Price Table button.
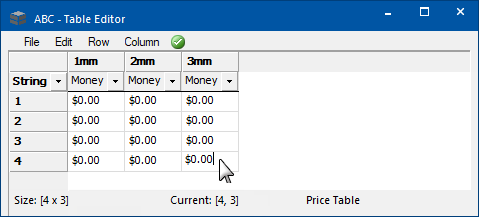
The table will be created and opened in the table editor to allow you to manually populate the table as required.

Similar to Add : Empty table except that the rows are labelled differently i.e. as a String instead of Length.
Step 1 : Folder
First you need to select the folder from the drop list or type in the name of a new folder.
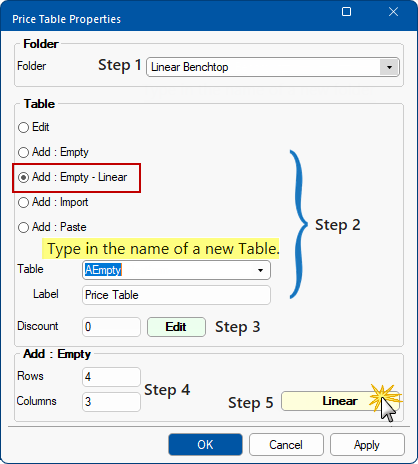
Step 2 : Table
Using the radio button, select Add : Empty - Linear option.
Enter the Table name along with a Label, which is a Table Comment.
Step 3 : Discount
A Discount can be applied - see Editing Discount Tables.
Step 4 : Rows/Columns
Specify the size of the table Rows and Columns.
Step 5 : PriceTable
The table will be created and opened in the table editor to allow you to manually populate the table as required.
Adds a price table by importing from a delimited file (e.g. a comma delimited 'CSV' file).
Step 1 : Folder
First you need to select the folder from the drop list or type in the name of a new folder.

Add : Import - Click to Expand
Step 2 : Table
Using the radio button, select Add : Import option.
Enter the Table name along with a Label, which is a Table Comment.
Step 3 : Discount
A Discount can be applied - see Editing Discount Tables.
Step 4 : Browse
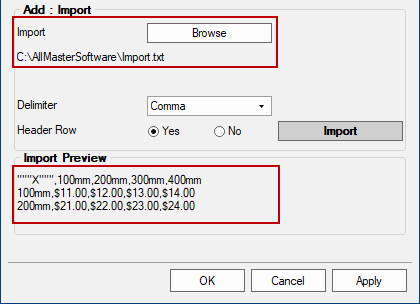
Use the Browse button to locate the import file. The file will be previewed at the bottom of the screen.
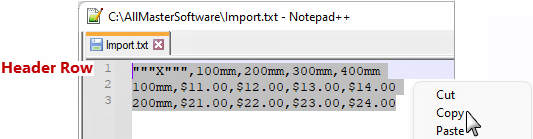
In this example, a comma delimited text file is imported, called Import.txt. Click on image to view text file.
Add : Import - Click to Expand
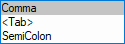
Step 5 : Delimiter
Specify the delimiter using the drop list. In this example, Comma.
Step 6 : Header Row
Specify whether the first row of data is a Header Row, specifying column names. In this example, Yes
Step 7 : Import
Click on the Import button.
Step 8 : Price Table
This will create the table and open it in the table editor.

Adds a price table by allowing import data to be pasted from the clipboard.
Step 1 : Folder
First you need to select the folder from the drop list or type in the name of a new folder.

Step 2 : Table
Using the radio button, select Add : Paste option.
Enter the Table name along with a Label, which is a Table Comment.
Step 3 : Discount
A Discount can be applied - see Editing Discount Tables.
Step 4 : Paste
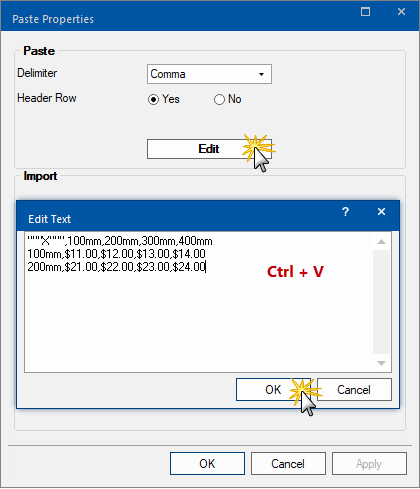
Click on the Paste button, which will open the following dialog.
Step 5 : Delimiter
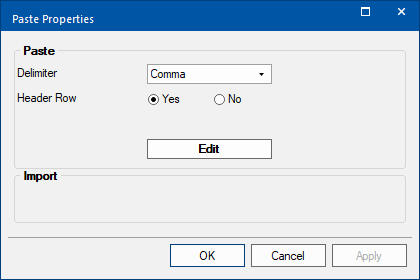
Specify the delimiter using the drop list. In this example, Comma.
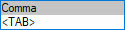
Step 6 : Header Row
Specify whether the first row of data is a Header Row, specifying column names. In this example, Yes
Copy the data for import.
- In this example, Select All in the Import.txt file and Copy data.
Step 7 : Edit
Click on the Edit button, shown below, which opens a Edit Text box..
- Paste the content of the clipboard into the text box, as shown.
- You can also manually enter/edit data into the text box.
- Click OK to close the text box.
Step 8 : Price Table
This will create the table and open it in the table editor.
 command button, to price any material based on its' depth.