CM-Cabinets Library User Guide
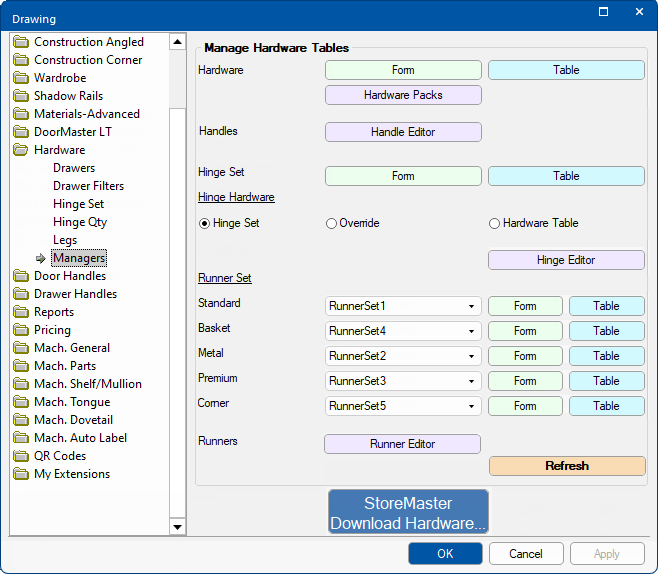
The Hardware > Managers page of the Drawing Properties provides the ability to add and maintain all tables pertaining to the relevant hardware item.
To locate information about any part of the following image,  click on the area of interest.
Defaults for your current job/drawing are not set on the Managers page. For setting Drawing Property defaults, see section on the Hardware category.
Remember to use the Refresh button to ensure your current drawing is updated with its new values.
Hardware tables are made available for download via the StoreMaster shortcut button. Follow link for step by step instructions and instructional video.
The Hardware Manager provides the ability to create, modify or delete hardware such as Accessories and Construction Items used.
The Hardware table can be used for Hinges, see discussion below, but it is recommended to use Hinge Set and Hinge Editor.
Location of Hardware table : <your CabMaster folder>\Table\Hardware.qlt
The Hardware Manager can also be accessed from the Pricing > Materials/Hardware page in the Catalog/Drawing Properties.
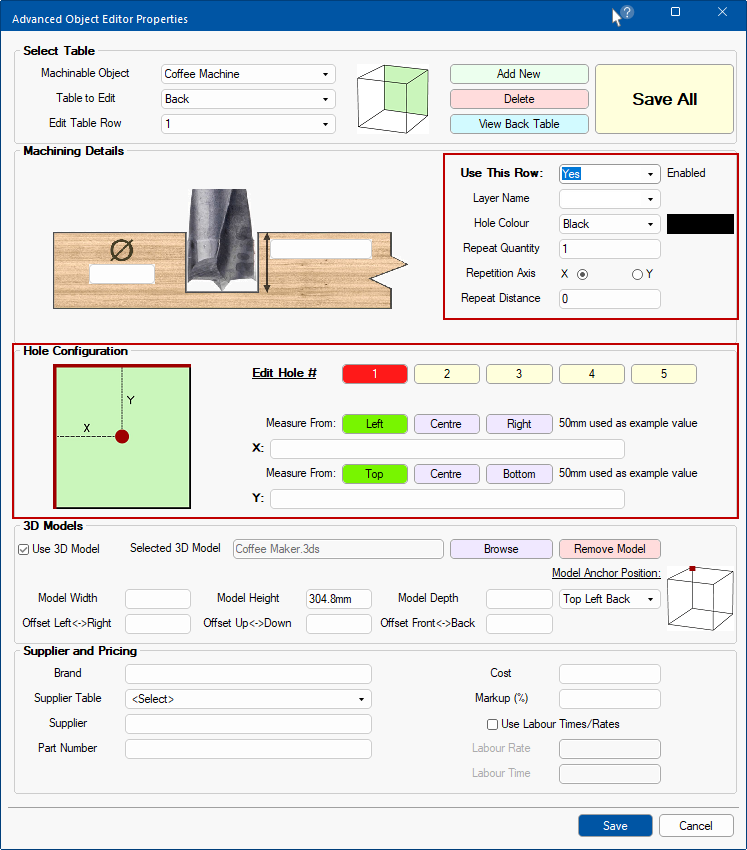
Use the Advanced Object Editor button to launch Advanced Object Editor dialog which initially provides the ability to...
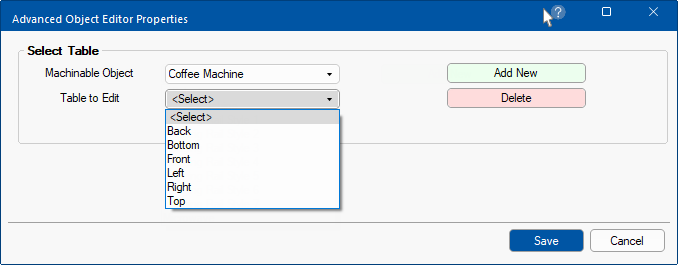
Machining is optional. Each table row using the Edit Table Row drop list can be independently configured.
When Use this Row is Enabled you will have the extra ability to set the Hole Configuration for individual holes.
For detailed discussion on location of Hardware tables, see Advanced Object Editor Overview.
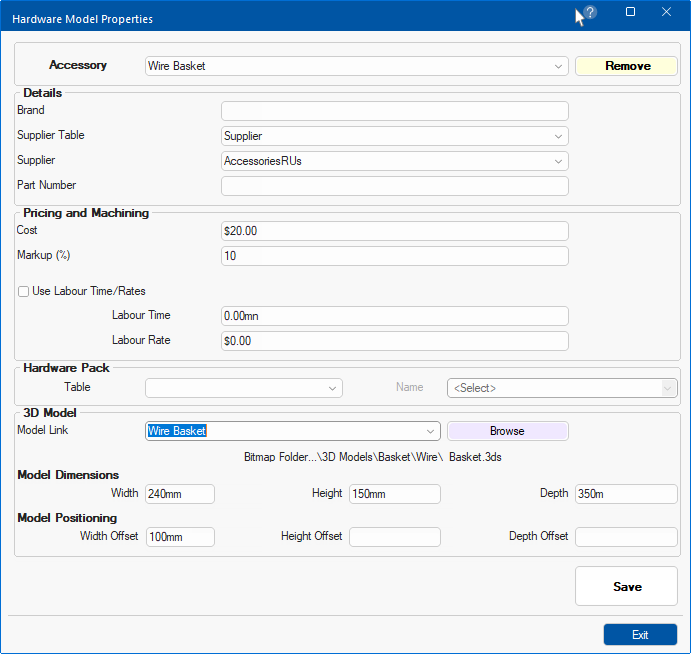
The dimensions and positioning of 3D Models can be specified. For a detailed discussion, see topic on 3D Models.
A supplier and pricing details can also be allocated. For a detailed discussion, see tutorial on Pricing Advanced Object.
When the Use This Row is Disabled then the options for Machining Holes is not displayed for selection.
Example
The Ancillary Items Editor button allows you to save a configuration file. This will include the number of holes drilled in a cabinet to be reported based on the layer name, depth and or diameter.
These figures can appear on Board, Hardware and Quantity reports that are grouped by Cabinet.
There are two types of Ancillary Item...
Hardware items, including Runners and Handles, can be associated with a supplier. There is also the ability to support multiple supplier tables.
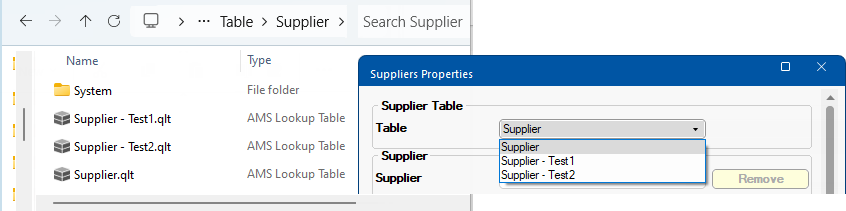
Multiple 'Supplier' tables can exist in the root of <your CabMaster folder>\Table\Supplier folder. Users are at liberty to create their own tables, but in most cases additional supplier tables are added as a result of installing a download from StoreMaster.
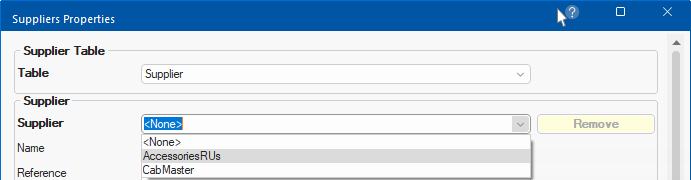
Multiple Supplier Tables
This is an example of multiple 'Supplier' tables in the ...\Table\Supplier folder and corresponding selection in Suppliers Properties.
Any table (.qlt file) in this folder is considered a 'Supplier table' and will be included in any Supplier Table drop list e.g. in the Supplier or Runner Editors.
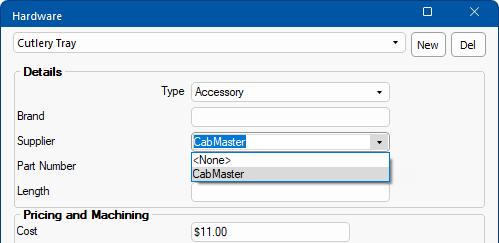
Pressing the Supplier Editor button opens a Property Sheet allowing you to create, edit and delete suppliers and associating them with Hardware Items.
Click to Expand - Logo can be selected by clicking on logo/folder image.
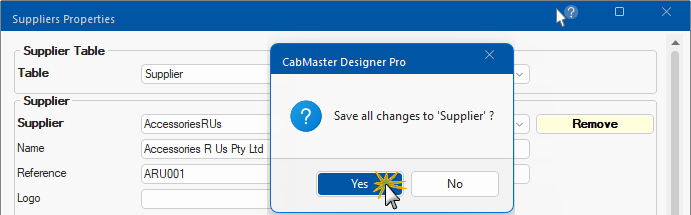
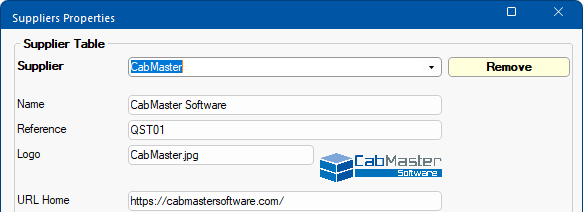
Create a new supplier by simply selecting <None> from the drop down (as shown above) and overtyping. When finished, click the Save to Table button and Yes to the confirmation message.
Example: Creation of Supplier
In this example, the Supplier 'AccessoriesRUs' is created and saved to the table.
The newly created supplier will now be made available for future selection.
- The Logo file name can be typed in the edit box or click on the existing logo (or folder image) to Browse for File.
- File needs to be in <your CabMaster>/Bitmap folder.
- If the URL Order field is blank, then the URL Home address will be used.
Delete by selecting the supplier you want to delete and clicking the Remove button and Yes to confirm action. Then Save to Table.
Pricing : The Cost price of Hardware items (including Runners and Handles) can then be associated with a supplier.
See Pricing Tutorials i.e. Pricing Hardware Accessories and Construction - Tutorial 3 : By Supplier
Click to Expand
Reports : For reports by supplier, enable relevant option on the Reports > Hardware page and/or Reports > Other (Quantities report).
The Handle Editor provides the ability to create, edit and delete handles used in your job/drawing.
The Hinge Editor provides the ability to create, edit and delete hinges used in your job/drawing.
There are a number of ways to set up your preferred source of hinge hardware. Simply use the radio buttons to select by:-
Hinge Set

Click to view location of Hinge Set tables
The Hinge Set Manager contains a list of the different purposes for which they are being used (e.g. a Bifold hinge). Each is then matched up with the appropriate Hinge and Hinge Plate chosen from the Hinges table.
Any number of Hinge Sets can be predefined and stored in a table. Overrides can occur at both the Drawing and Cabinet level i.e. even though a given Hinge Set may be predefined and saved into the table, it can be locally edited once chosen on the drawing.
Use the Edit button to create, edit and/or delete - click on image above to view location of tables.
Example of Hinge Set Form
This is similar to the properties dialog available on the Hardware > Hinge Set page - click on image to compare.
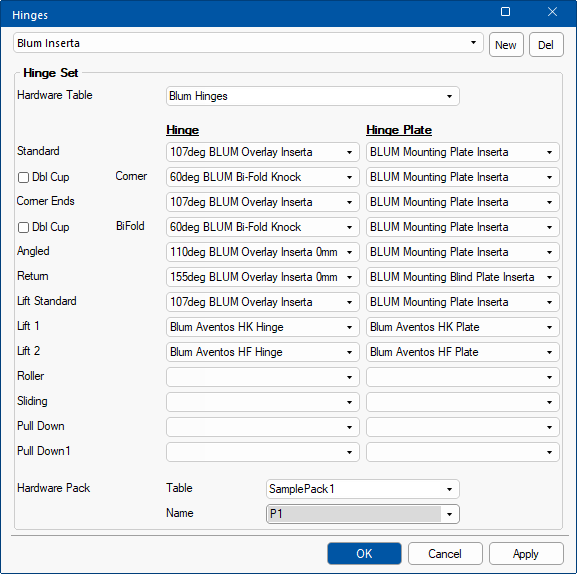
Click to compare with the Form available on the Hardware > Hinge Set page.
Location of tables : <your CabMaster folder>\Table\Hinges\
The Hardware > Hinge Set page of the Catalog/Drawing Properties allows the selection of the hinges for the current drawing.
Hardware Table

Click to view location of Hardware.qlt table
Alternatively, you can use the existing Hardware table. Use the Hardware Form button discussed above, to create, edit and/or delete.
The location of Hardware table used is <your CabMaster folder>\Table\Hardware.qltOverride
The hardware table used for hinges can be selected independently by using the Override radio button.
This allows you to create a table for each Hinge Set, allowing distribution of differing tables for each manufacturer.

Click to view location of override tables i.e. Hardware / Hinges
Location of tables : <your CabMaster folder>\Table\Hardware\Hinges\
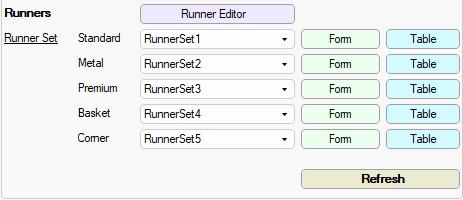
The Runner Editor allows you to manage overrides of runner properties using a Property Sheet (or Form) instead of using direct table editing.
 video tutorial.
 The Form allows for the creation of any number of sets of runners for each Drawer Runner group, along with the heights at which they should be used (up to 5 runners per set). Use the drop list to select.
Click to Expand
The tables for runner sets can be found in <your CabMaster folder>/Table/RunnerSet. There are five tables...
Multiple runner set tables can be set up, and then selected from, for each drawer type. There are, however, restrictions on the naming of runner set tables.
For a detailed discussion, see separate topic on Runner Sets.
Remember to use the Refresh button to ensure your current drawing is updated with its new values.